Version 3.1.0 for CDESK brings a number of useful features, as well as a redesign of selected parts of the system.
Simple filter for the request list – initial version
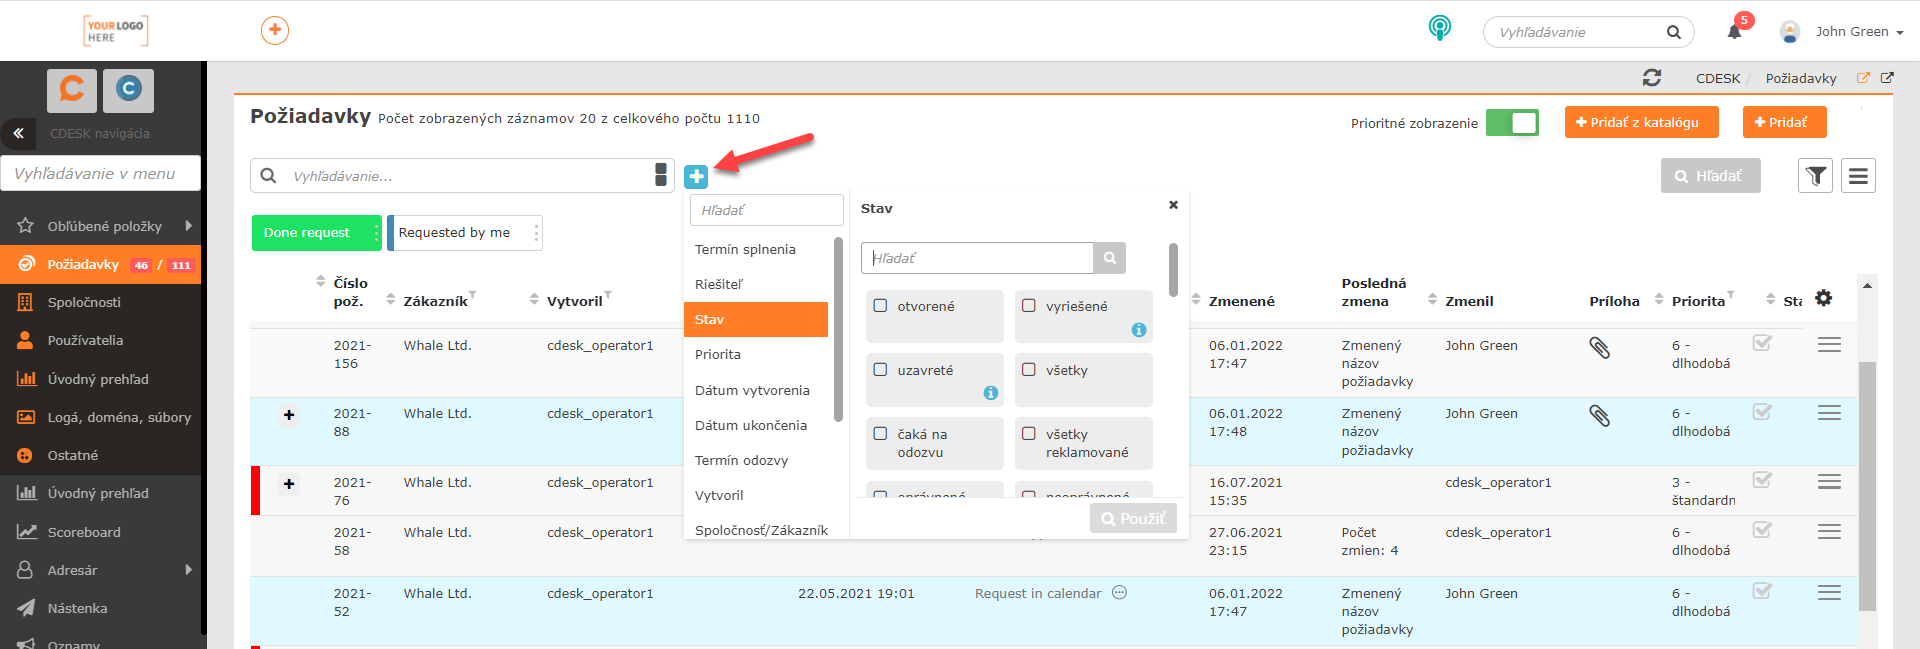
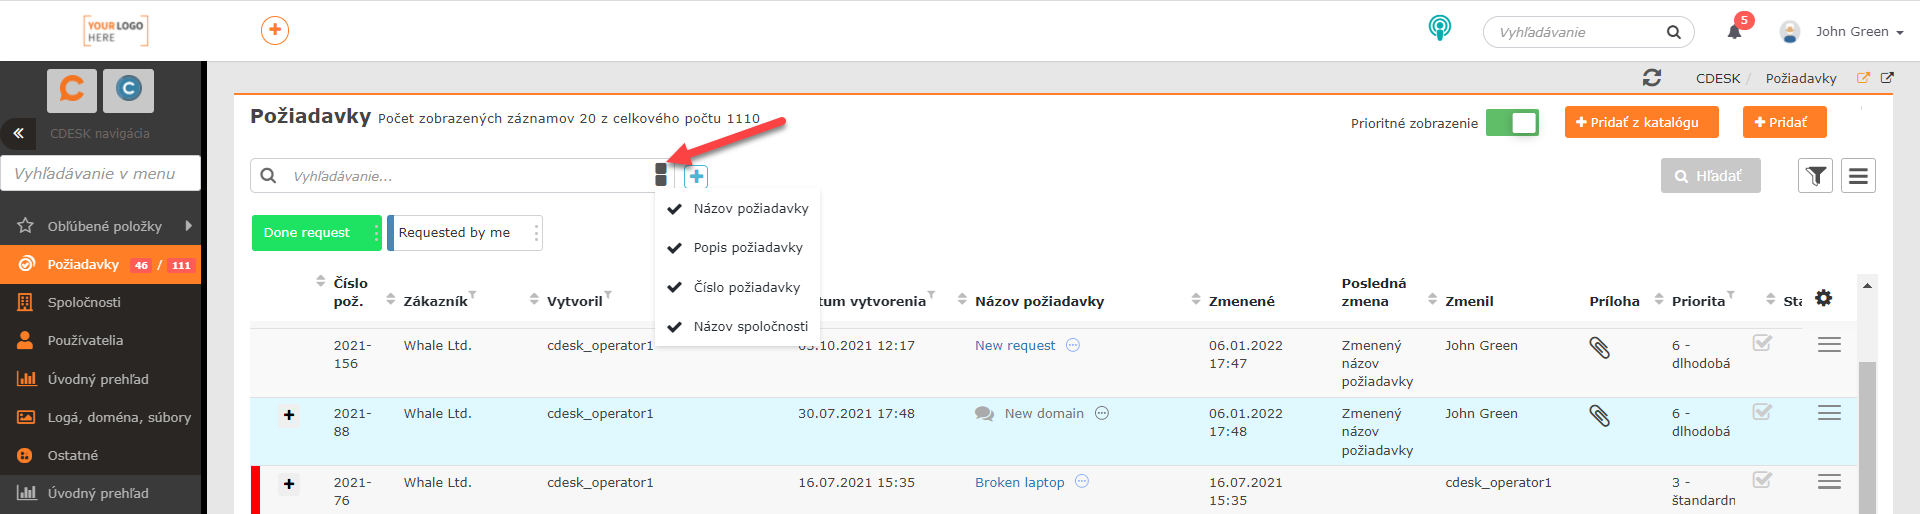
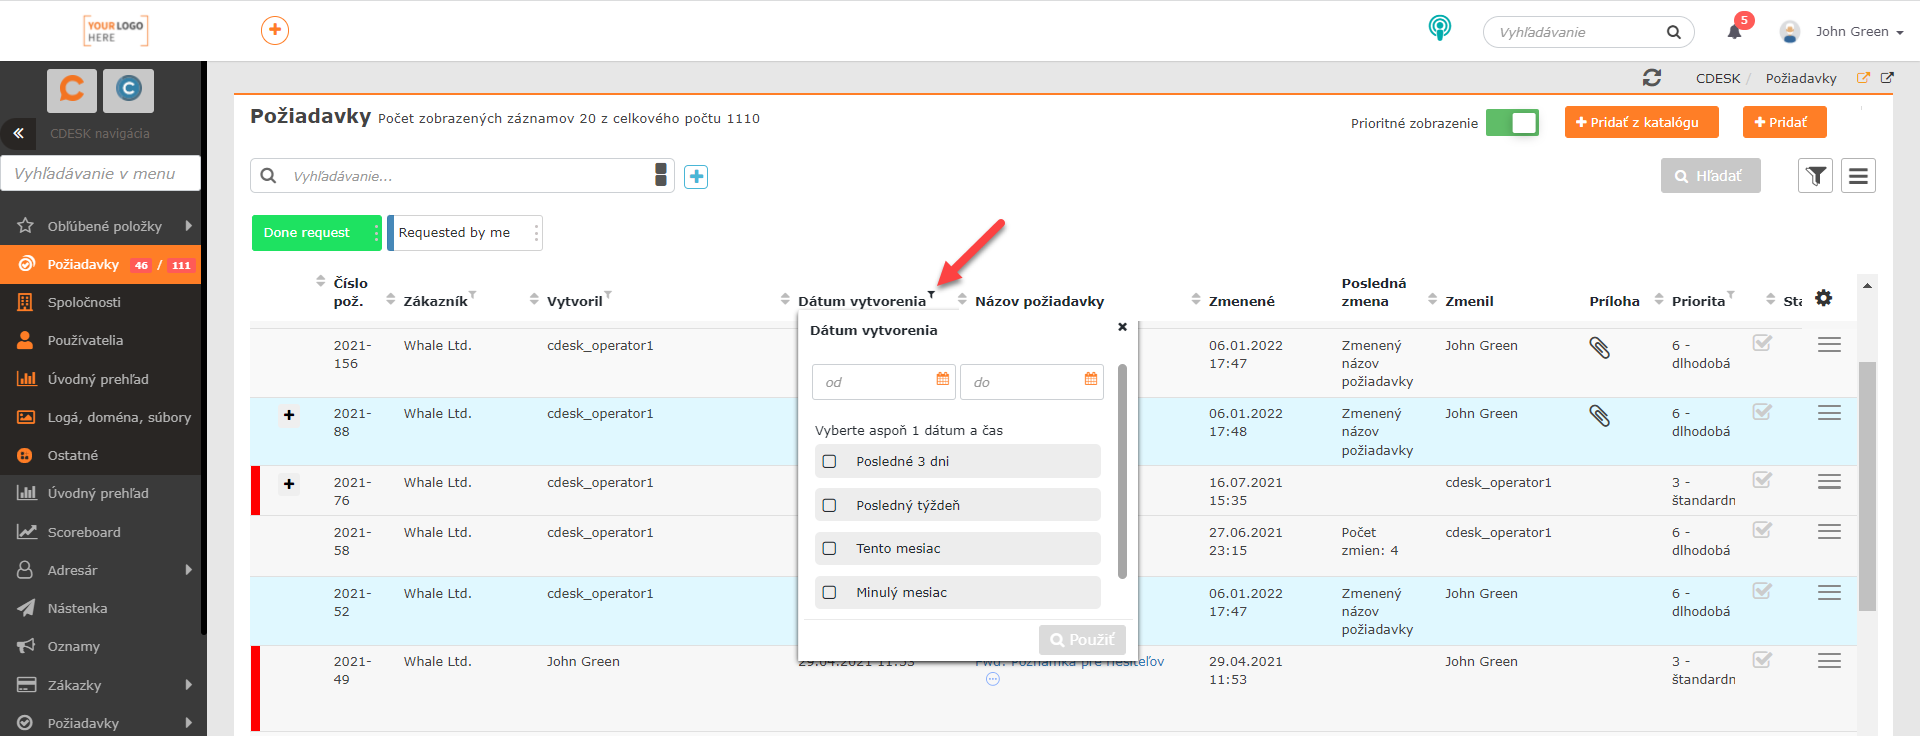
From version 3.1.0 onwards, two types of filters can be used in the request list – the advanced and the simple filter. Unlike the advanced filter, the simple filter contains only those filtering conditions that are most frequently used when working with requests. The configuration of the individual conditions is also simpler and faster. Configuration of simple filter conditions When the simple filter is activated, the search panel also changes. It displays buttons for setting the criteria on the basis of which the search will be performed. Buttons for setting the criteria on the basis of which the search will be performed The conditions set within the simple filter can be transferred to the advanced filter. However, due to the number of filtering conditions and the options for setting them, backward compatibility from the advanced filter to the simple filter does not work. Conditions in the simple filter can also only be linked with the AND condition. The new version of CDESK also brings the option to filter results in the request list without the need to directly configure a filter – whether simple or advanced. Clicking on a column name displays conditions just like when using the simple filter. This allows records to be quickly filtered based on a single criterion belonging to the given column. Filtering the request list based on a condition set directly via a column We continue to develop the simple filter further in order to achieve the simplest possible solution for searching and filtering data in lists. We will inform you about improvements in future versions.
Improved buttons with saved filtering conditions
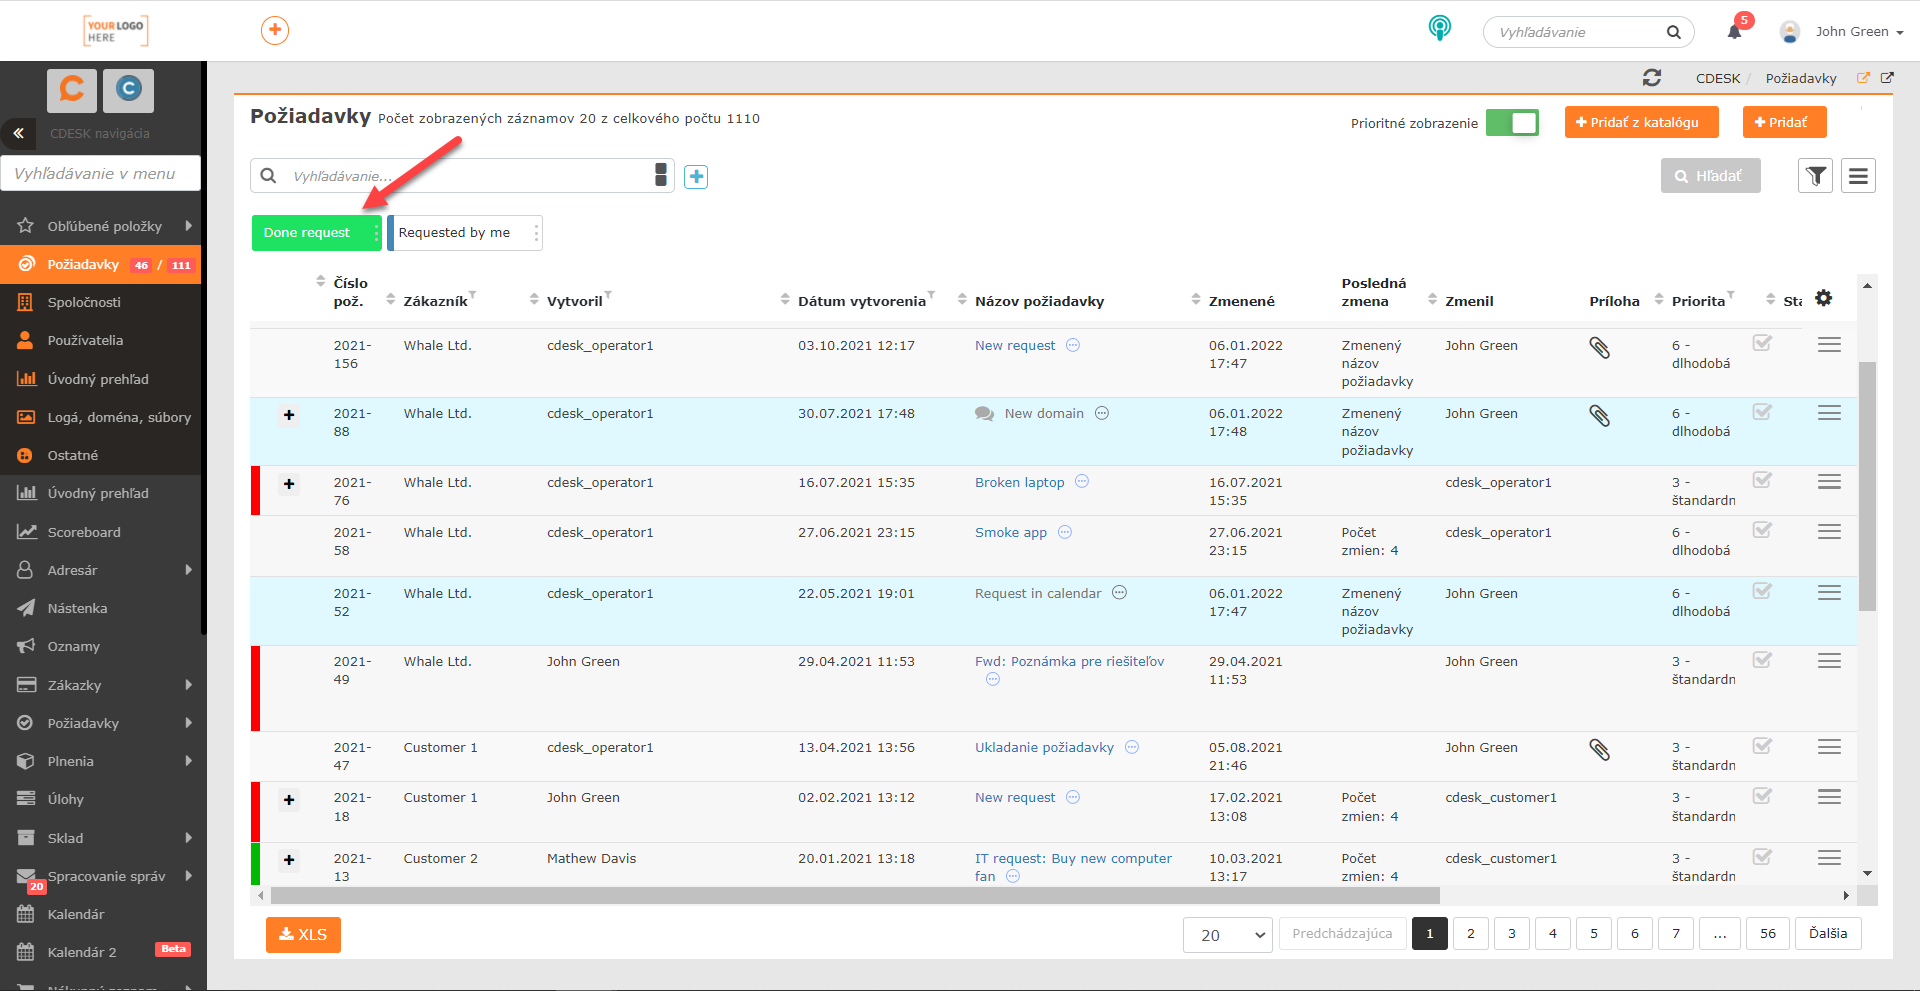
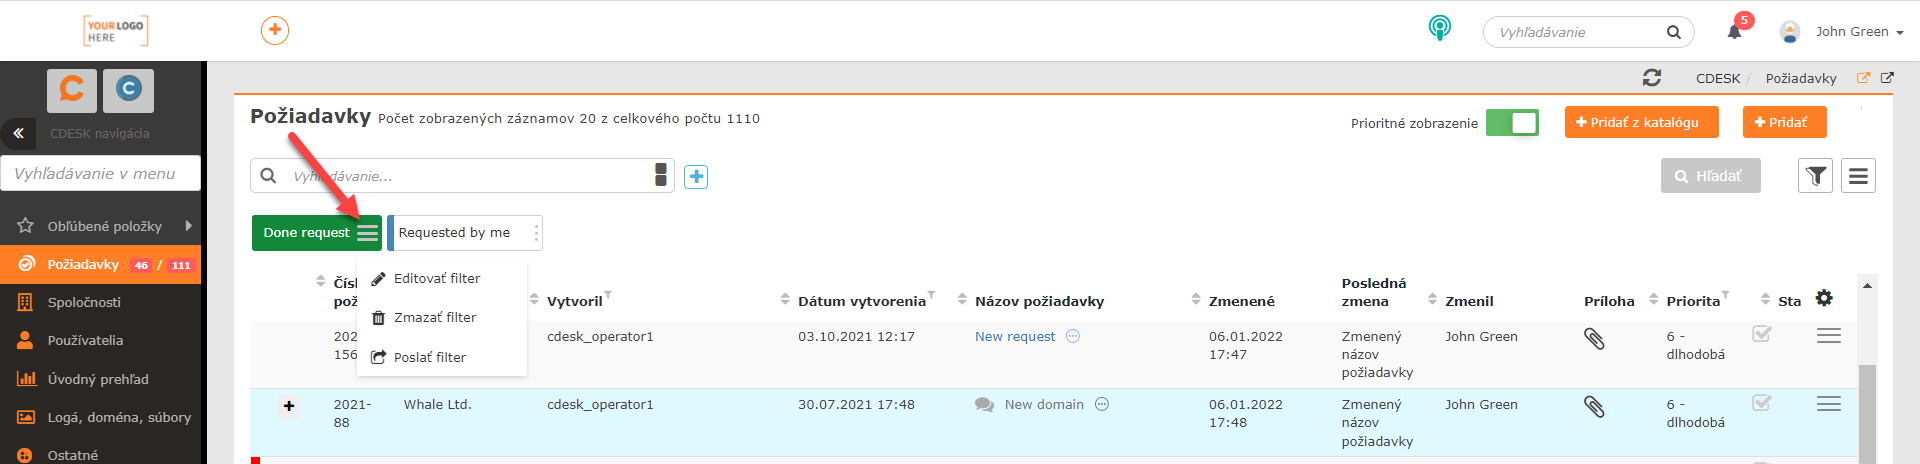
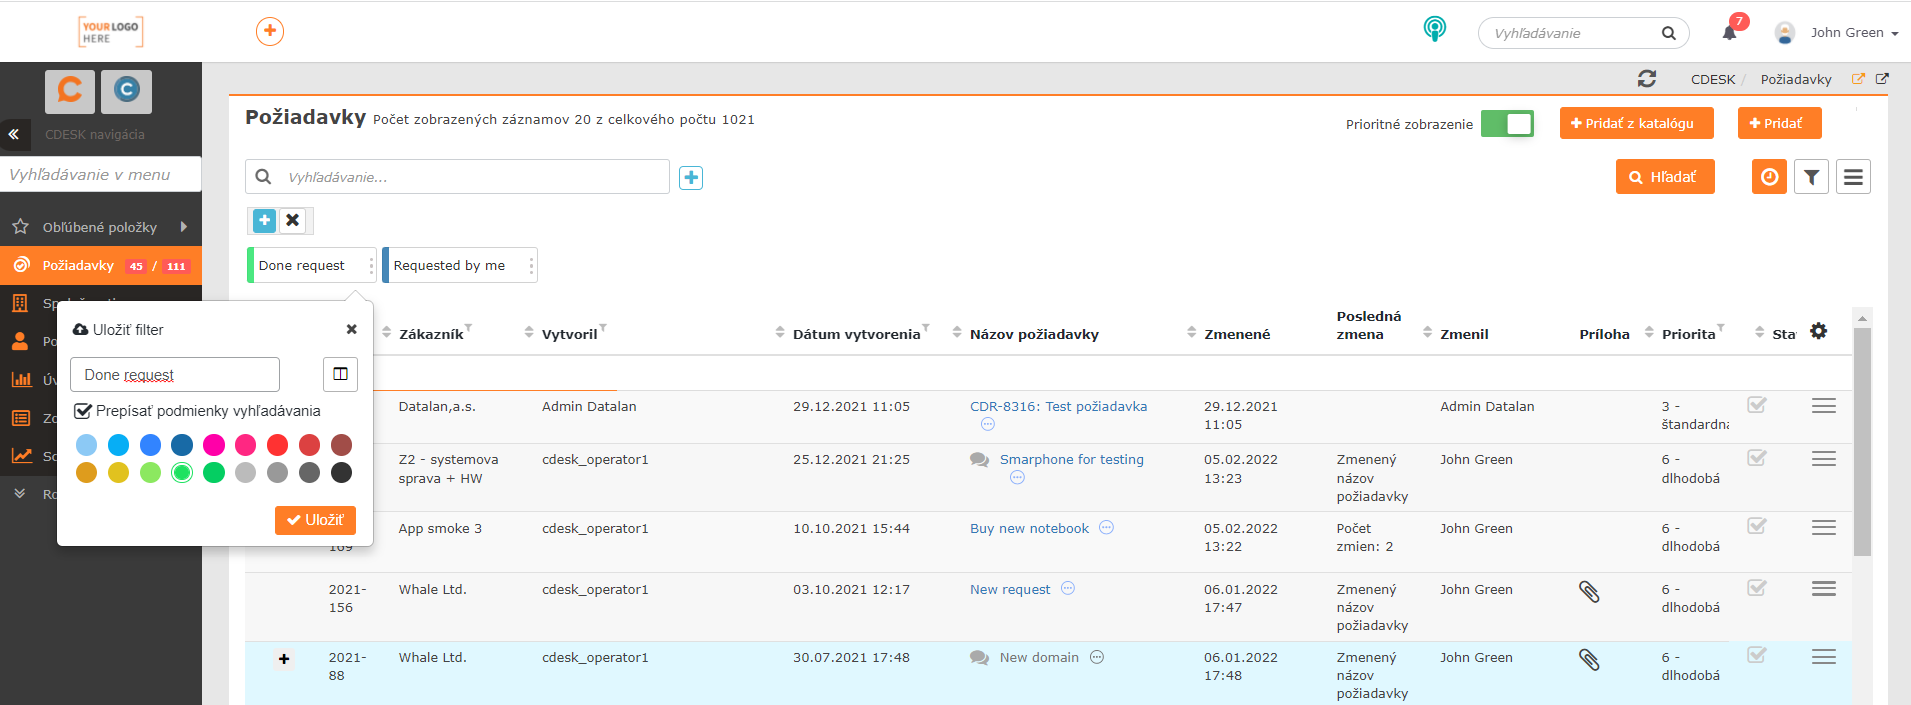
The buttons used to activate a saved filter have also undergone changes. Their order can be easily changed using Drag&Drop. The way the active button is distinguished by colour has also been changed. After clicking, the entire button is filled with the colour set for it. The active advanced filter button is now filled entirely Each button also contains a menu that allows you to edit the configured filter, send it and also delete it. Menu displayed in the saved filter button Changes can also be made to a filter that is not currently activated, without overwriting the search conditions. Window for making filter changes
Free approval
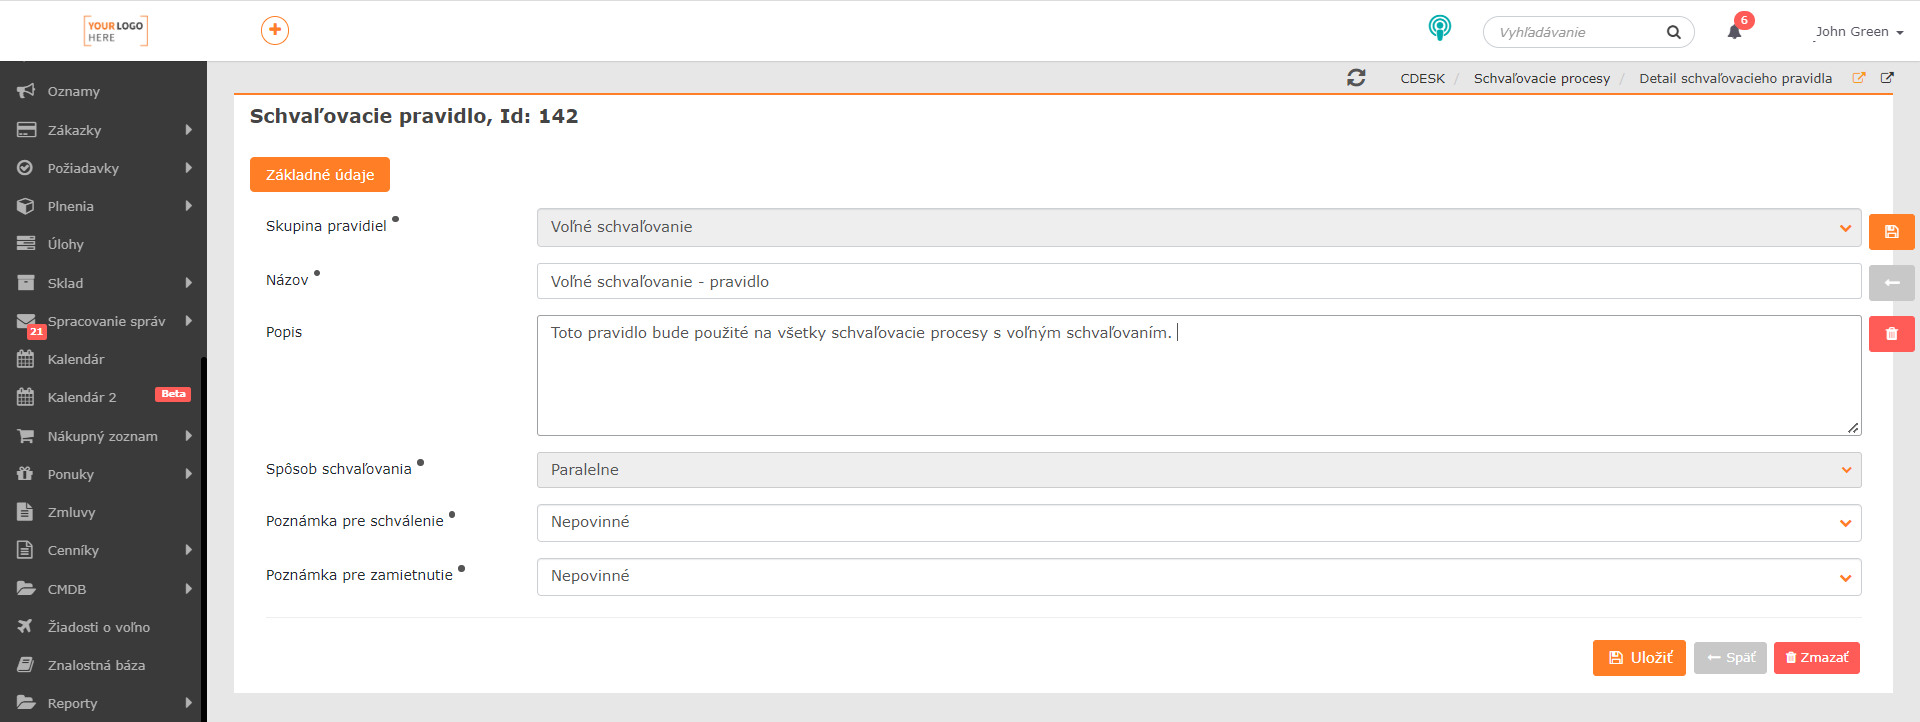
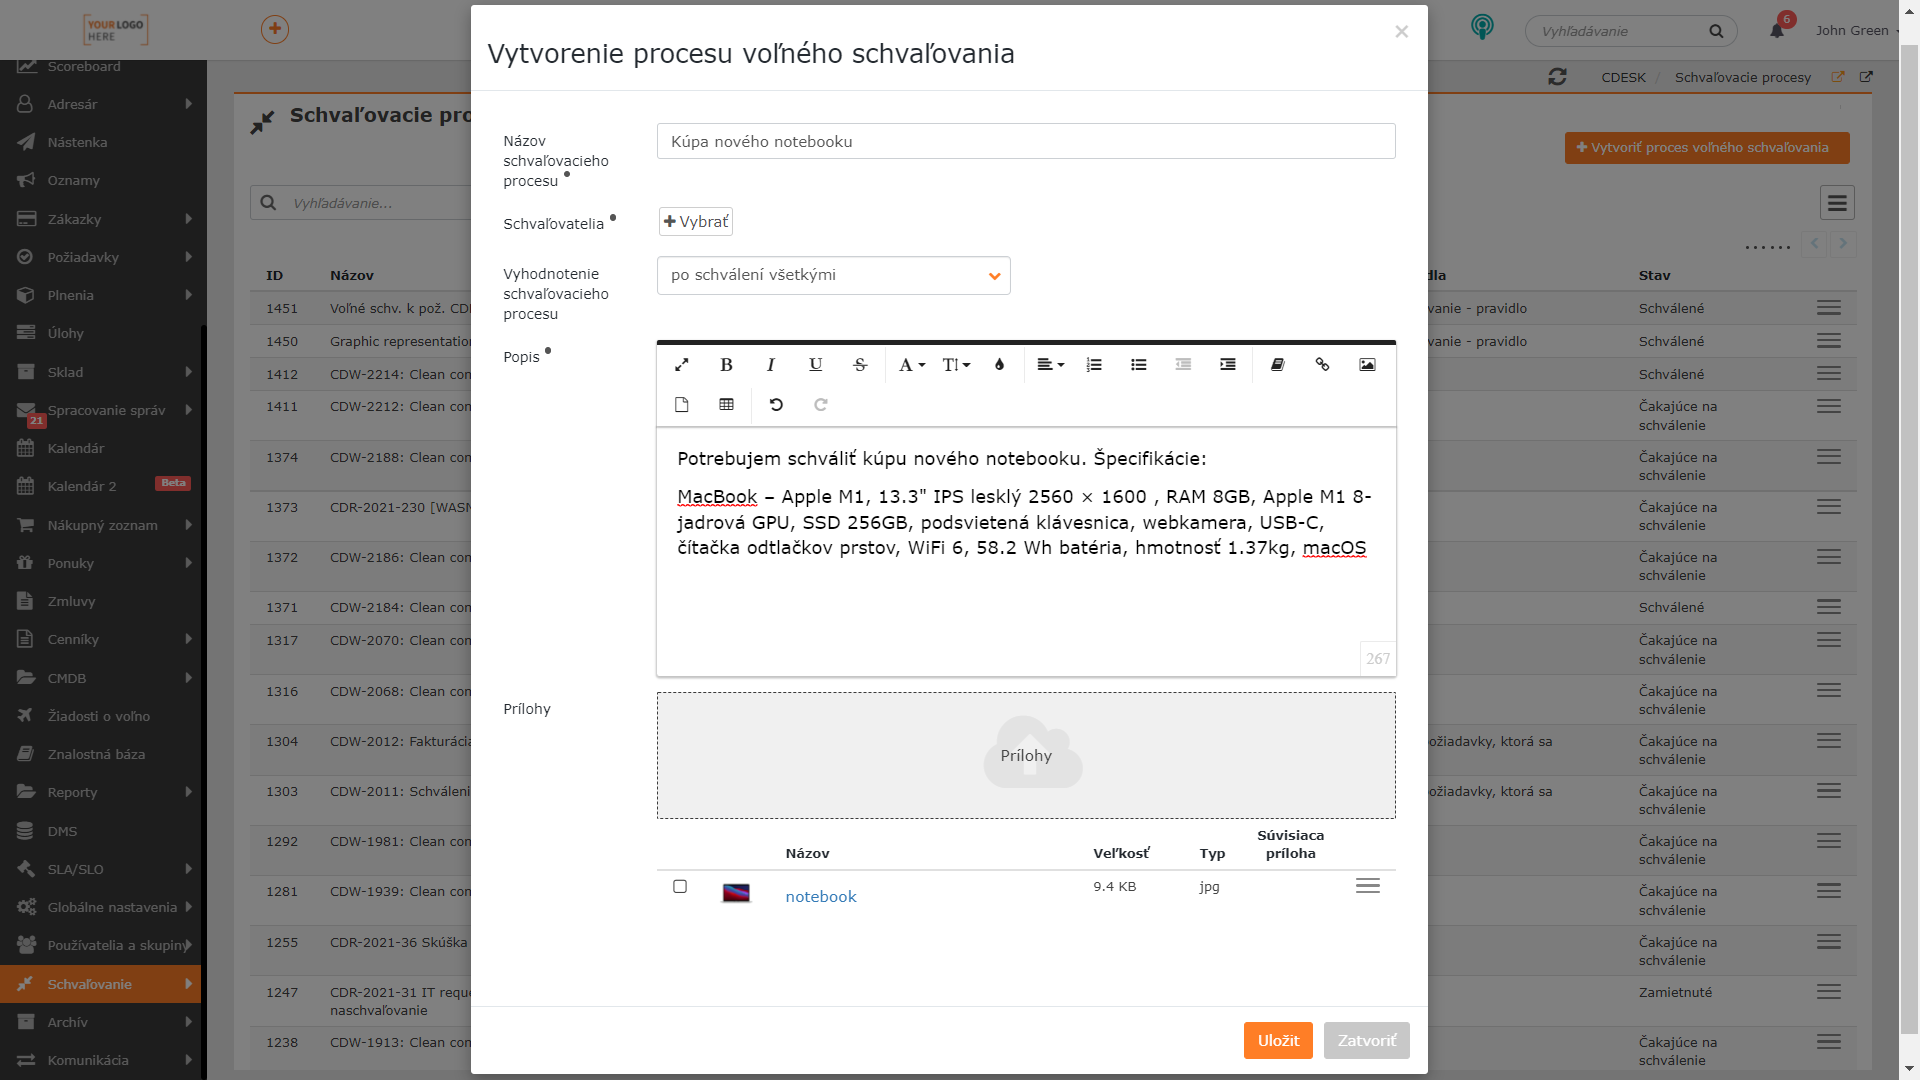
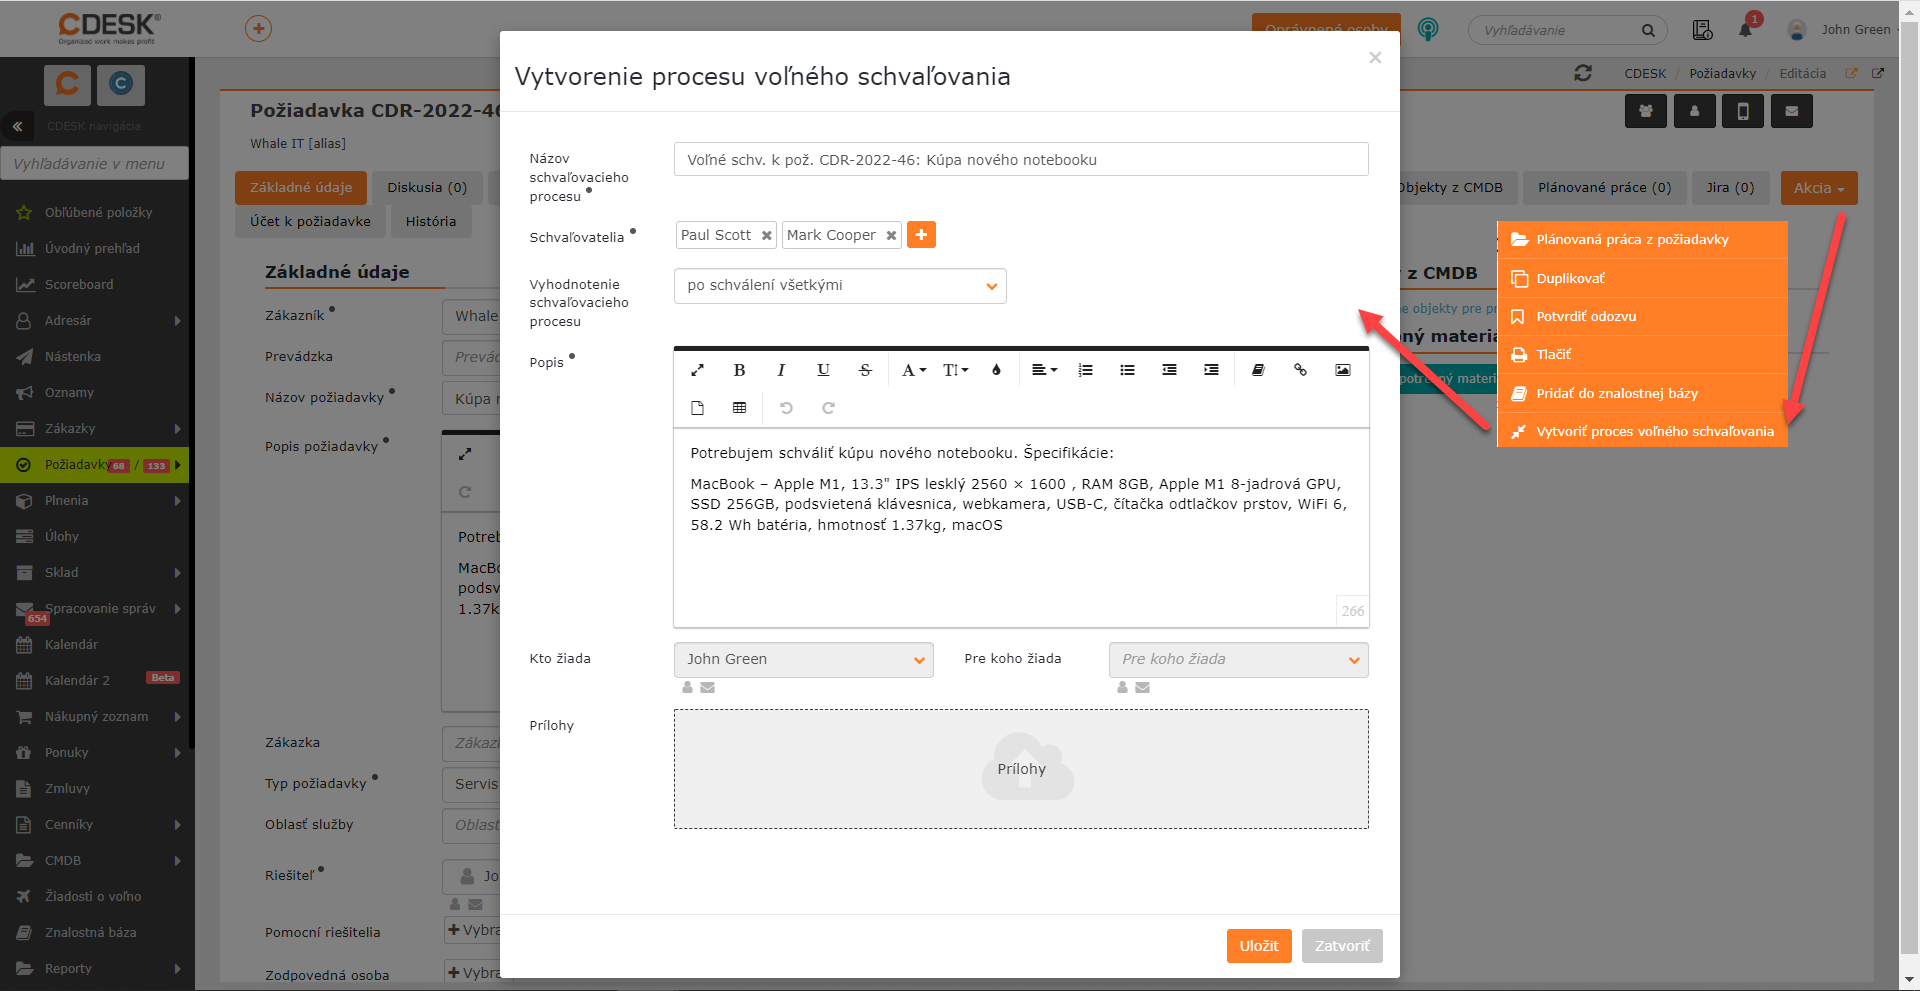
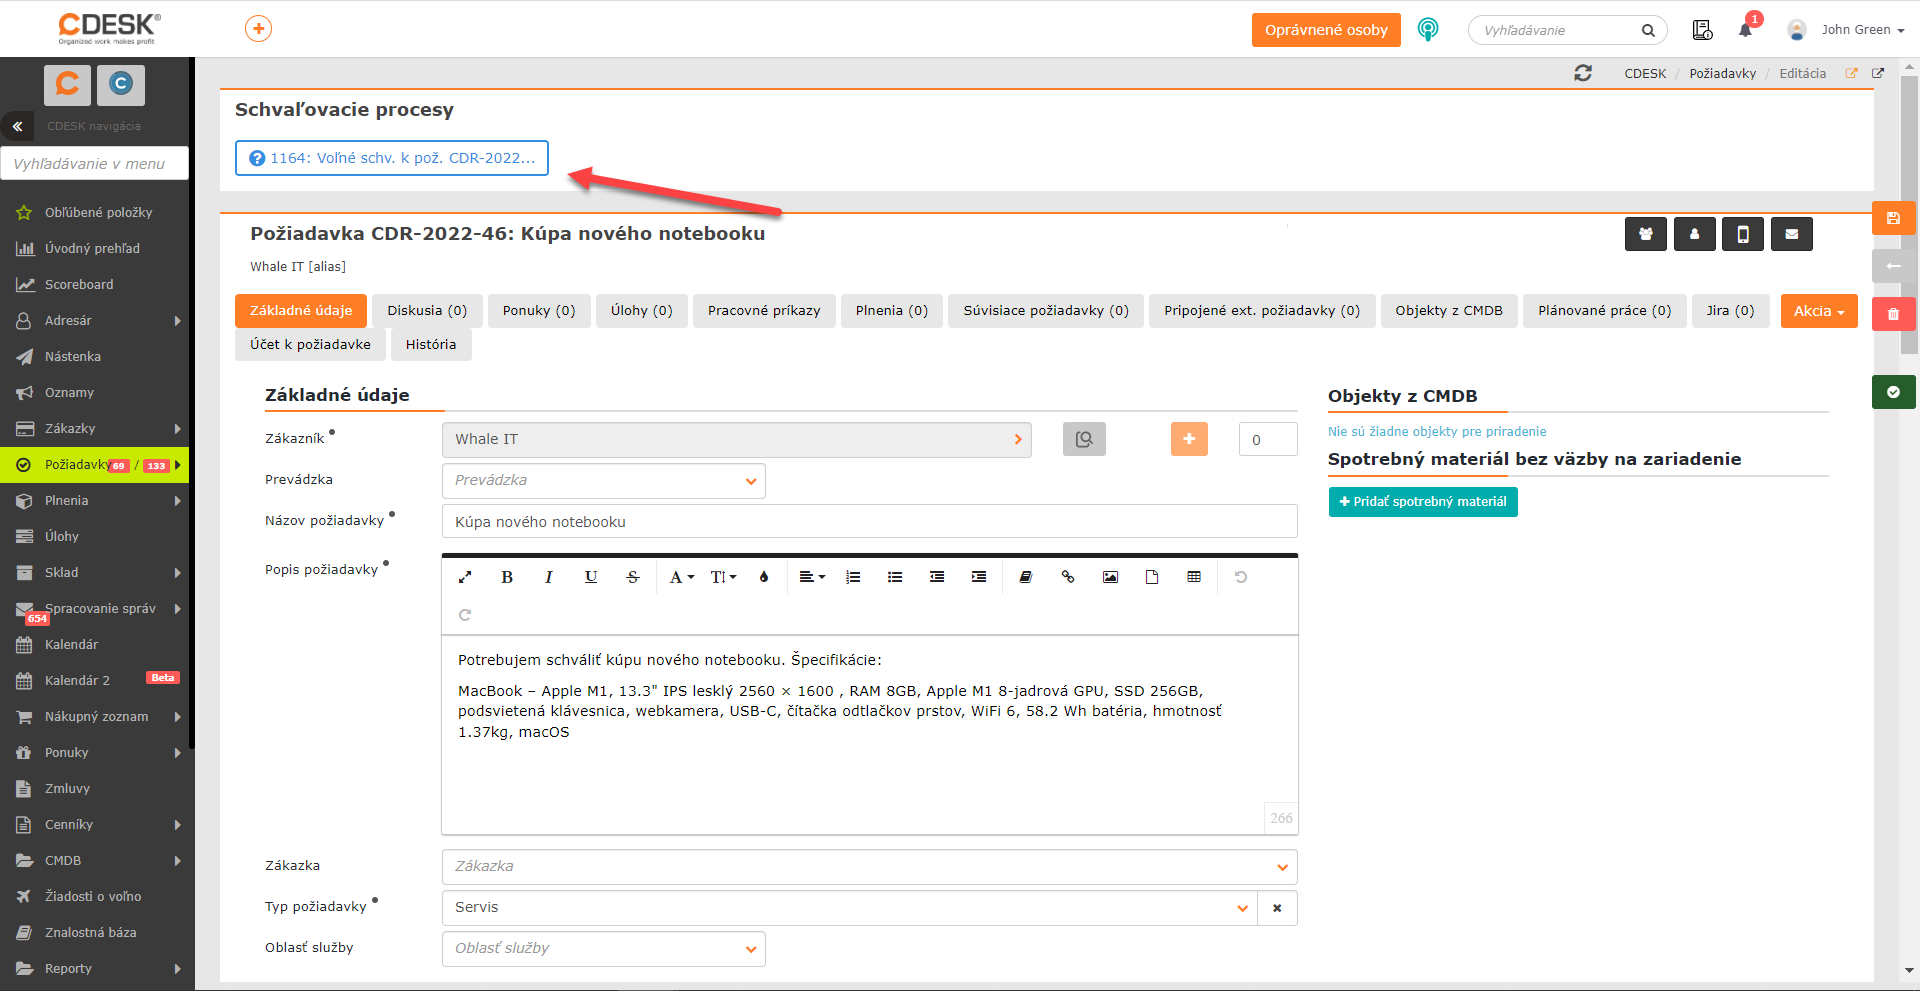
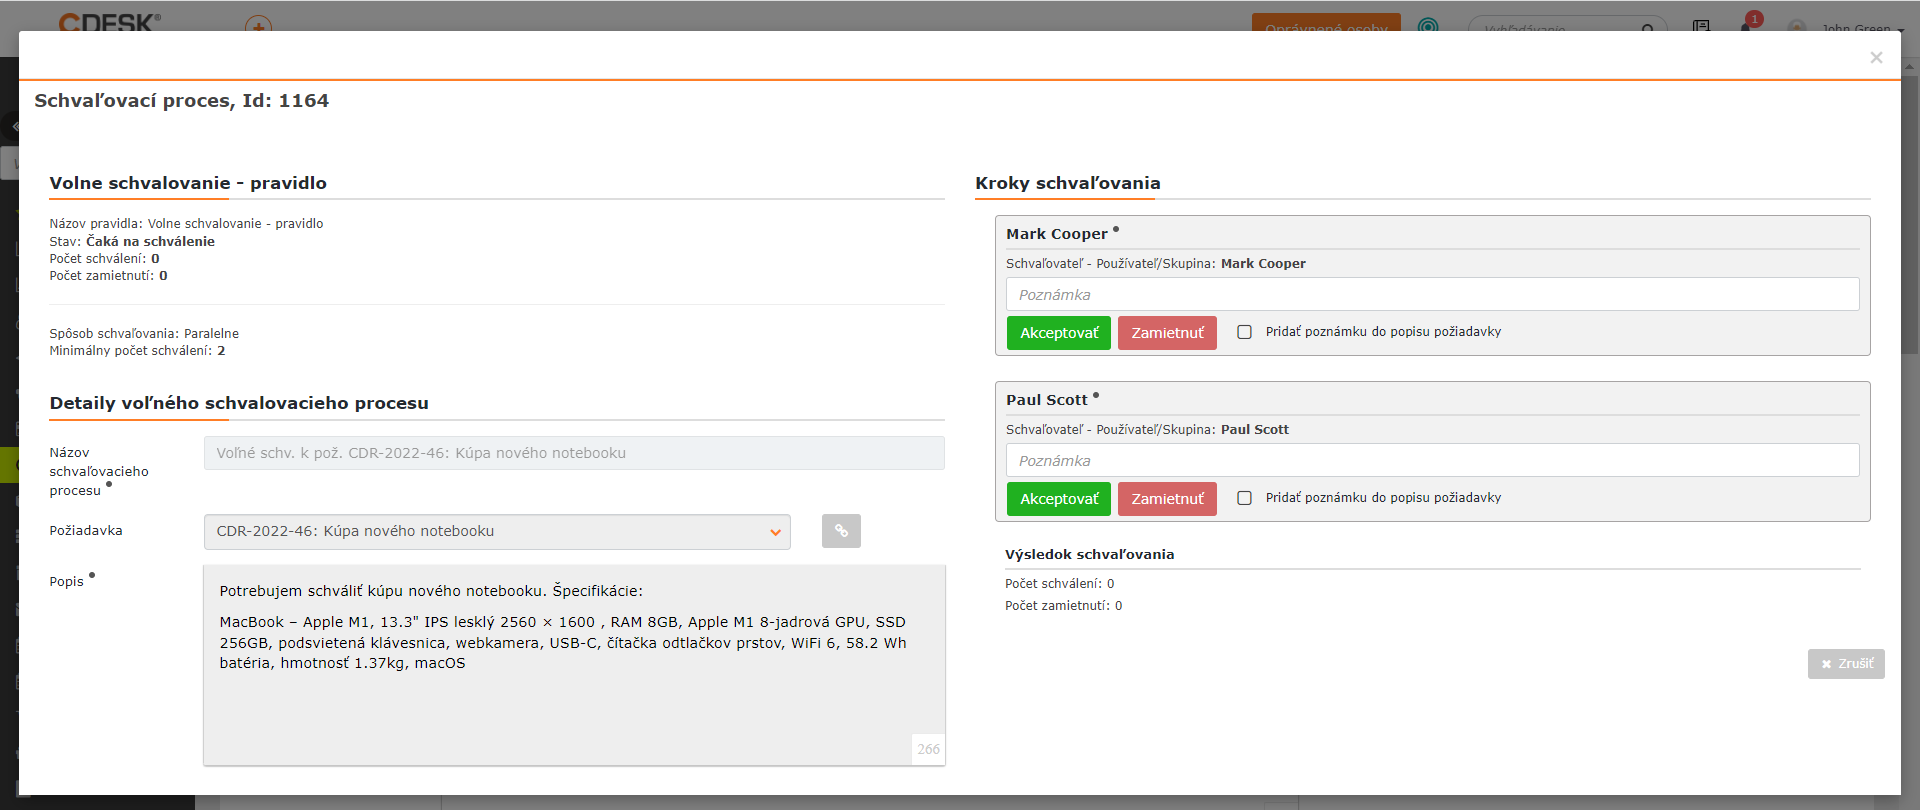
With the latest update, the approval options have also been expanded to include free approval. Unlike the approval already present in CDESK, it is not tied to a request template or a work order. Thanks to this, the free approval feature offers a dynamic and simple solution for every situation that requires approval. Free approval requires the definition of only a single rule, which you define in the Approval Rules module. This rule will then be used for all free approval processes. Definition of a rule for free approval Free approval can be created without a link to any module, or directly in a request with a link to that request. Creating free approval without a link to any moduleCreating free approval on a request If free approval is linked to a request, information about it is displayed directly in the request form. Information about approval on a request After an approval is created, whether linked to a request or not, the approvers are notified via an email notification and also a push notification directly in the system. The approval in both cases then proceeds in the same way as approval via a request template or work order. Free approval form
Widgets for displaying hours worked on fulfilments per week and month
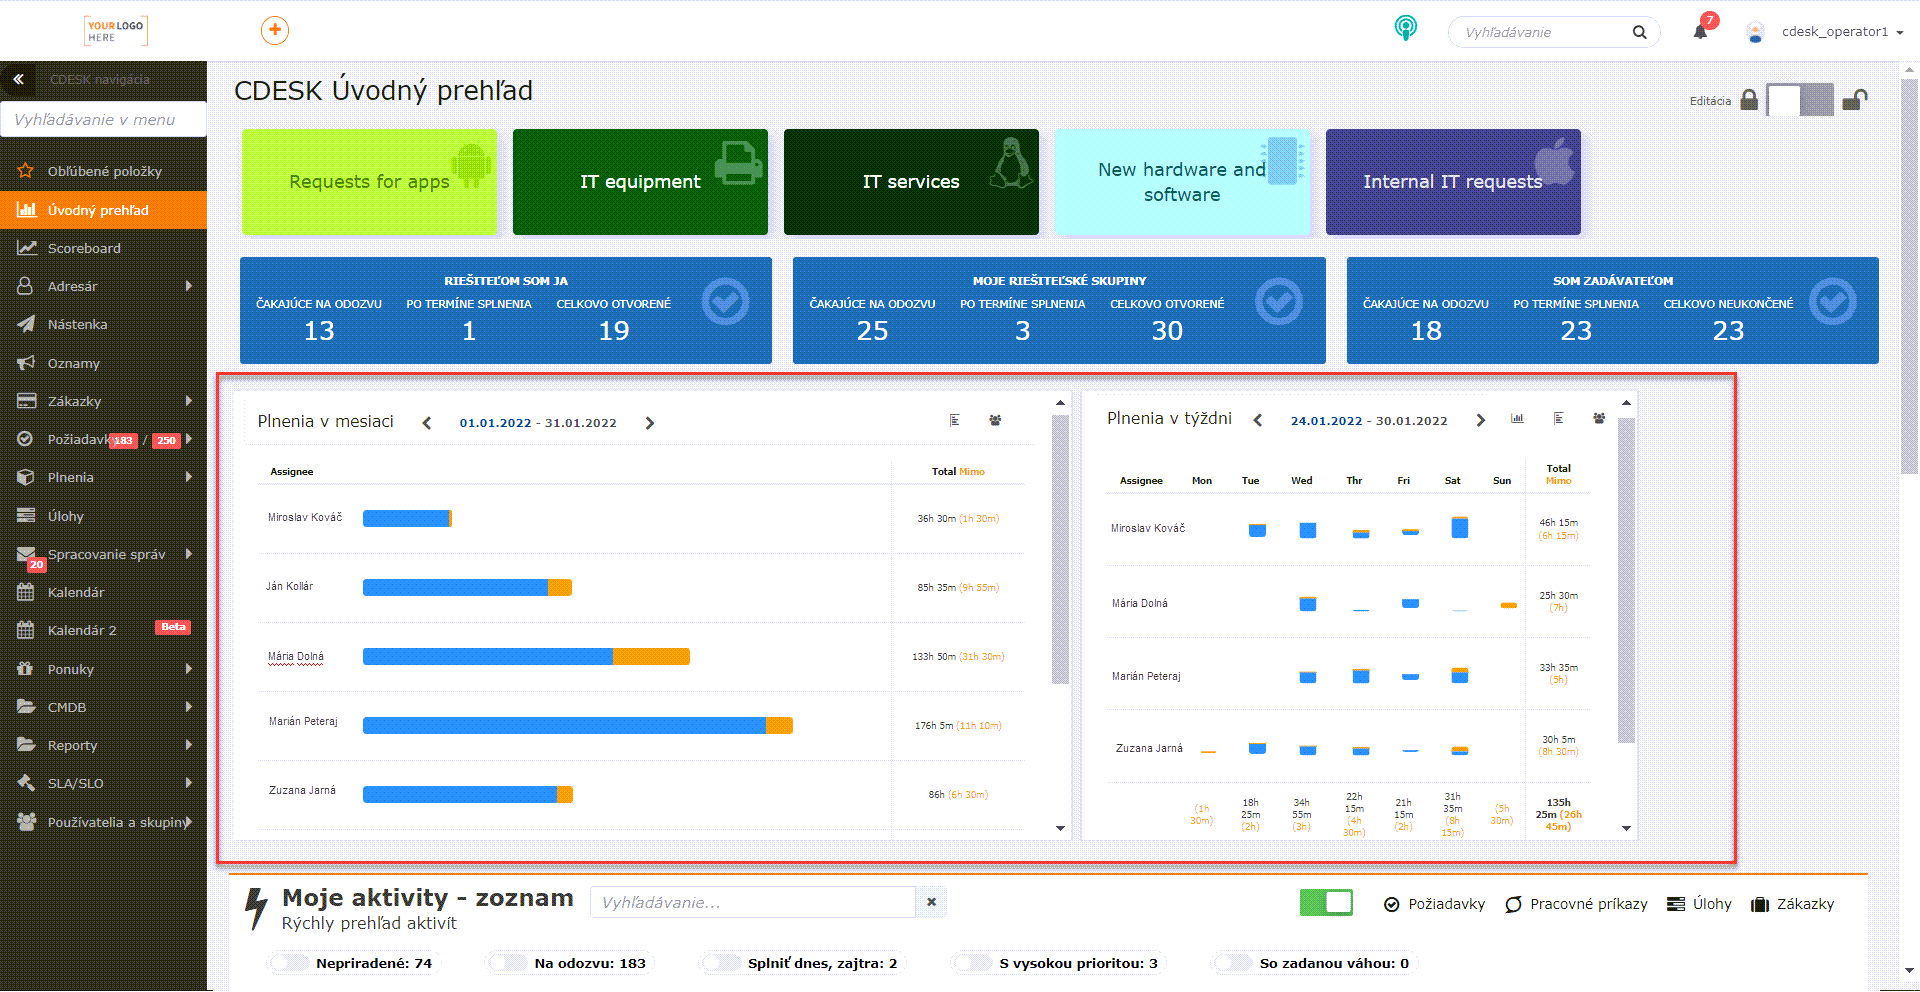
We are adding the first widgets to the Home overview, which are focused on tracking the time reported on billing fulfilments. These are Fulfilments this week and Fulfilments this month. Both widgets graphically compare fulfilments during working hours and outside working hours for selected assignees for the chosen week or month respectively. In the following updates, widgets for requests will be added, and the widgets for fulfilments will be expanded to include internal fulfilments. Fulfilments this week and Fulfilments this month widgets
New responsive design of the form for accepting / rejecting the closure of a request from an email notification
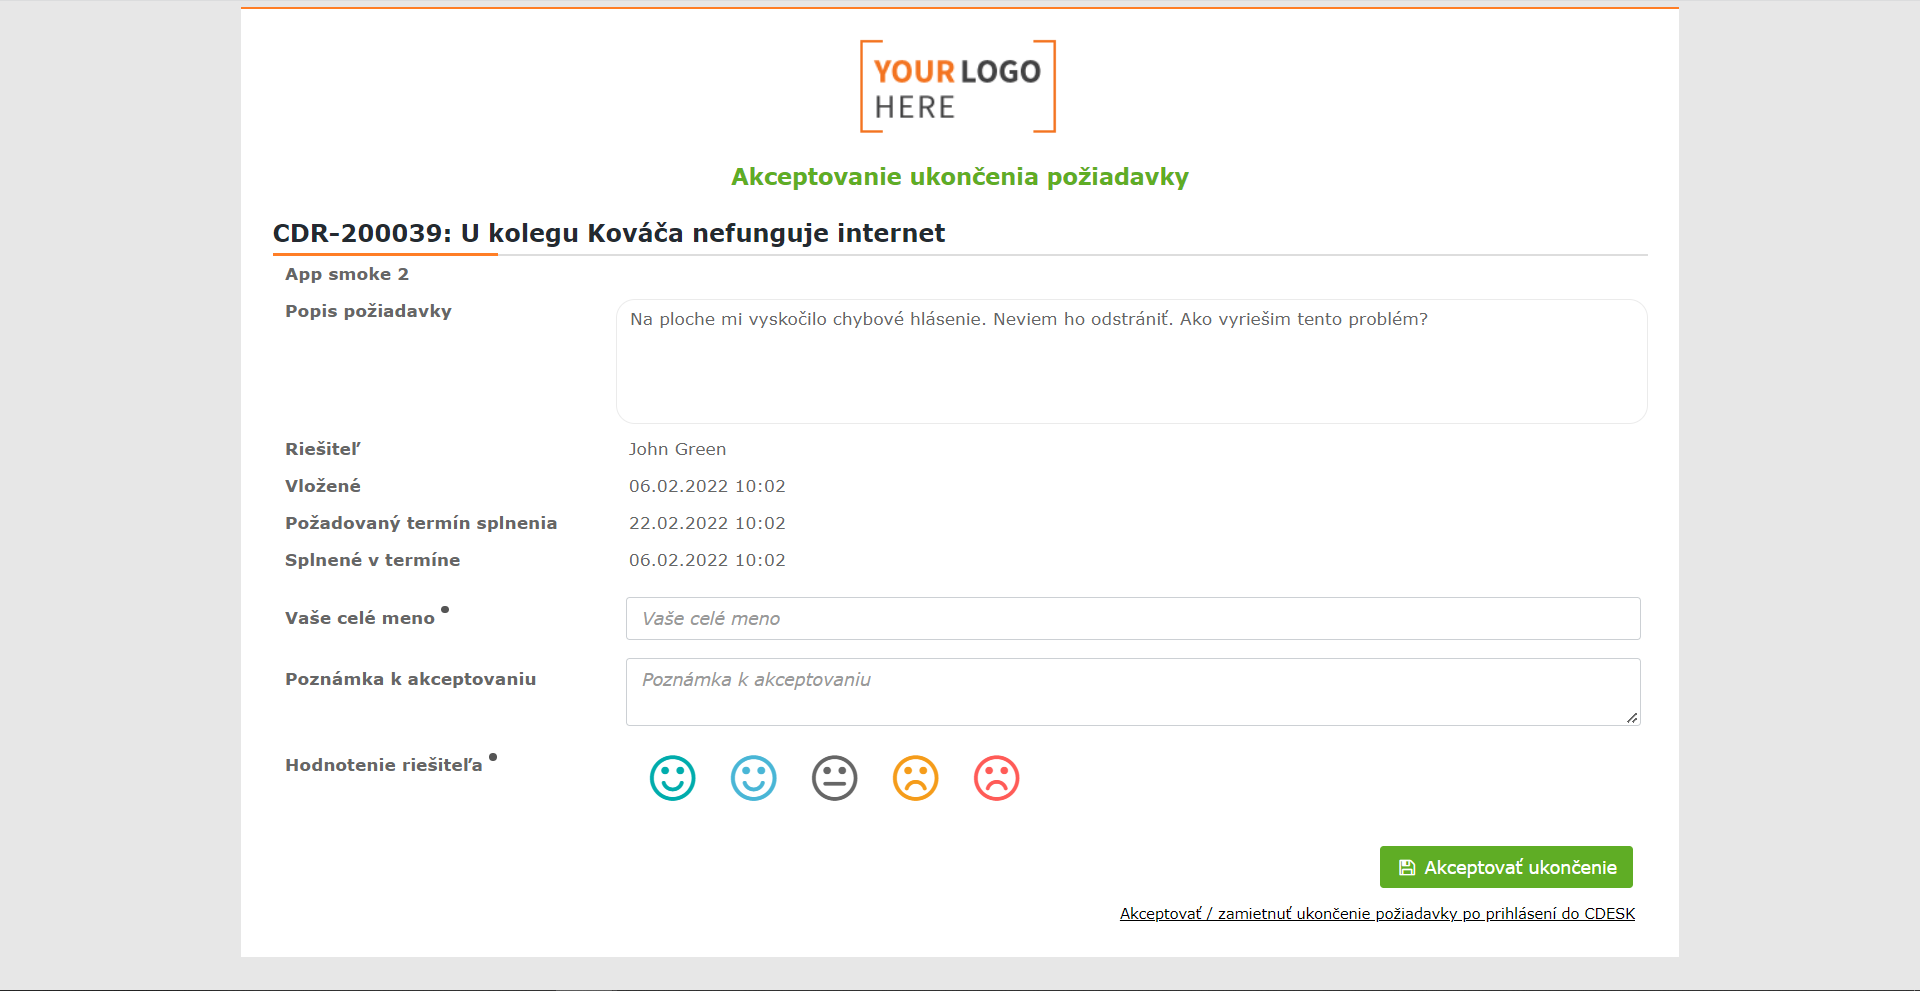
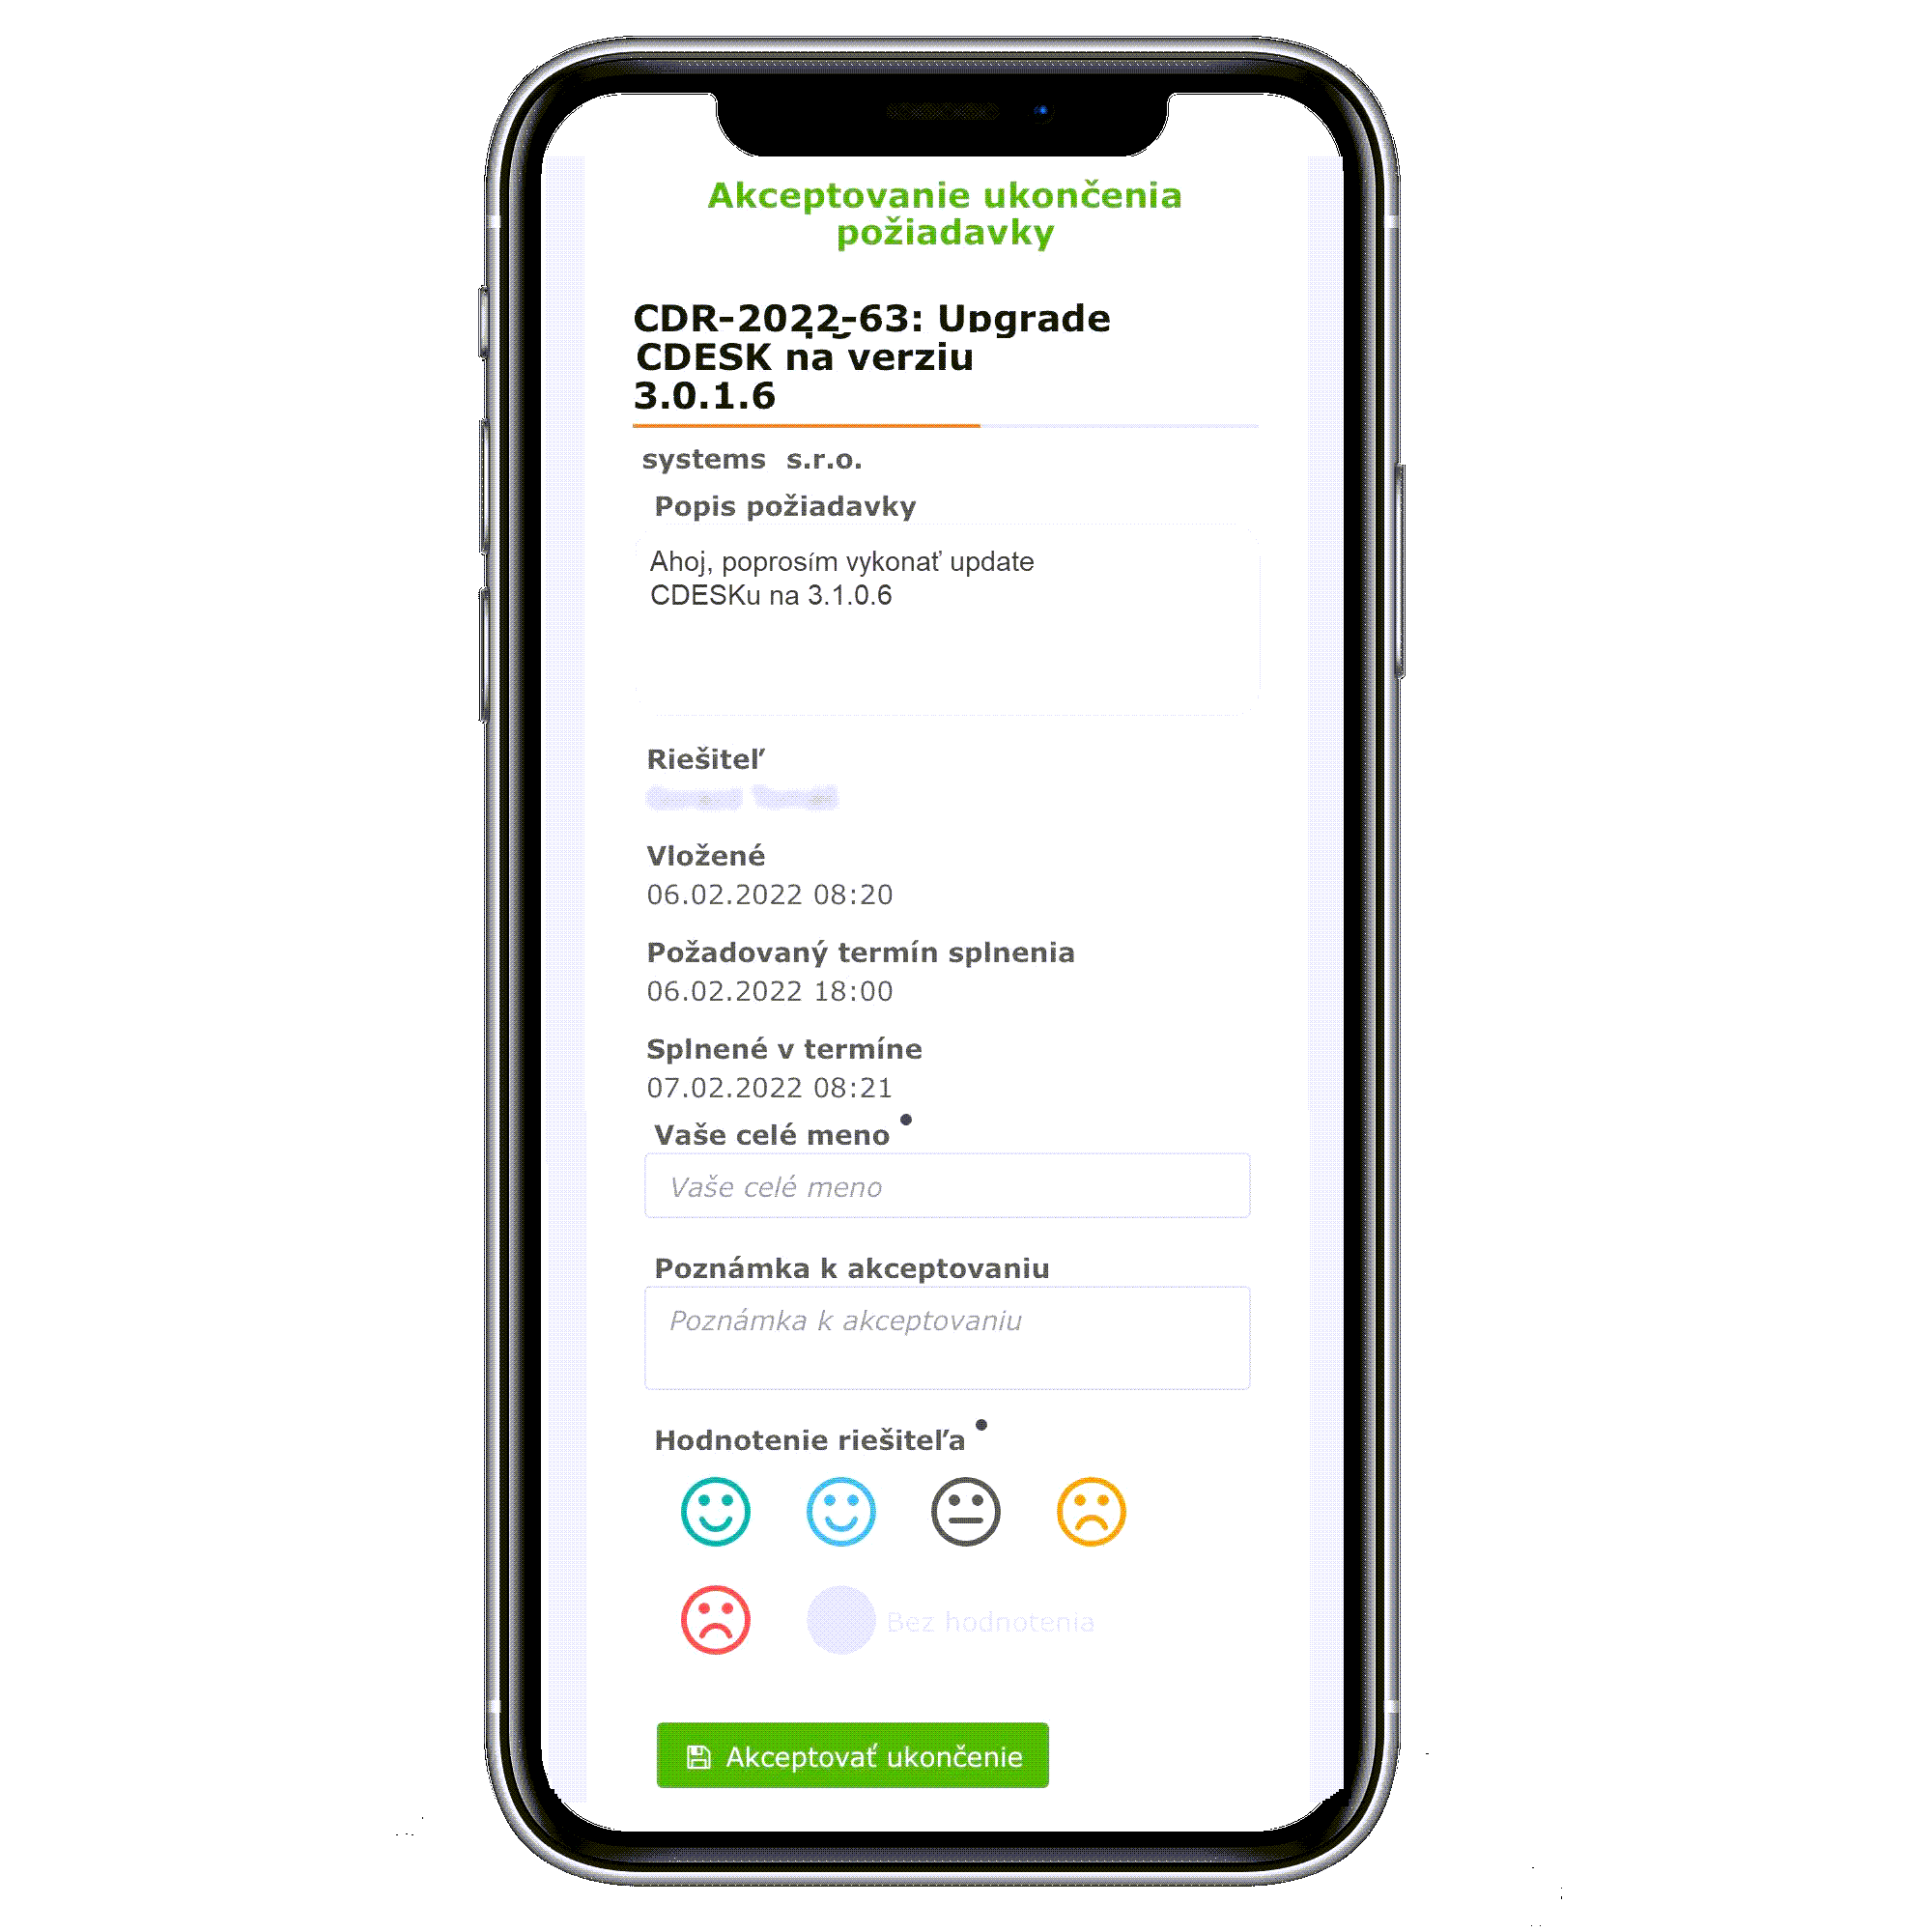
Update 3.1.0 brings an improved design for many of CDESK’s features and components. One of these is the form for responding to the closure of a request, which opens after clicking the Accept closure / Reject closure button in the email notification. The functions of this form have not changed. It still allows quick and simple closure of a request without the need to log in to CDESK. New design of the form for accepting / rejecting the closure of a request from an email notification The form is also optimized for display on mobile devices. Thanks to this, you can respond to the closure of a request via mobile as well. Display of the form for responding to the closure of a request on a mobile device
Favourite items – the slide-out menu now offers the option to display items at the first level and have functions available with a single click
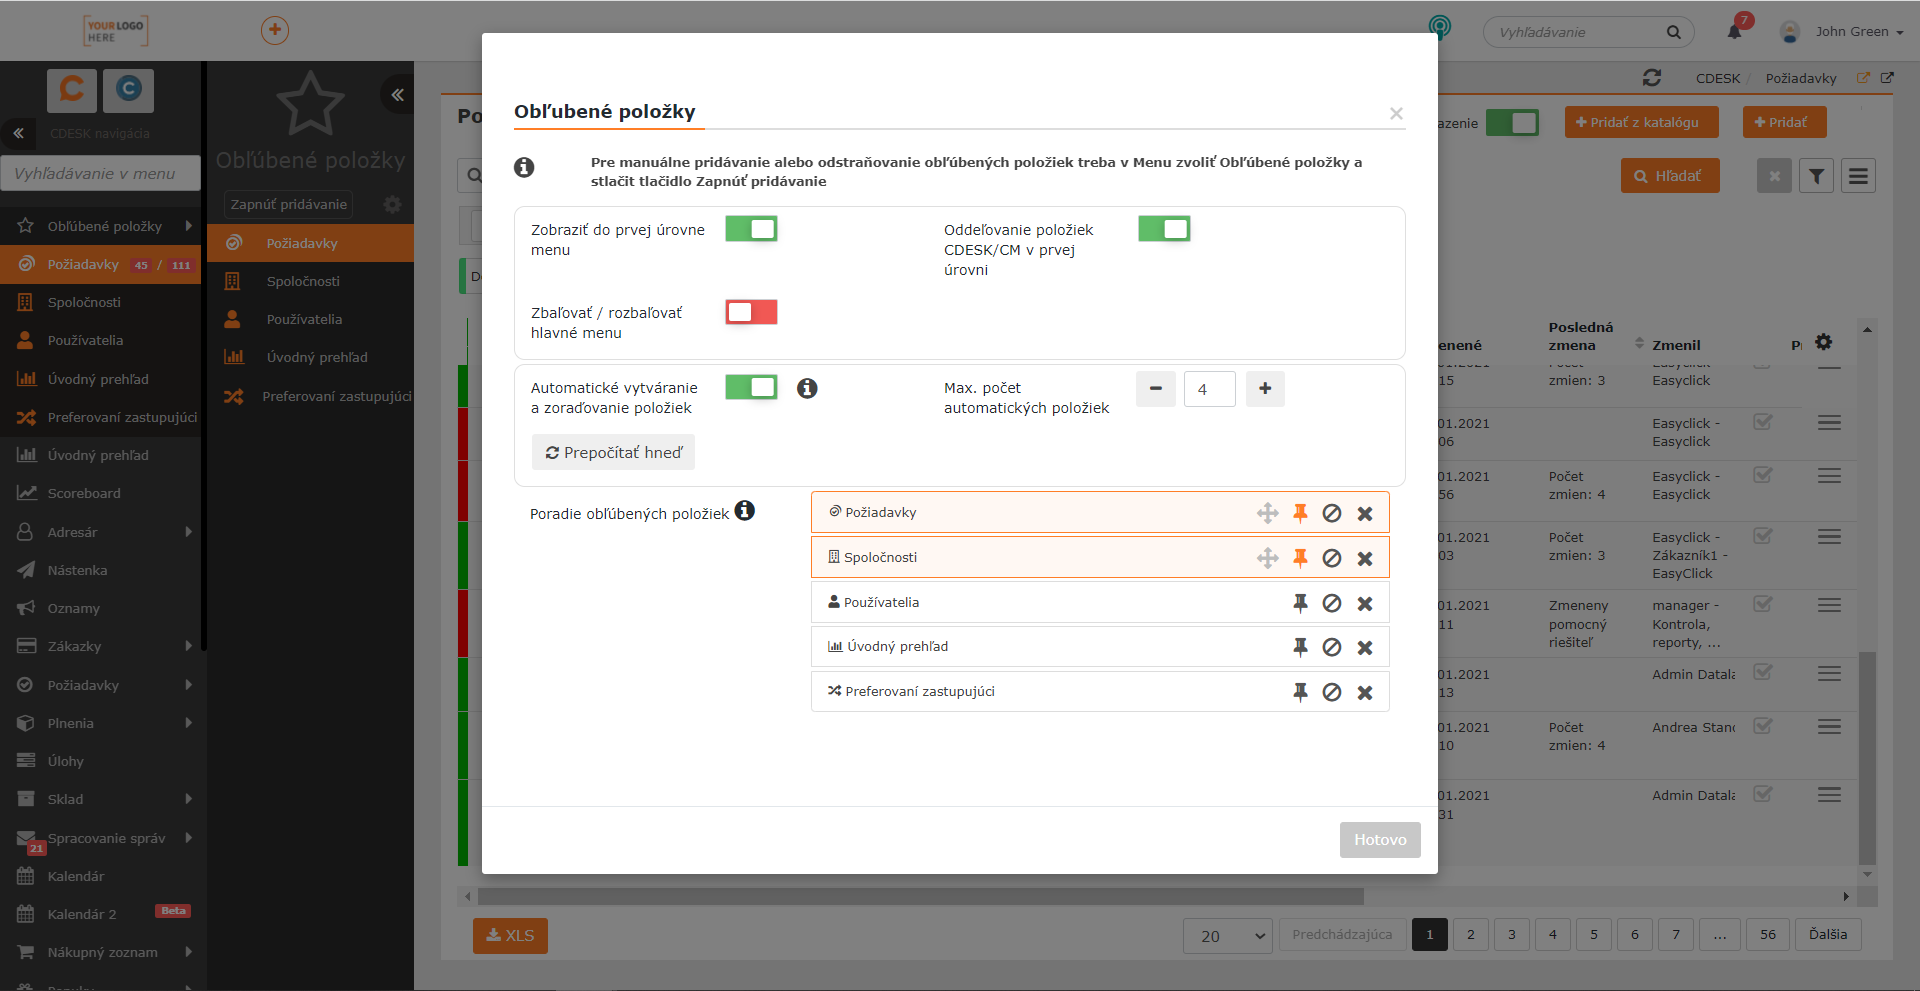
The Favourite items feature has been part of the slide-out menu for some time. With the latest update, however, it has been significantly improved. Items can be sorted into favourites automatically, based on how often the user accesses them. The user also has the option to choose which modules will not be sorted into favourites automatically in this way. It is also possible to turn off this automatic sorting of items into favourites and add items manually. New settings for favourite items Favourite items can be displayed directly at the first menu level, and it is possible to set the remaining menu items to collapse. Favourite items at the first menu level, with the remaining main menu items collapsed For more information about favourite items and the options for configuring them, see the dedicated article.
Option to change the icon in the browser tab (favicon)
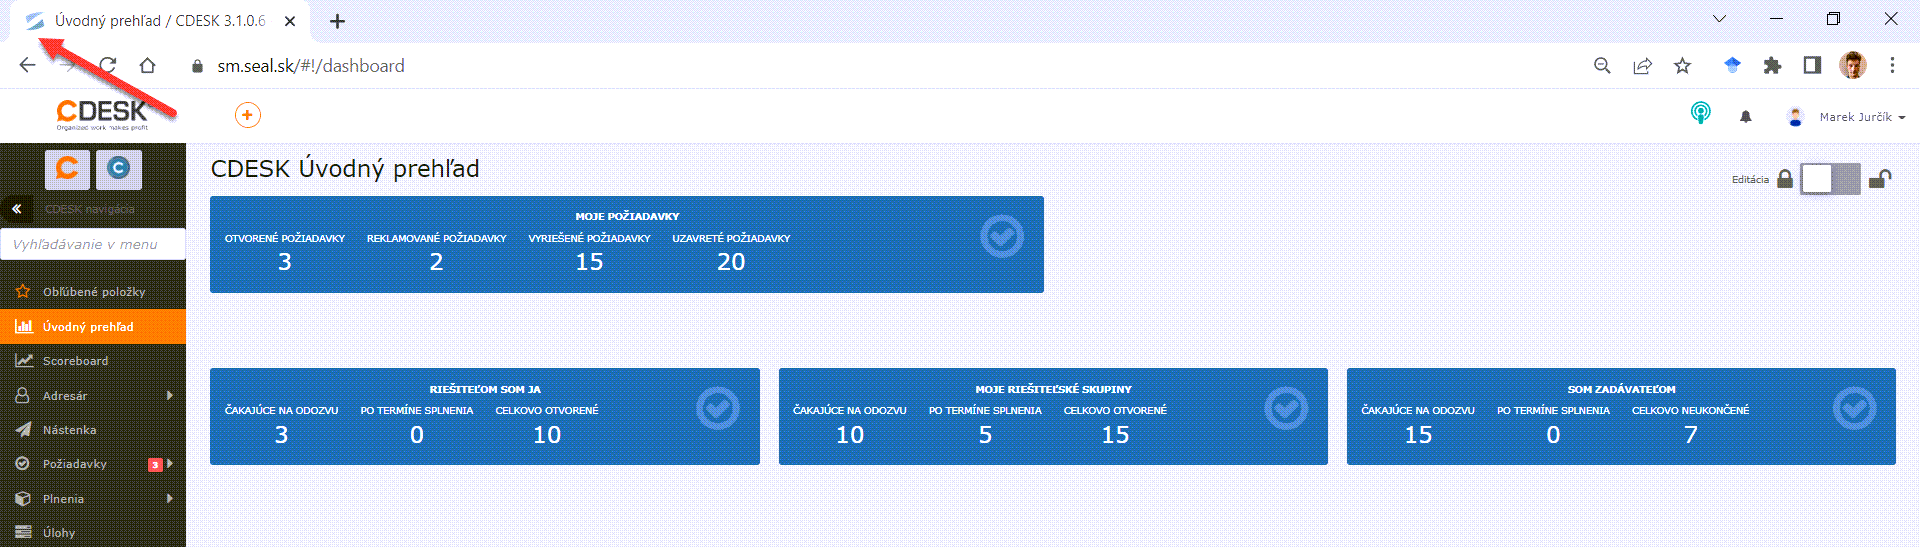
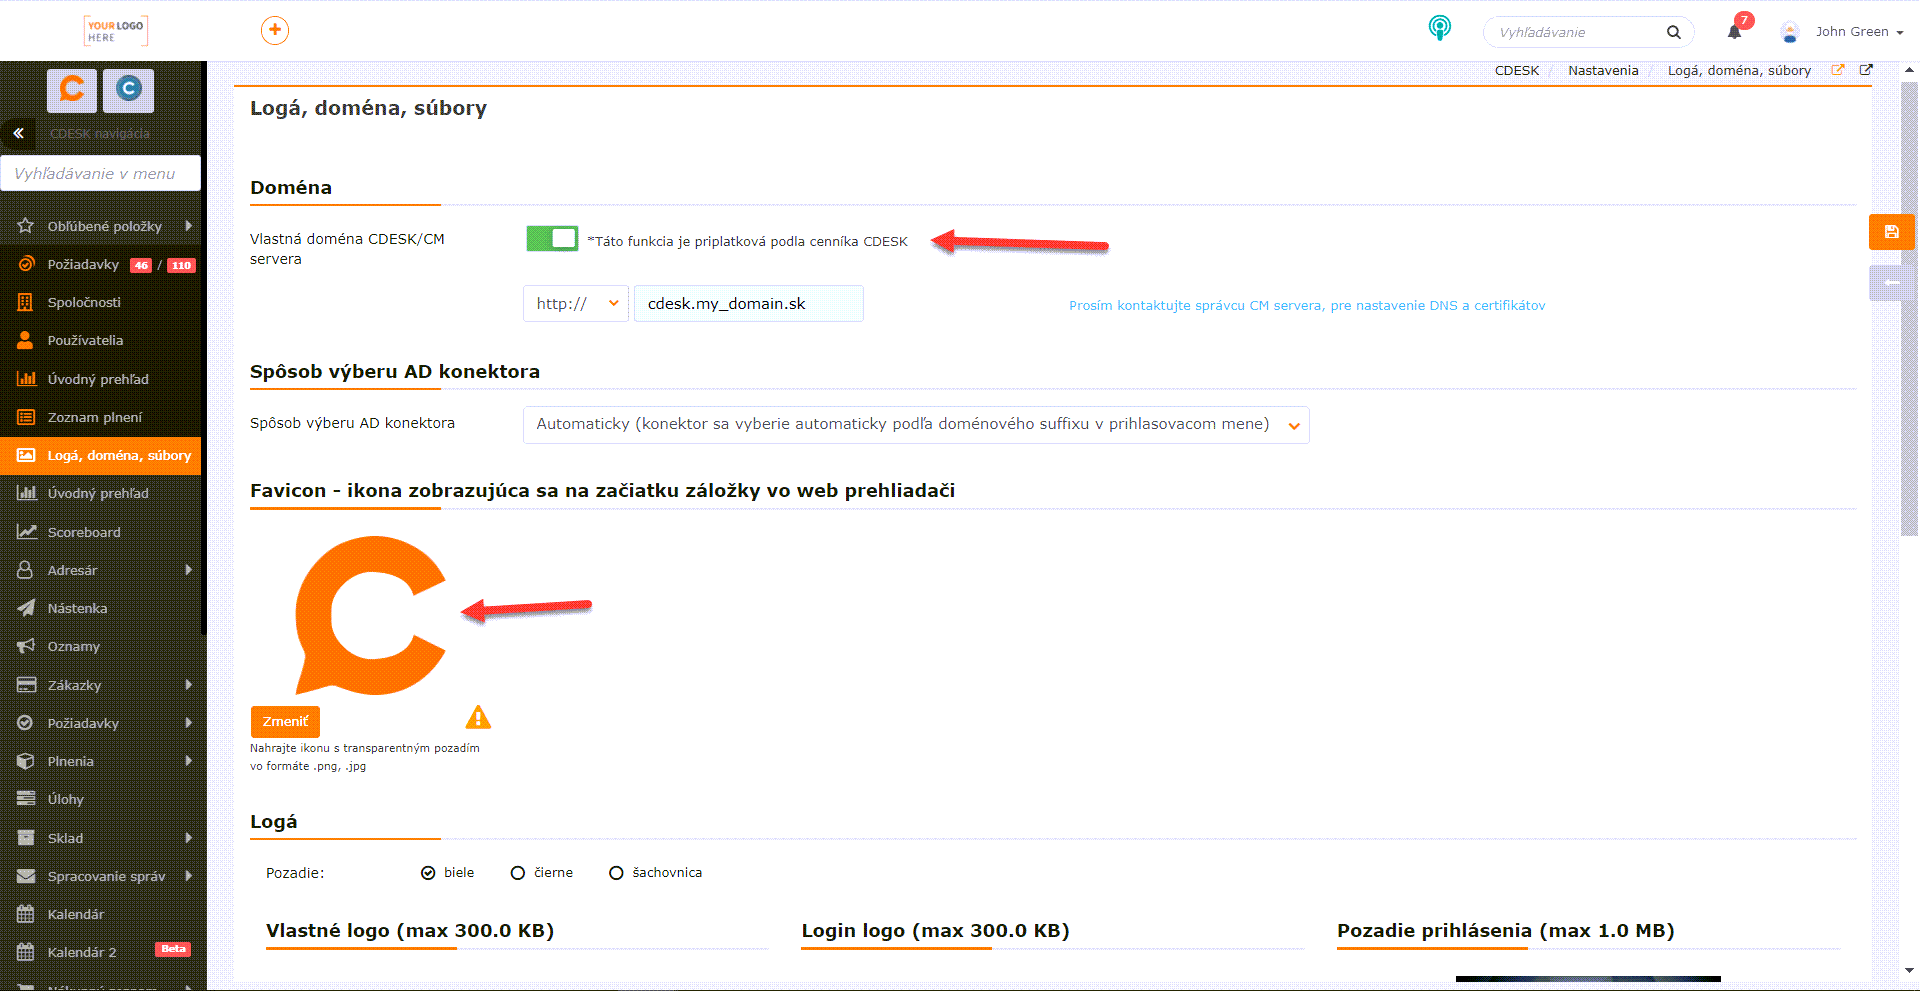
The new update also brought the option to set a custom icon that will be displayed in the browser tab. Custom icon in the browser tab The icon can be set in Global settings -> Logos, domain, files. To set the icon, you first need to enable the custom CM server domain and then you can set a custom icon in the Favicon – the icon displayed at the start of the tab in the web browser section. Enabling the custom CM server domain and changing the favicon Enabling the custom CM server domain is a paid feature according to the CDESK price list. After changing the icon, it may happen that the original icon still flickers. Removing the cache files may not help, because this file has its own management depending on the browser. So far, we have not found a simple, reliable way to remove the original icon from storage, and we recommend leaving the removal to the browser’s own management. A possible solution is to rename the directory where the browser keeps user data. Thanks to this, the browser will start saving new data with the new icon.
New condition for the advanced filter: Assignees – group members
Version 3.1.0 also added a new condition for the advanced filter: Assignees – group members. The condition allows you to filter requests with an assigned assignee who is / is not a member of the group set in the filter. Configuration of the Assignees – group members condition
Buttons for navigating between requests in the request detail preview within the request list
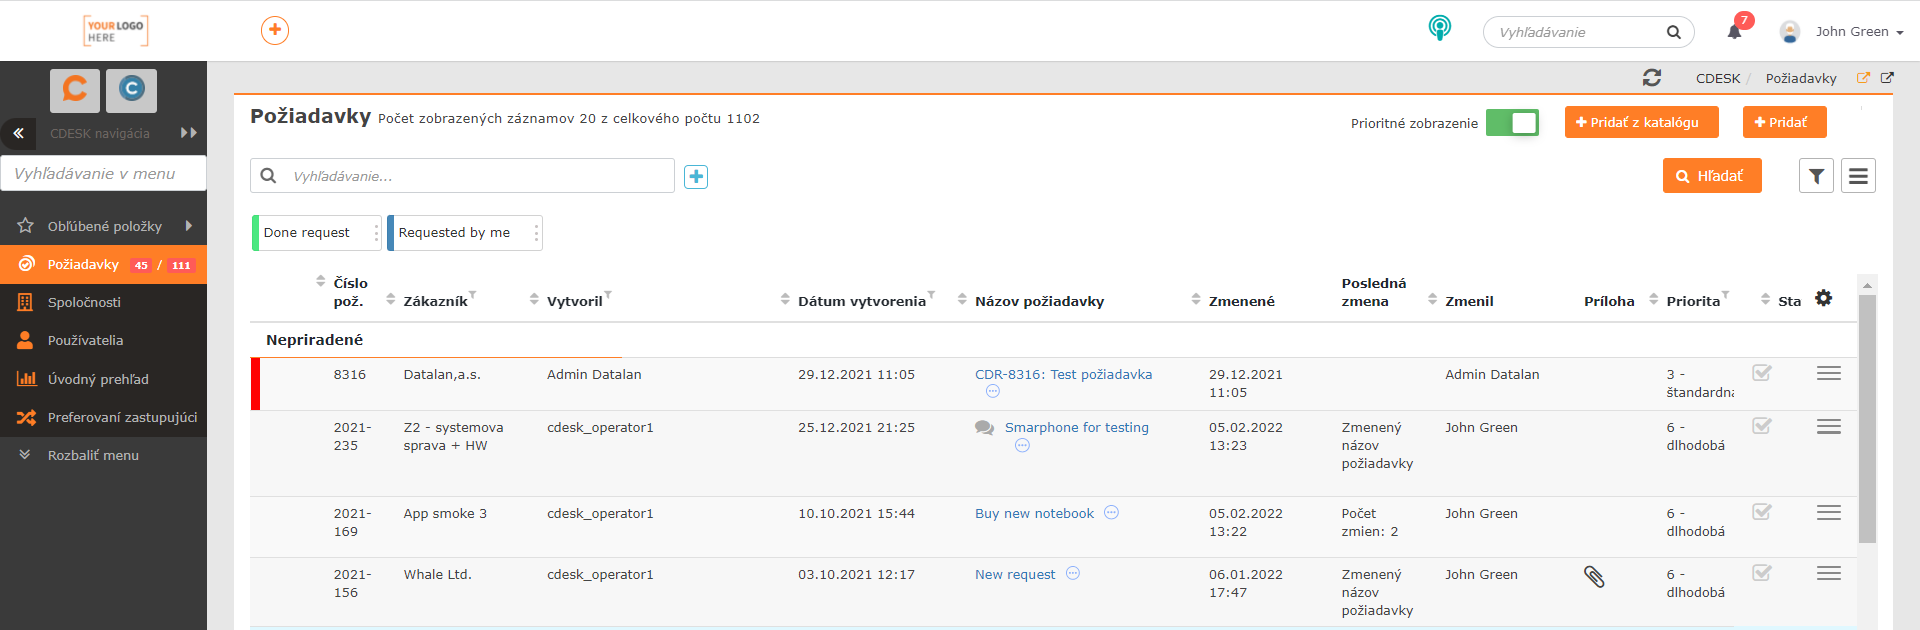
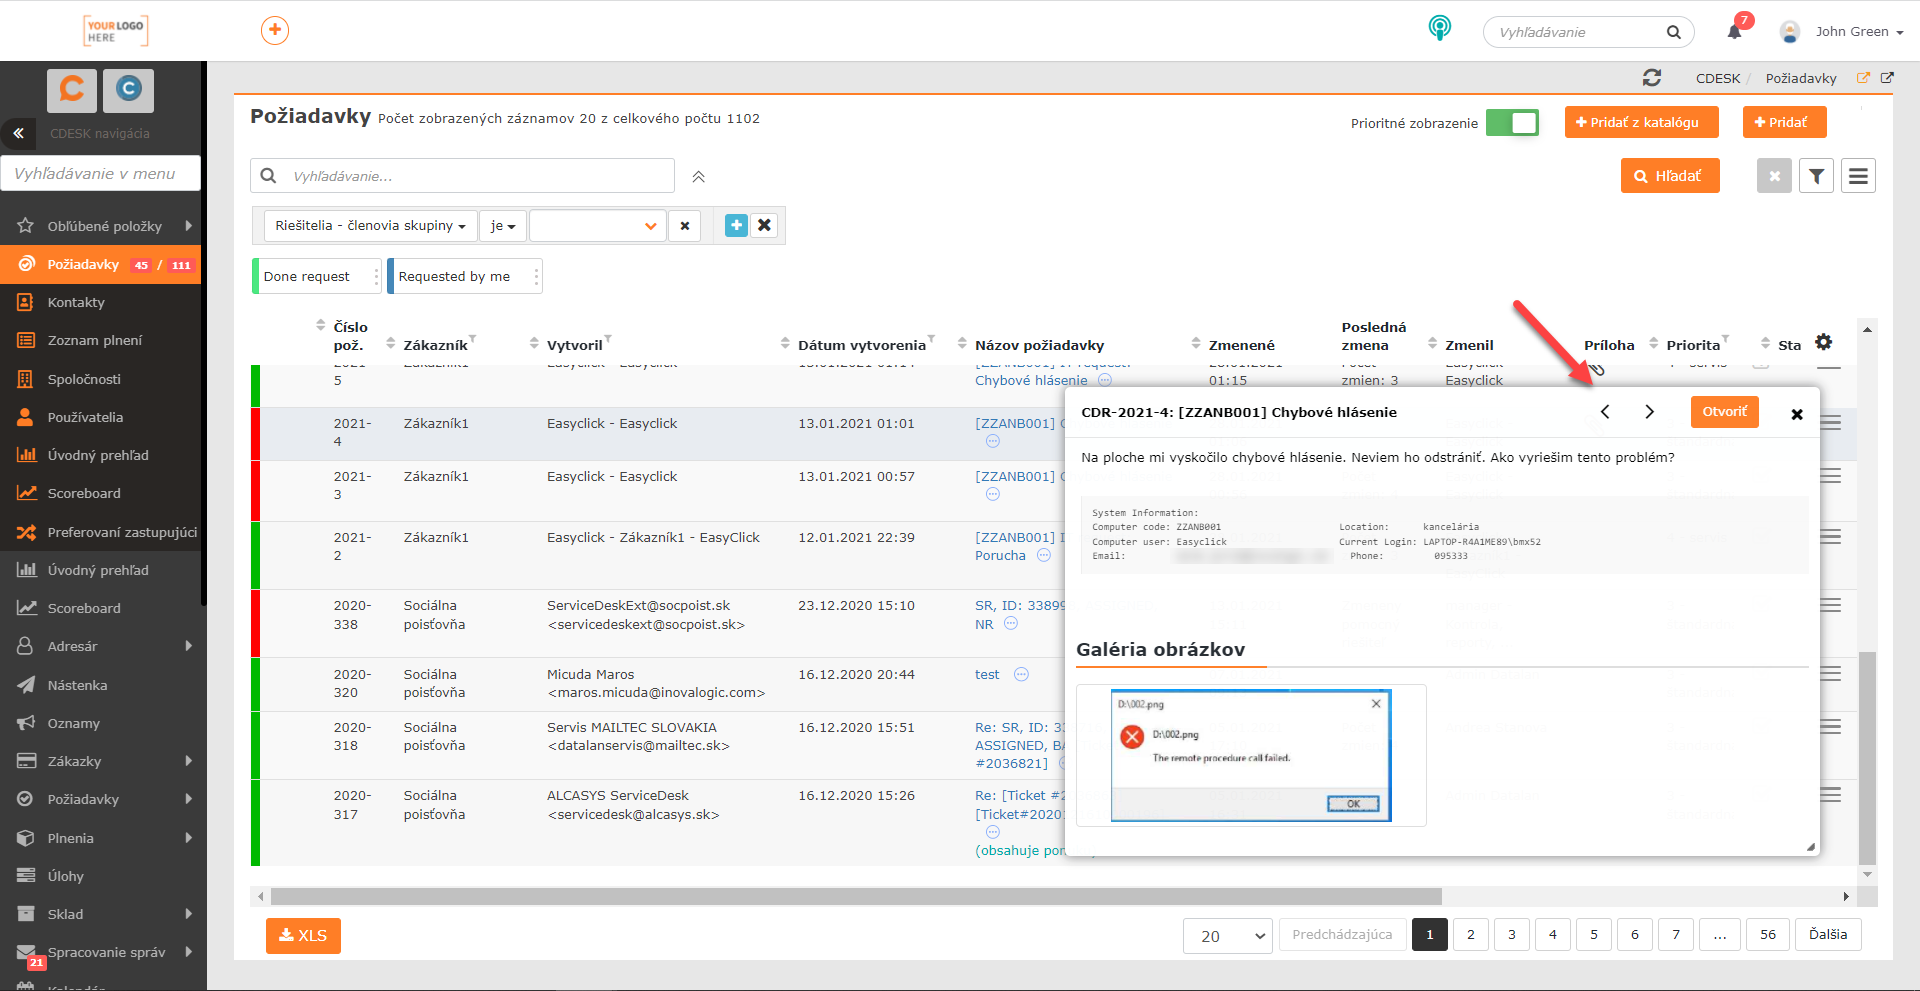
By clicking on the three-dot icon next to the request name, you can display its preview directly in the request list. With the latest update, buttons have been added to this preview that allow navigation between requests displayed in this preview. When navigating, requests are displayed based on their order in the list. Buttons for switching between requests in the request preview
Completion of the first phase of integration with JIRA
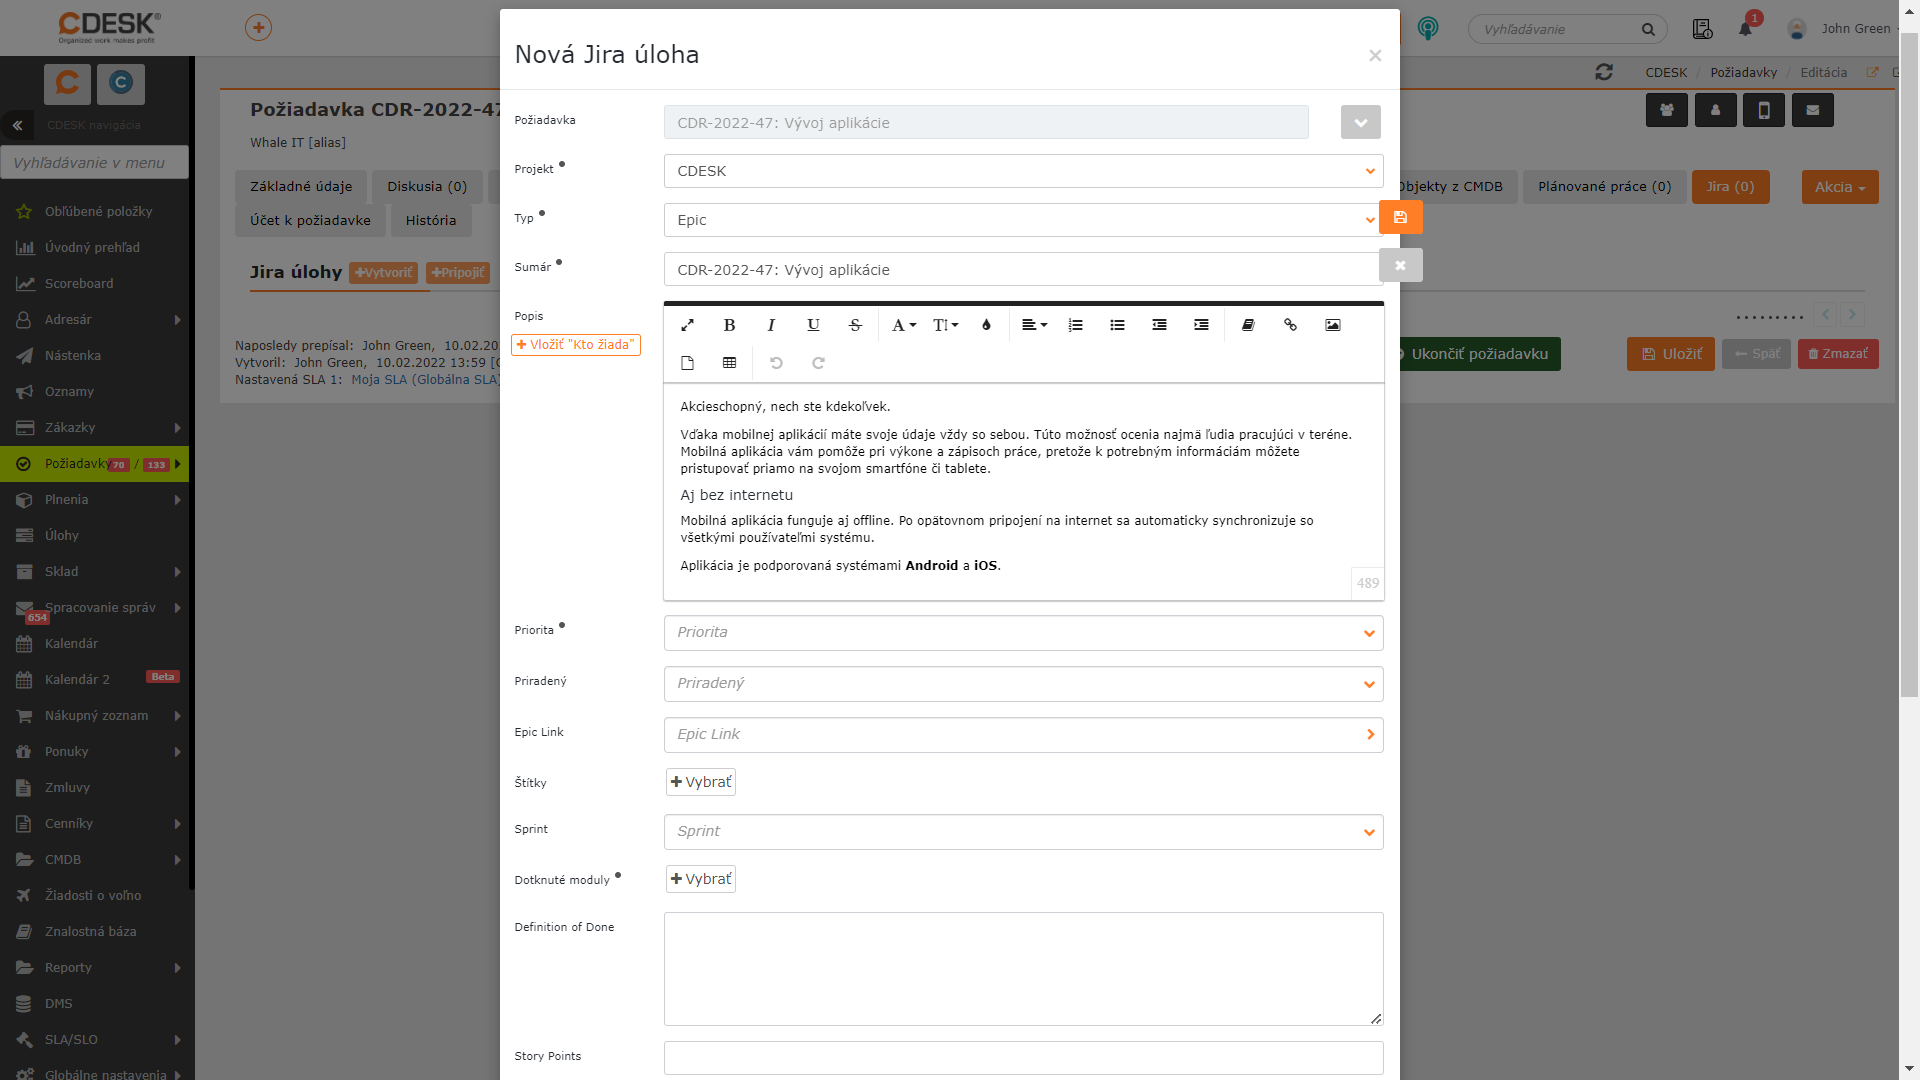
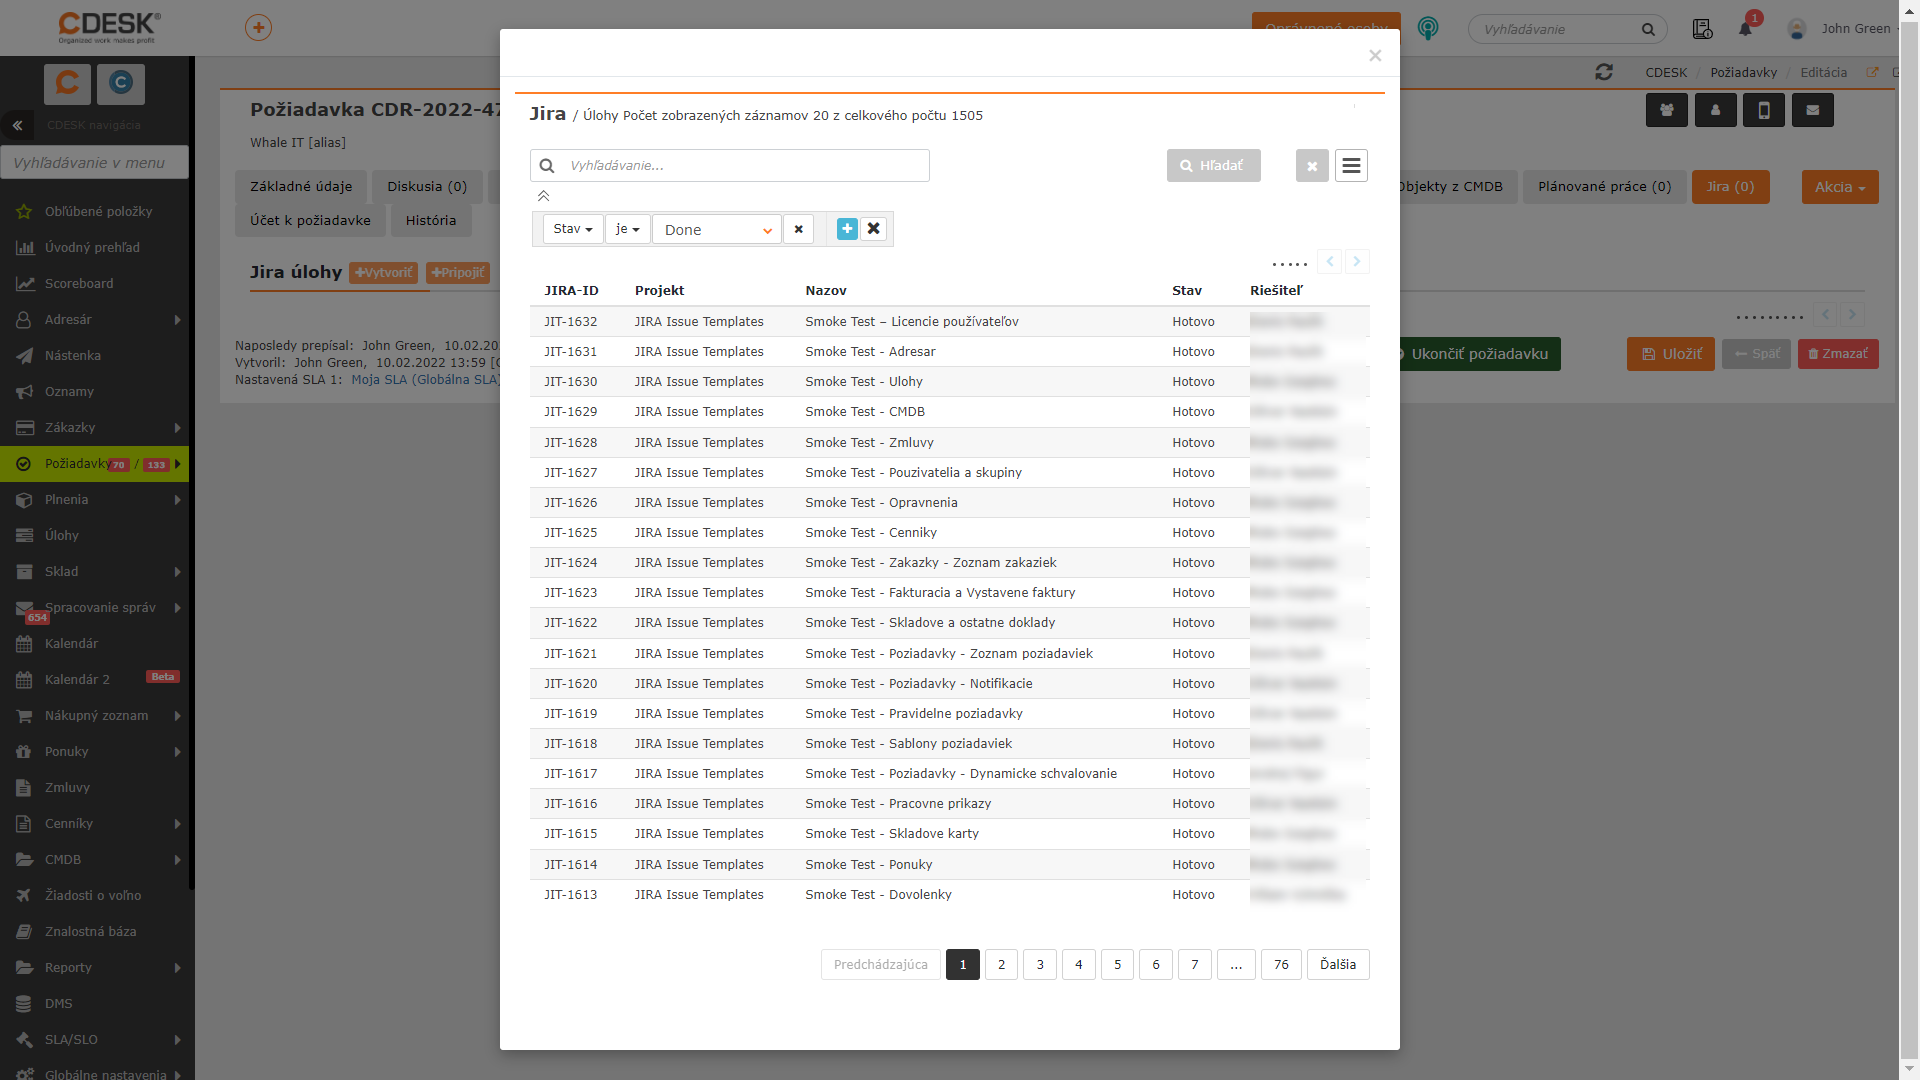
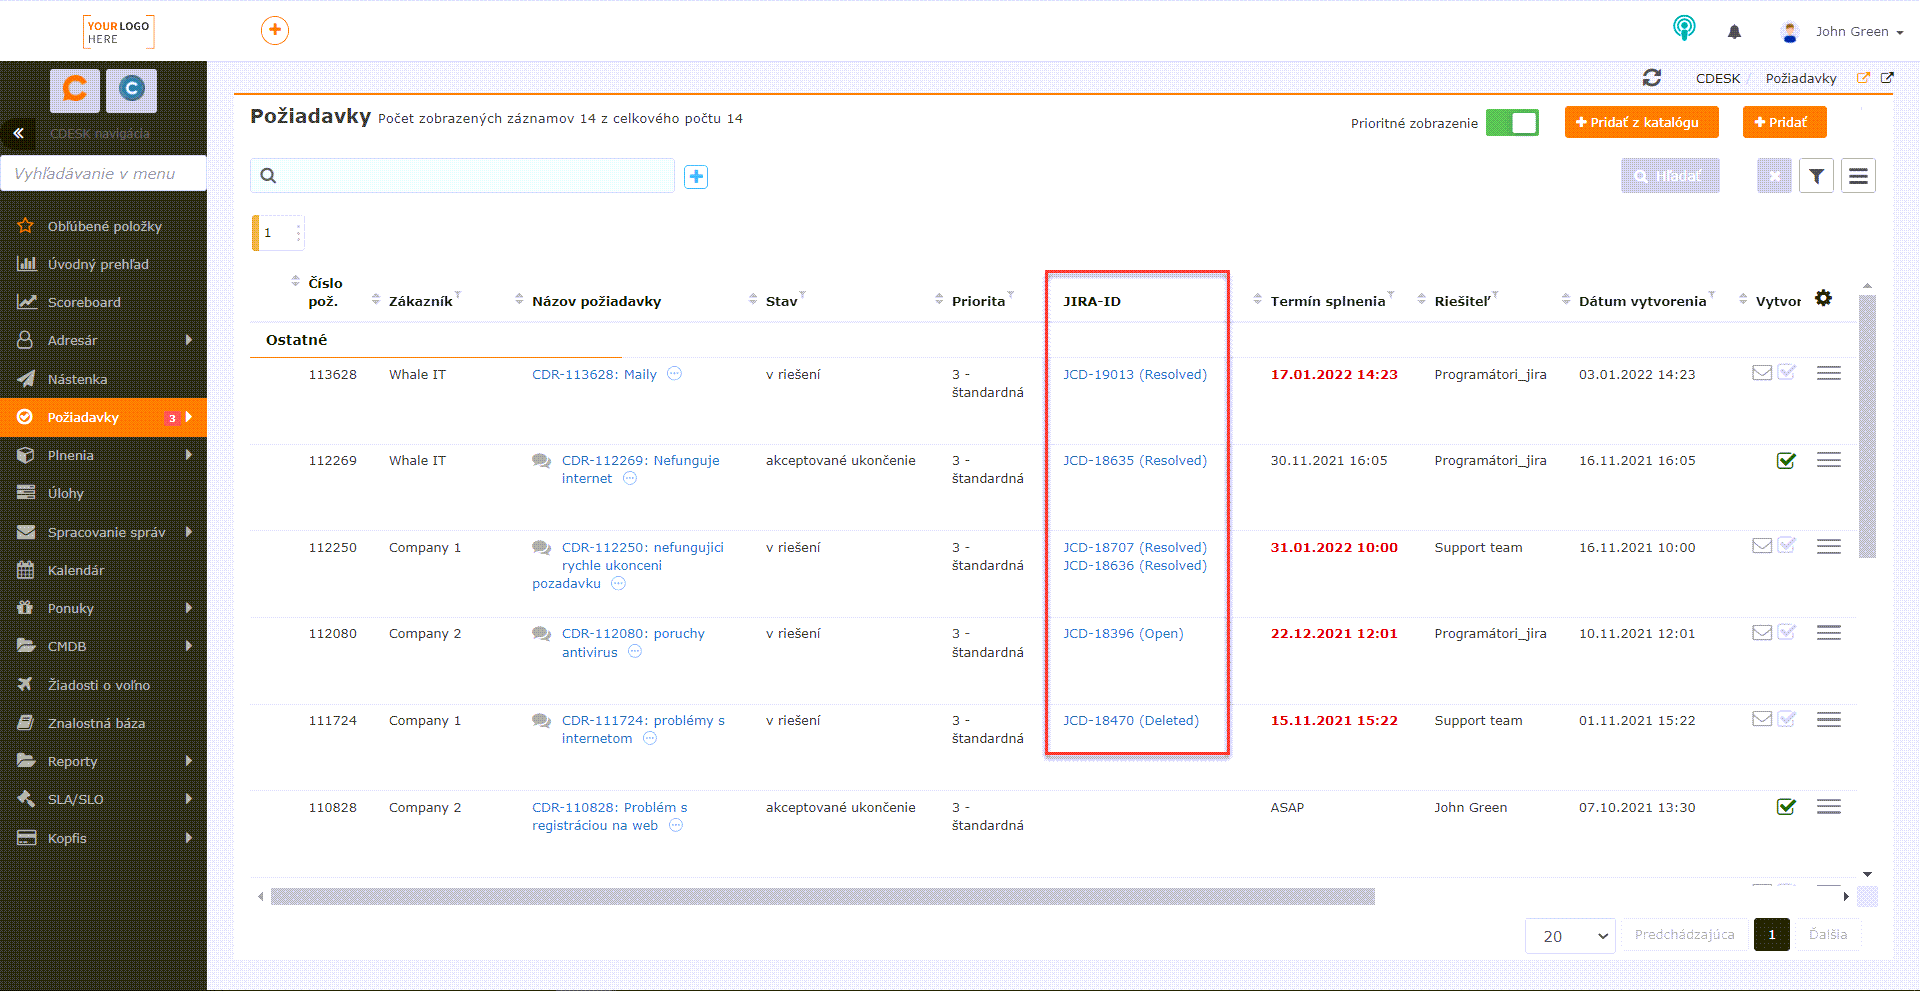
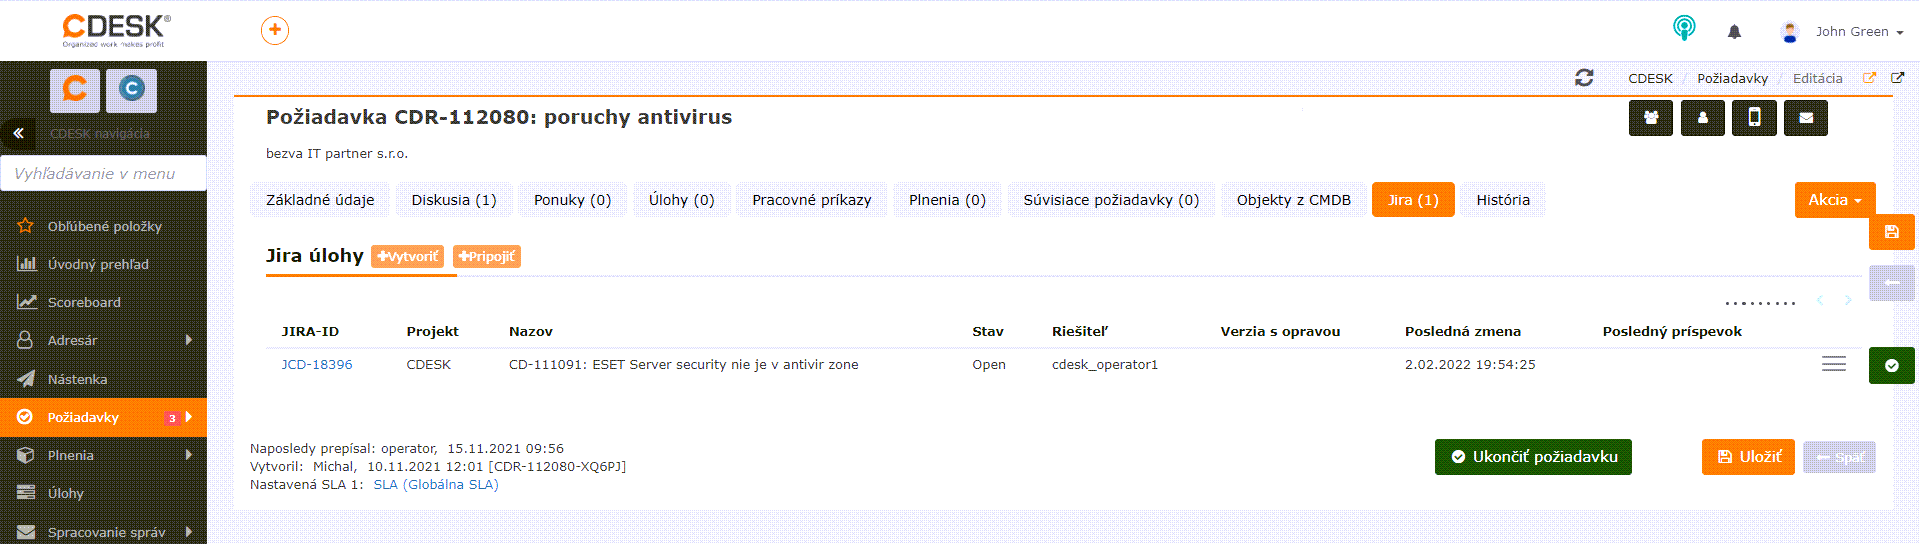
The options for working with requests have also been expanded thanks to the JIRA connector, which provides two-way integration between CDESK and the JIRA system. After activating and configuring the connector in Global settings, a JIRA tab appears on the request. The tab contains buttons for creating a new JIRA task, or directly for linking an existing one. Form for creating a new JIRA task directly from a requestLinking a JIRA task to a request One of the goals of this integration is for support staff working on software projects to see in CDESK what state the tasks related to a request are in. This information can also be made available to end customers. The integration with JIRA can also be supplemented for other purposes, for example, the support team’s work will record the work performed in CDESK and it will then be transferred to the worklog in JIRA. Integration with JIRA displayed in the request listJIRA tab
Connector enabling the integration of multiple CDESK instances
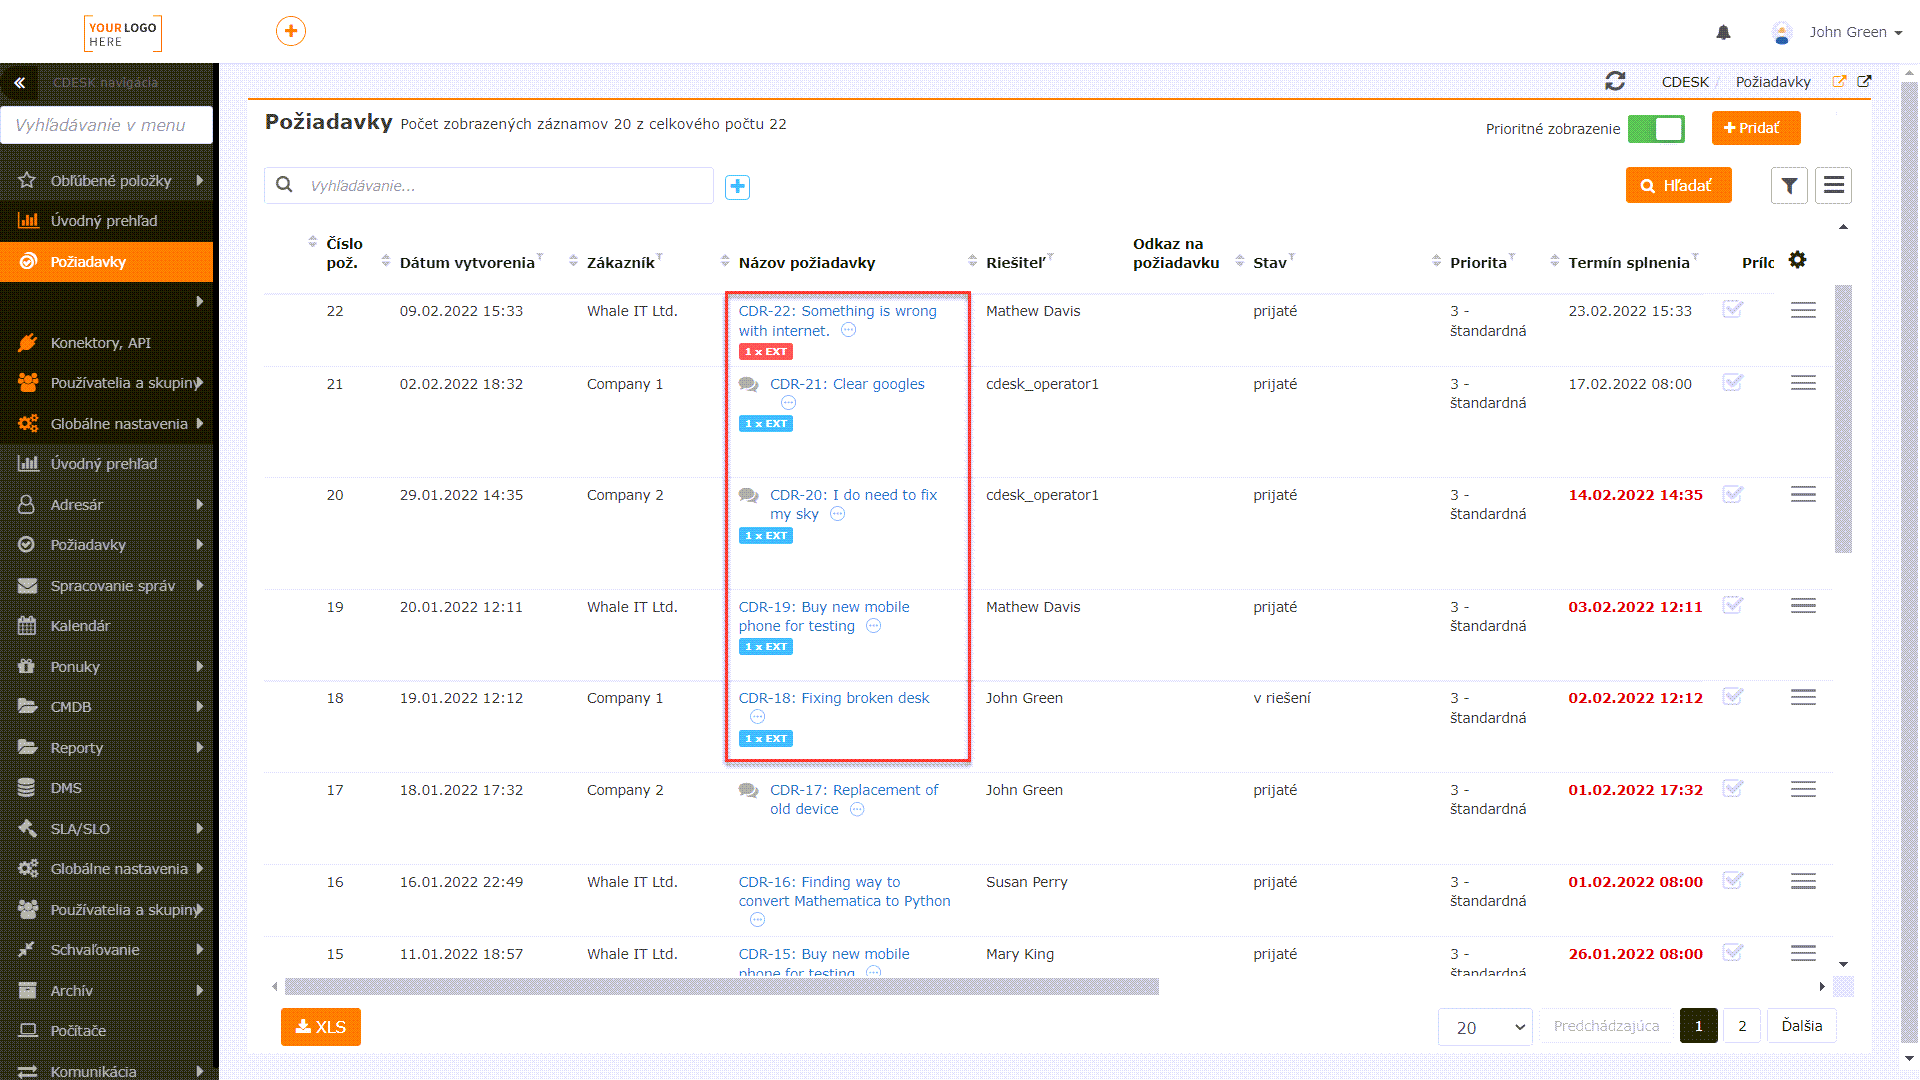
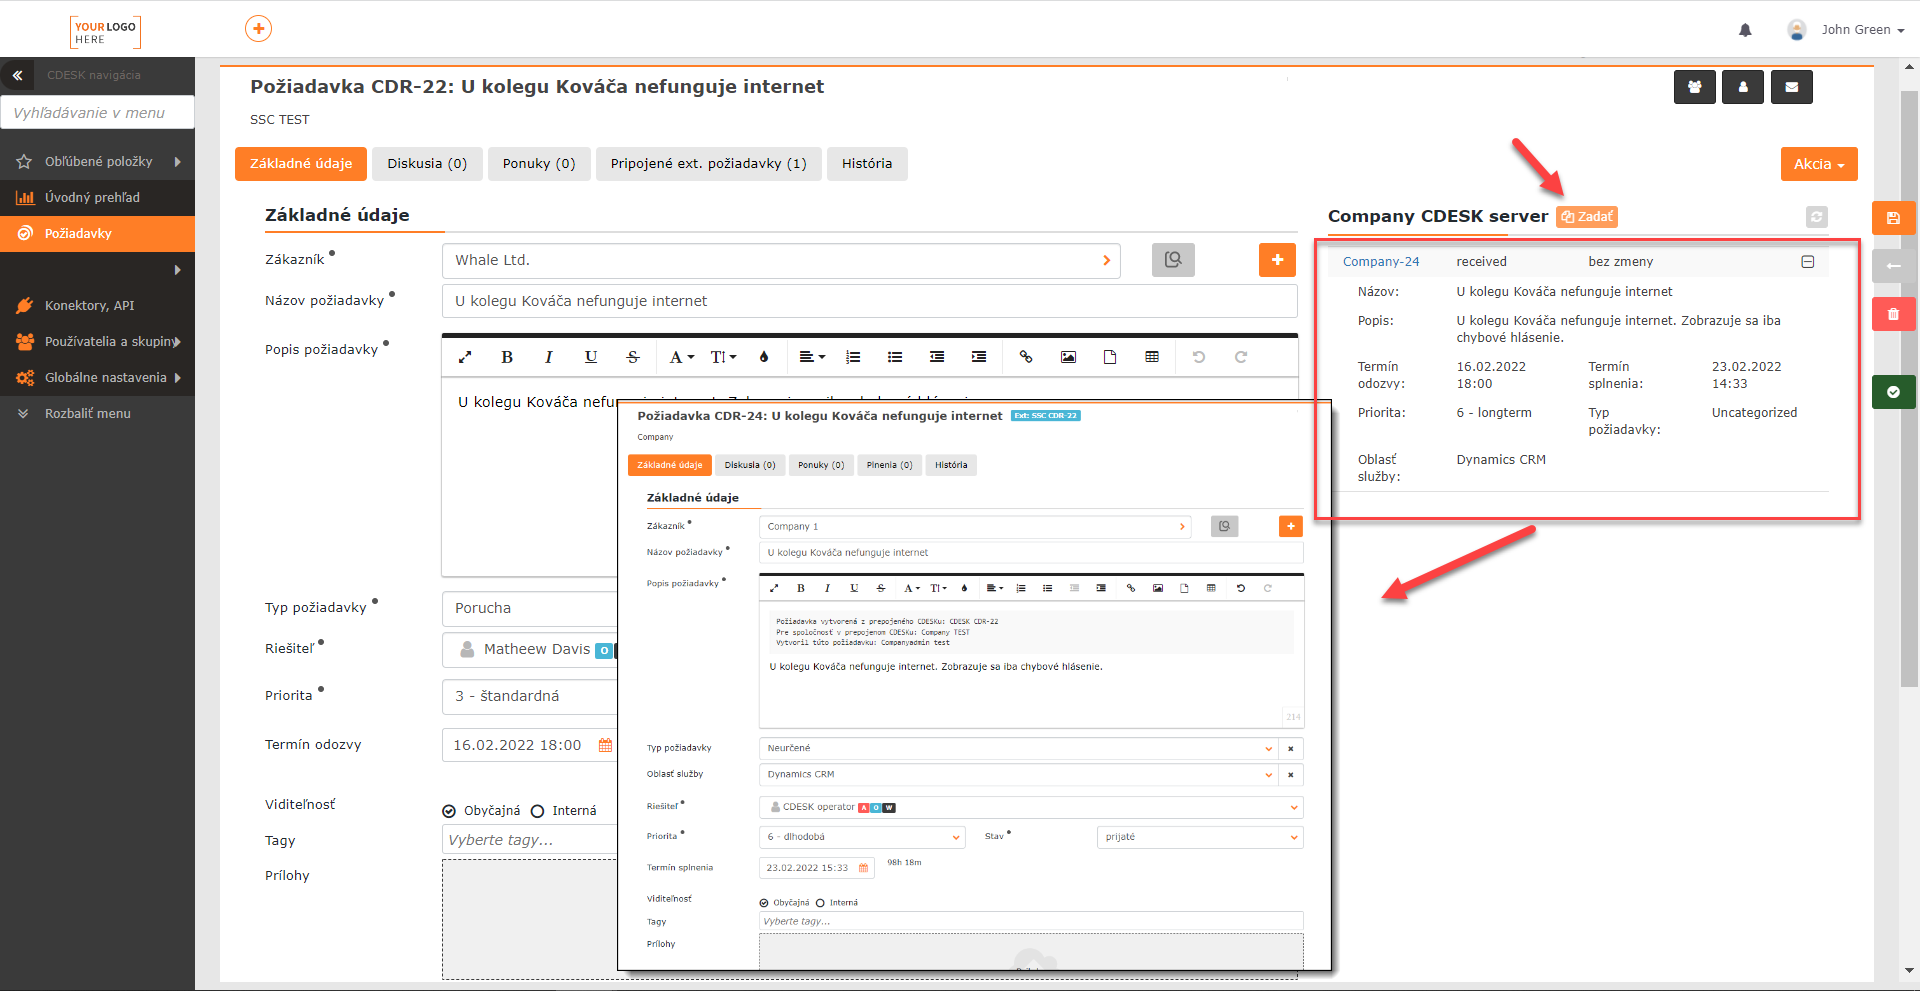
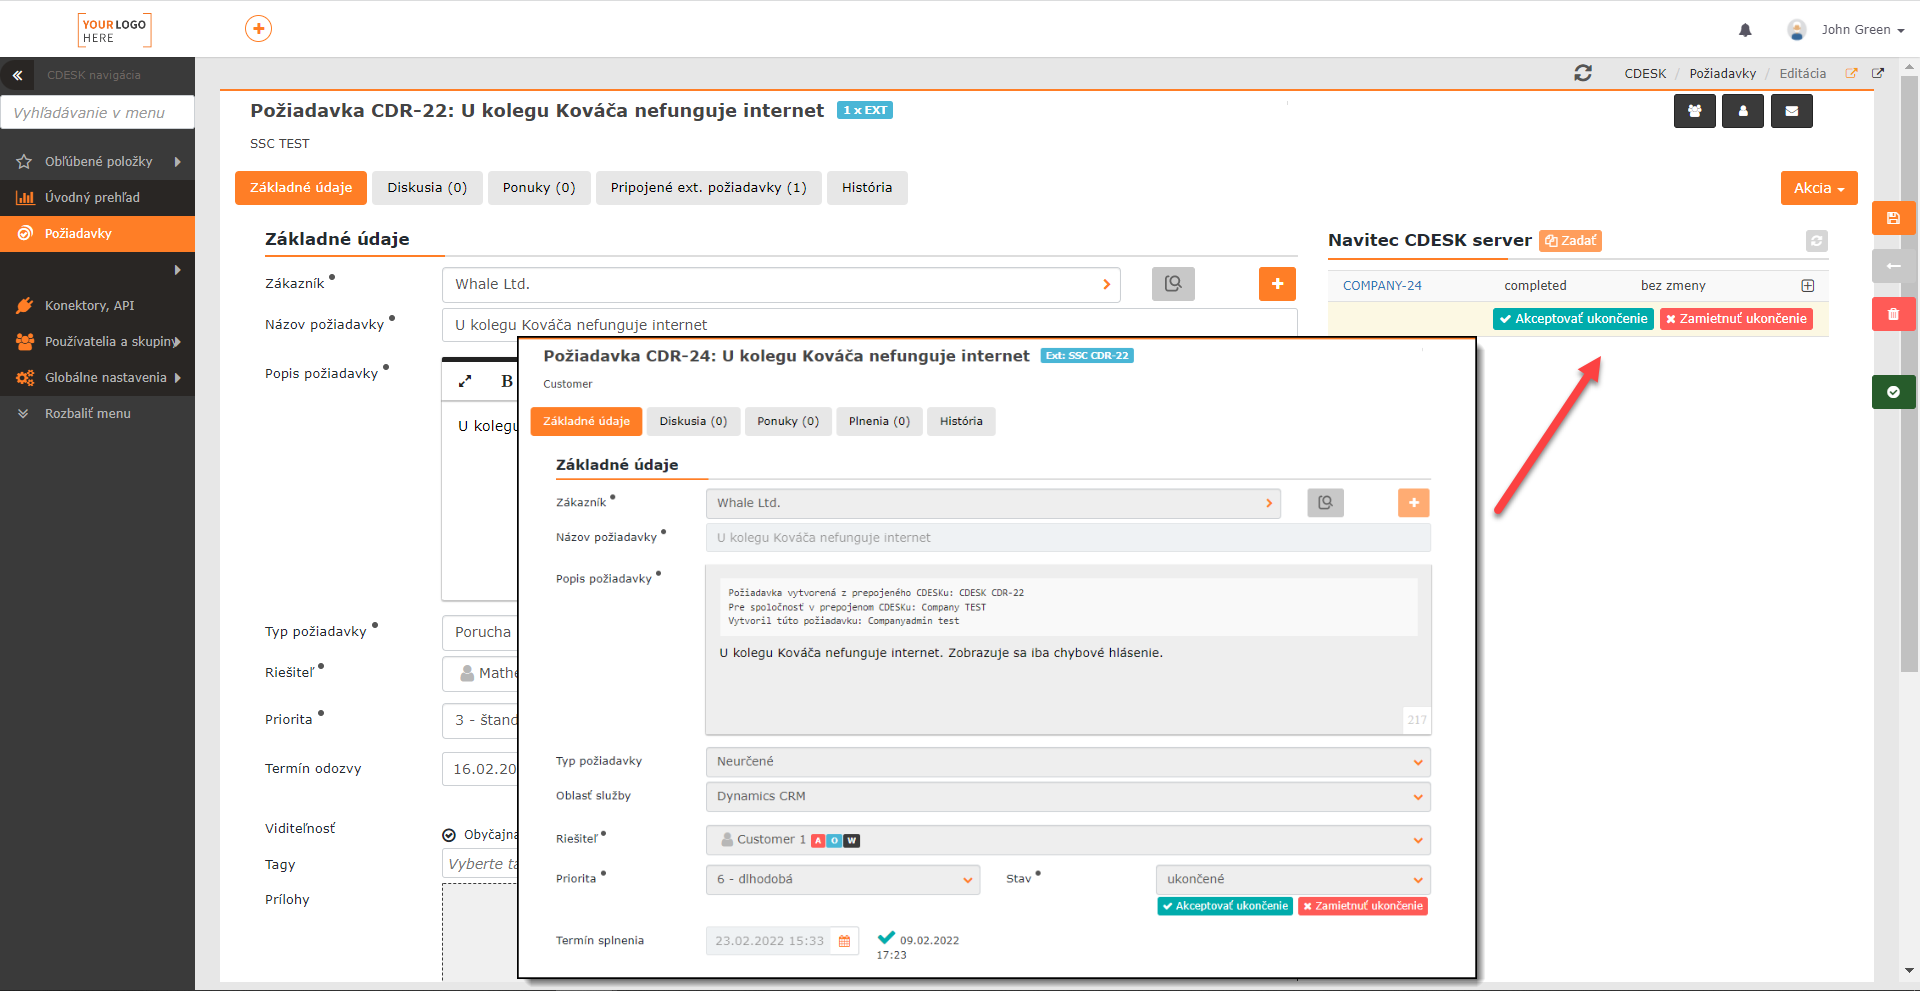
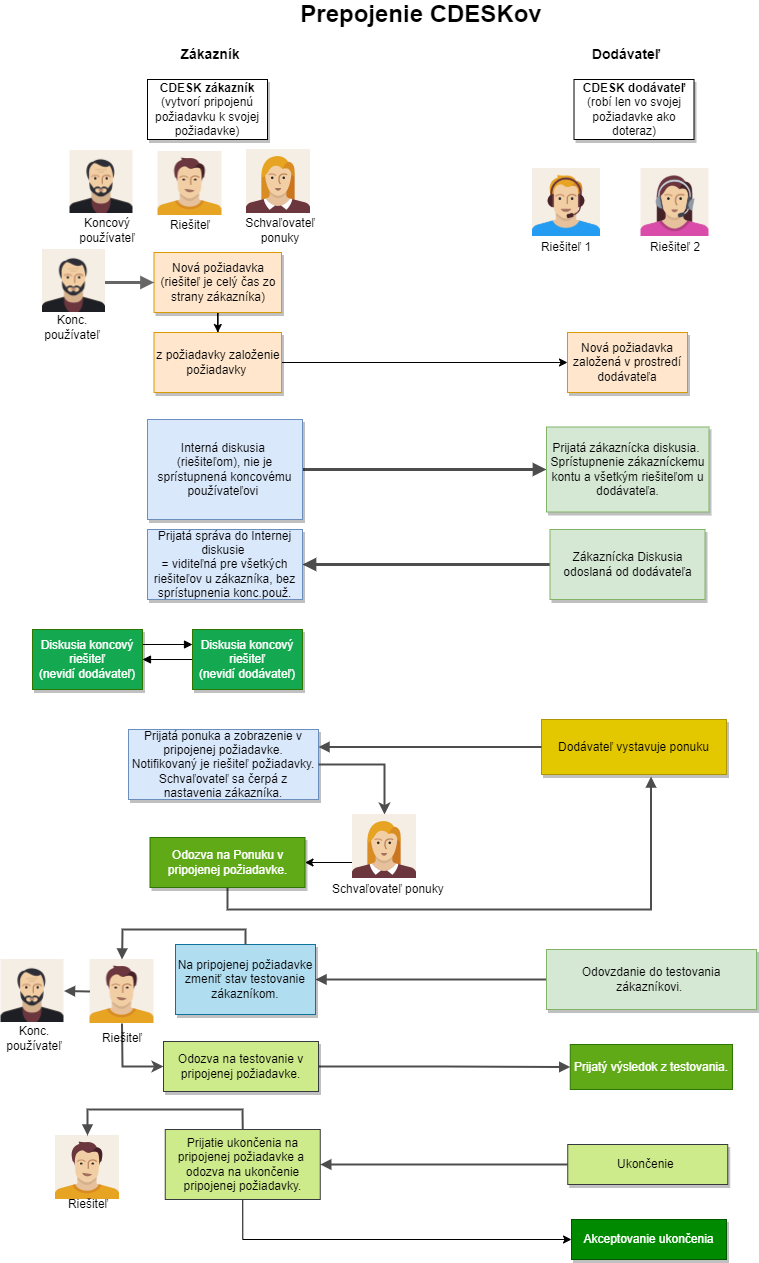
If both the customer and the supplier use CDESK, the new connector brings the option of integrating them with each other. Thanks to this, both users can work on requests in their own environment without the need to create new accounts in other environments. Changes made to requests are reflected on both sides. Whether it is adding a discussion, creating and approving an offer, or changing the status of a request. The customer enters a request in their own CDESK. After the request is saved, an icon appears in the form that allows this request to be automatically created in the supplier’s environment as well. Requests created in this way are distinguished in the list by a flag. List of requests with requests automatically created from another CDESK environment The parameters of an automatically created request on the customer’s side are also displayed in the supplier’s request. If the supplier adds an offer to their request, the customer can approve it in theirs. Likewise, the customer can respond when the supplier switches the request to the Tested by the customer status and also Closed. A request automatically created thanks to the integration of two CDESK instancesDisplaying the prompt to respond to the closure of a request in the customer’s request
These are the only online cookies that taste delicious. Why? Because they ensure the best user experience on our website and help us improve our business. That's why we need your consent to process them.
Functional
Always active
The technical storage or access is strictly necessary for the legitimate purpose of enabling the use of a specific service explicitly requested by the subscriber or user, or for the sole purpose of carrying out the transmission of a communication over an electronic communications network.
Technické uloženie alebo prístup je potrebný na legitímny účel ukladania preferencií, ktoré si účastník alebo používateľ nepožaduje.
Technické uloženie alebo prístup je potrebný na legitímny účel ukladania preferencií, ktoré si účastník alebo používateľ nepožaduje.
Statistics
The technical storage or access that is used exclusively for statistical purposes.Technické uloženie alebo prístup je potrebný na legitímny účel ukladania preferencií, ktoré si účastník alebo používateľ nepožaduje.
Marketing
The technical storage or access is required to create user profiles to send advertising, or to track the user on a website or across several websites for similar marketing purposes.