DEALS
Purpose of Deals
Billing Using Deals
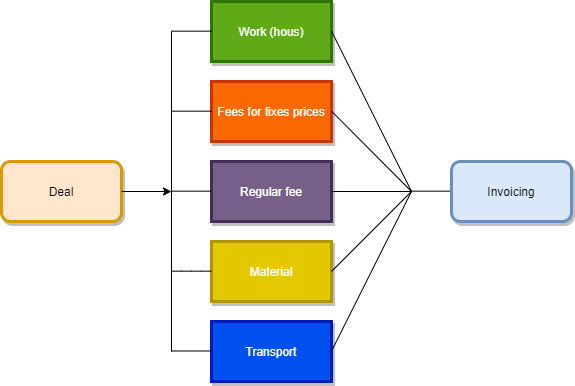
By using Deals module you can bill work, various types of charges and issued material. The output can be the final invoice that you manually or automatically transfer to your ERP system. The other output might be an invoice for internal purposes. Alternatively, deals will not be invoiced at all, and the structure created within the deals will be used only for reporting purposes.
View of Smaller Project Status Using Deals
The Deals module can also be used to organize the work of smaller projects so you can track the progress of scheduled actions.
List of Deals
The list of deals can be found in the main menu under Deals. If Deals do not appear in your menu, probably the Deals module is not enabled for you in the Global Settings->Deals, or you have not the appropriate permissions to use this module in Users and Groups-> Users-> specific user-> Permissions tab-> Deals.
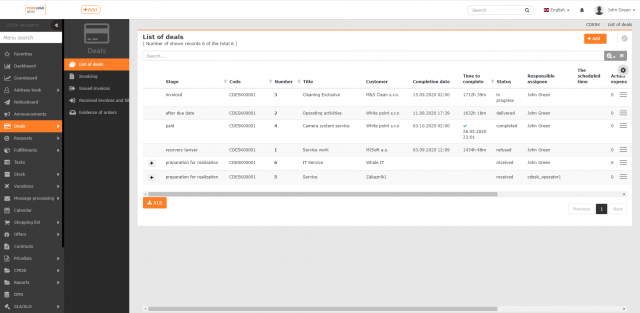
The list of registered deals can be found in Deals-> List of Deals. The header of the window informs about the number of displayed deals from the total quantity, it also contains controls for creating a deal, advanced filter search and a button to export to XLS . Below follows a list of deals sorted from newest to oldest including displaying deal details.
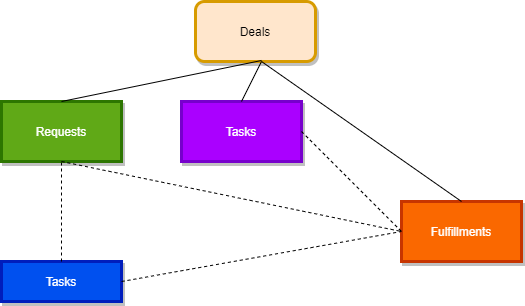
By using deals, requests and tasks can be grouped together under this module. Deals containing requests or tasks include the icon + at the beginning of the row to expand the list of assigned requests and tasks.
By clicking the icon ![]() , you choose columns to be displayed in the list and set their order.
, you choose columns to be displayed in the list and set their order.
Deal drafts are automatically saved as draft – they are sorted first in the list and distinguished by the DRAFT.
Create a Deal
To create a deal, use the +Add button in the list of deals. The button for adding deals is only displayed if you have permission to add records. Permissions can be set in Users and groups-> Users-> specific user-> Permissions tab-> Deals-> Records.
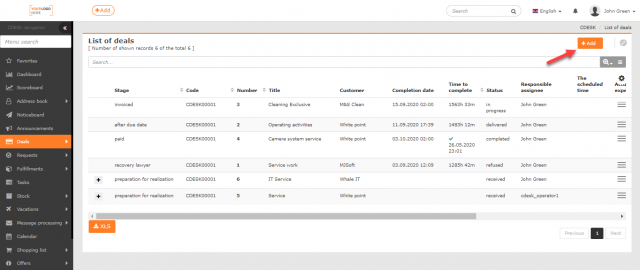
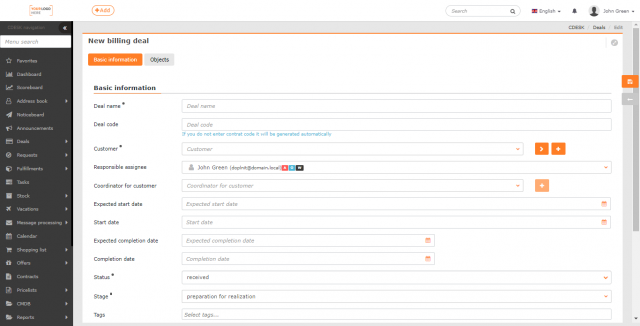
Clicking the +Add button opens the form for the new billing deal divided into Basic Information and Objects. The meaning of each field is described in the text below under Basic Information and Objects.

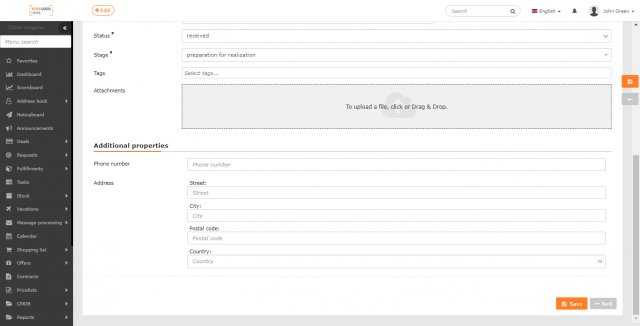
To create a deal, click Save.
If you have initially assigned a name to a deal, all changes are continuously saved in the background, even though you have not saved the deal yet. If something interrupts your work while entering a deal, you can continue where you stopped by editing the draft. You can find the deal you are working on in the list of deals marked with the DRAFT. Ongoing changes of deals are only saved in the draft, before deals are saved for the first time. All changes made after saving must be confirmed by saving it again.
Deals Tab Description
Basic Information
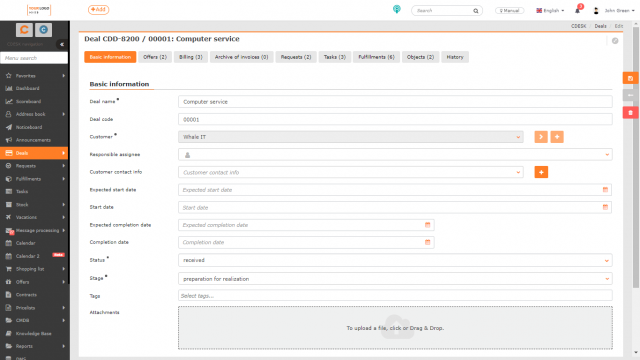
Deal name• – create an apt name under which the deal will appear in the lists.
Deal code – if you do not specify a code, it will be generated automatically. If deals are to use the default numeric format, set it in Global Settings->Deals
Customer• – select a company in which the deal will be registered. Click on > to display a list of companies in a separate window along with additional details. If the requested company cannot be found, add a new one by clicking on + .
Responsible assignee – select a user responsible for the deal solving.
Customer contact – select a contact to communicate about the progress of the deal on the customer side. If no contact is created, add a new one using + .
Expected start date – date and time when the deal is expected to start.
Start date – date and time of the real commencement of the deal implementation.
Expected completion date – date and time when the deal is expected to be finished.
Date of Completion – date and time of the real deal completion – this date will be used to assess whether the deadline has been met. If the deadline is exceeded, the system sends a notification to the responsible operator.
Status• – select status of the deal. The list of available deal statuses can be edited in Global Settings->Deals.
Stage• – select stage of the deal implementation. This field can be enabled optionally in Global Settings->Deals, where it is also possible to edit the list of stages to be offered in the selection.
Tags – list keywords describing the selected deal. Tags that have not yet been entered will be created when the deal is saved.
Attachments – this feature allows adding an attachment (for example a scan, a document, a photo). You can attach a file by dragging it with the mouse on this field, or by clicking on it to select a file from the disk. It is also possible to add multiple attachments. The list of attached files will be displayed below this field.
Additional properties
If additional properties are predefined in Global Settings->Deals, they allow to extend the deal with additional information. For more information on the additional properties definition, see the article on Additional Properties.
Objects
It is possible to record objects from the Configuration Database (CMDB) if you wish to record to the object history that the deal was implemented to it.
The tab is displayed if the option Selection of Objects from CMDB is enabled in the Global Settings->Deals and you have the permission to see the CMDB (Configuration Database) module. This permission can be set in Users and Groups-> Users-> specific user-> Permissions tab-> CMDB.
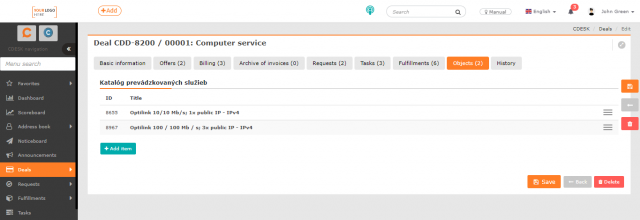
To enable selection from objects, it is necessary to define for the customer at least one group from the Facilities, Catalog of Provided Services or General Category in the CMDB. If objects are defined, they are added to the deal by clicking +Add item.
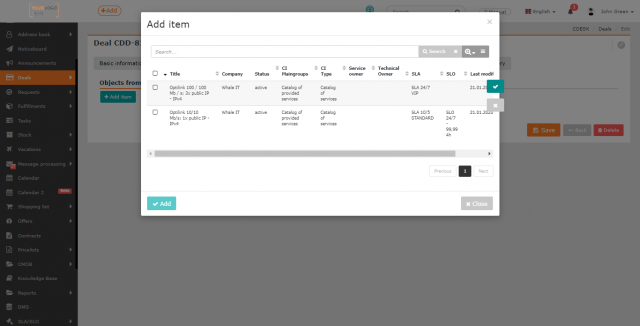
Clicking the button opens a window for selecting objects by main group and the CI type. Objects from that category are listed. Check the selected objects and click Add to assign them to the deal.
Other tabs for working with deals are displayed only after the deal has been saved. These are as follows:
Offers
Working with offers, which also applies to offers in deals, is described in detail in the article Offers.
|It is recommended to add the offers you have issued to the deal on the Offers tab. The customer can approve offers electronically. Individual offers contain several items such as work, regular fees, materials. The customer can comment on each one individually – approve, reject, or leave it without comment (i.e. unapproved).
The Offers tab is displayed if the Offers module is enabled in Global Settings ->Offers. If the tab is still not displayed, check your permission to see the Offers tab on deals. The permission can be set in Users and Groups-> Users-> specific user-> Permissions tab-> Deals-> Tab Access-> Offers. Check the permissions to access the Offers module as well. Permissions can be also set in the profile of the specific user under Permissions-> Offers tab.
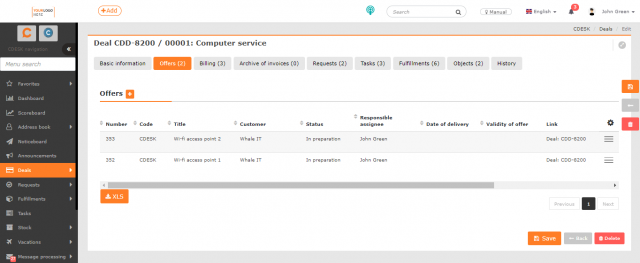
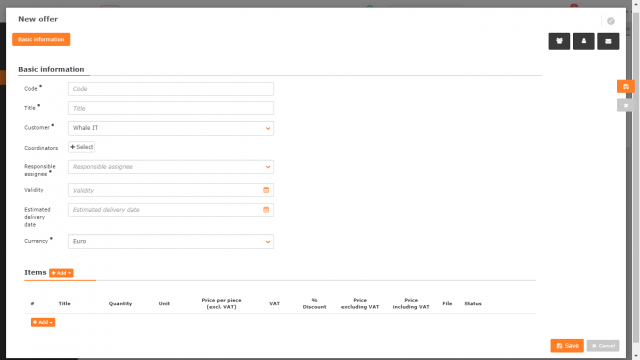
To add a new offer, click + . For more information on how to work with offers see the article Offers.
Export Offers on the Deal
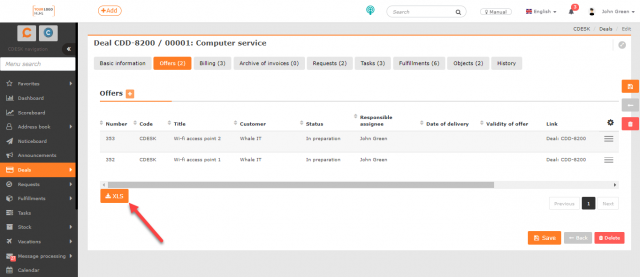
In the bottom right corner below the list of offers on the deal, there is an XLS button to export these records as an XLS file.
When clicked, a new window opens to select columns to export. If you want to export all columns, no need to select them individually. Click on < to select them all. The order of columns in this list also determines their order in the export. If you wish to have columns in the default order, click on ![]() and the columns will be sorted.
and the columns will be sorted.
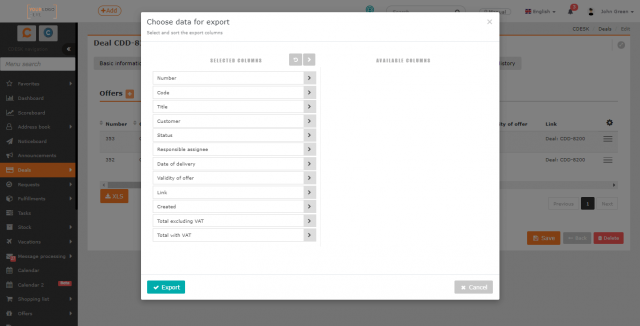
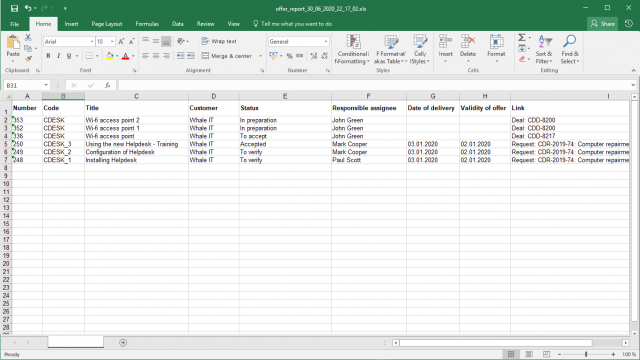
After selecting the columns, create an export using the Export button located in the bottom left corner of the window. Select Cancel to return to the list of tasks without exporting.
Billing
This section contains summary totals of items divided into billing of work and regular fees, billing of transportation and used materials that can be charged to the customer or invoiced directly from CDESK. For more information on billing see Universal Billing Using Deals and Work You Do Not Want to Bill.
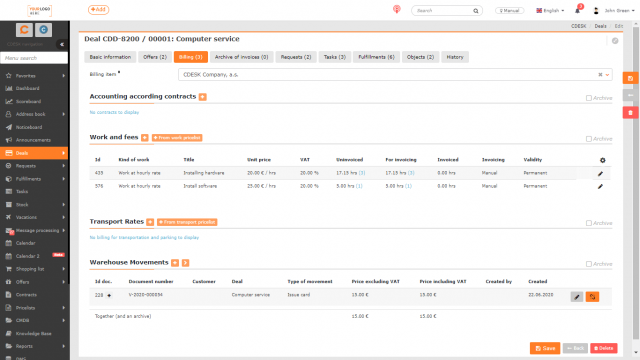
The tab is only displayed if you have the permission to see the Billing tab. Permissions can be set in Users and Groups-> Users-> specific user-> Permissions tab-> Customers-> Tab Access-> Billing.
Archaive of invoices
Here you can find a list of all invoices issued to the customer within the scope of the deal in CDESK.

The tab is only displayed if you have permission to see the Invoice Archive tab. Permissions can be set in Users and Groups-> Users-> specific user-> Permissions tab-> Deals-> Access to Tabs-> Archive of Invoices.
Requests
Requests track deal implementation. Using this feature allows recording fulfillments taking place during the deal implementation. These fulfillments are either part of the invoicing or not invoiced and used to track the deal costs. Unlike tasks, requests track communication with customers and deadlines (SLA) in more consistent way and are more flexible in further processing.
The Requests tab is only displayed if you have the Requests module enabled in Global Settings->Requests->Basic Settings together with the permissions set to work with this module. Permissions can be set in Users and Groups-> Users-> specific user-> Permissions tab-> Requests. If the tab still does not display, check the permissions to access the tab also in the profile of the specific user in Permissions tab-> Customers-> Access to Tabs-> Requests.
If you wish to cancel linking of request to deal, select from the context menu ![]() the option Detach from this deal . Use the Edit option to open the request for editing.
the option Detach from this deal . Use the Edit option to open the request for editing.
To add a new request linked to deal, click + . For more information on requests see the text Work with Requests for Operators.

You can select a request from the request catalog to the deal by using ![]() . Before selecting a request, select a customer first. By doing so, the catalogs linked to the selected customer are displayed. For more information on entering a request from catalog see the following text.
. Before selecting a request, select a customer first. By doing so, the catalogs linked to the selected customer are displayed. For more information on entering a request from catalog see the following text.
To add a request linked to the customer added on the Basic Details tab to deal, use the icon > .
Tasks
Like requests, tasks track activities concerning the deal implementation. Using tasks allows recording fulfillments made during the deal implementation. These fulfillments are either part of the invoicing, or not invoiced and used to track deal costs.
The Tasks tab is only displayed if you have the Tasks module enabled in Global Settings->Task and your permissions are set to work with this module. Permissions can be set in Users and Groups-> Users-> specific user-> Permissions tab->Tasks. If the tab still does not appear, check your permission to access the tab also in the profile of the specific user under Permissions tab-> Deals-> Access to Tabs-> Permissions tab->Tasks.
Use the context menu ![]() in the task bar to Edit or Delete tasks.
in the task bar to Edit or Delete tasks.
To add a new task, use + . For more information on working with tasks see the Tasks article.
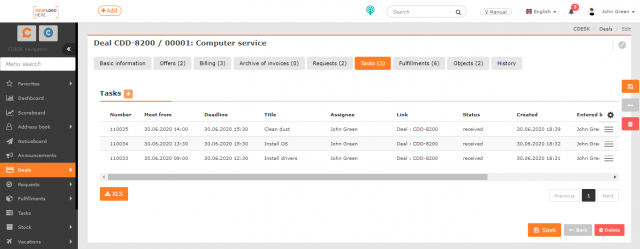
Export of deal tasks
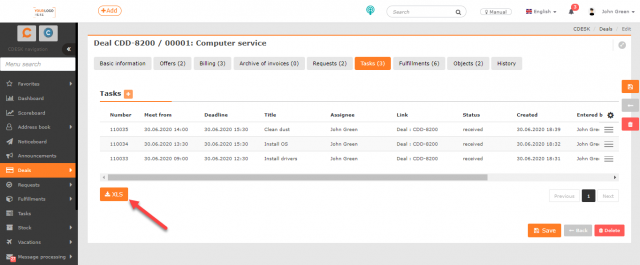
In the bottom right corner below the list of deal tasks, there is an XLS button to export these records as XLS file.
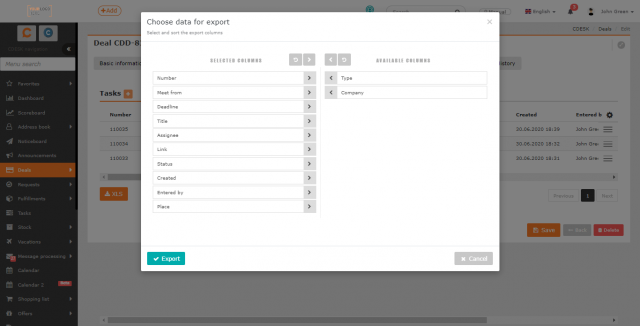
When clicked, a new window opens in order to select columns to export. If you want to export all columns, you do not need to select them individually. Click on < to select them all. The order of the columns in this list also determines their order in the export. If you wish to have the columns in the default order, click ![]() and the columns will be sorted.
and the columns will be sorted.
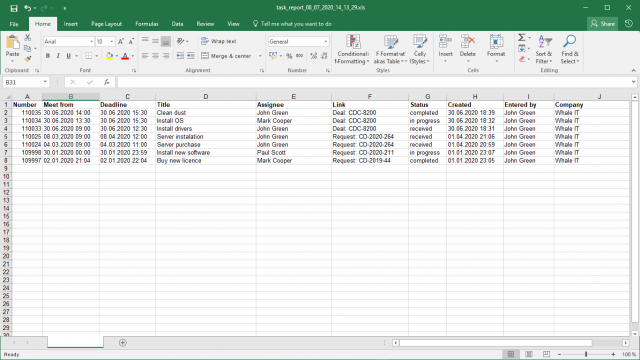
When columns selected, create an export using the Export button located in the bottom left corner of the window. Select Cancel to return to the list of tasks without exporting.
Fullfilments
As mentioned for requests and tasks, fulfillments are used to record work on deals. If your deal is simple and you do not need to plan the deal implementation using requests or tasks, but you need to track the implemented work, use fulfillments on this item. These fulfillments are either part of the invoicing or are not invoiced and are used to track deal costs.
The Fulfillments tab is only displayed if the Fulfillments module is enabled in Global Settings->Fulfillments. If the tab still does not appear, check your permission to see the Fulfillments tab on deals. The permission can be set in Users and Groups->Users->specific user->Permissions tab->Deals->Access to Tabs->Fulfillments. Check the permissions to access the Fulfillments module as well. The permissions can be set also in the profile of the specific user under Permissions tab->Fulfillments.
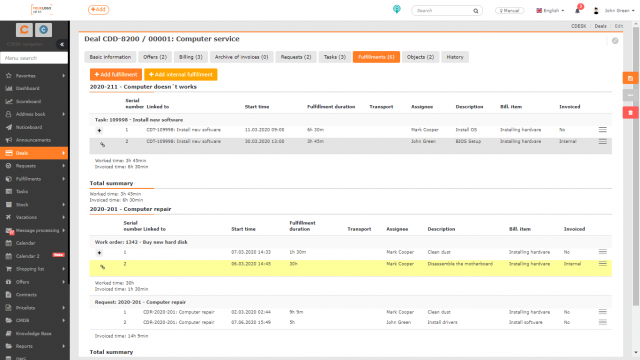
U plnení, pri ktorých nebola zvolená účtovná položka, budete upozornení ikonou ![]() – tieto plnenia nebudú účtované. Pomocou kontextového menu
– tieto plnenia nebudú účtované. Pomocou kontextového menu ![]() môžete existujúce plnenie Editovať , Vytvoriť kópiu, alebo k nemu Pridať interné plnenie pre záznam reálneho rozsahu plnenia.
môžete existujúce plnenie Editovať , Vytvoriť kópiu, alebo k nemu Pridať interné plnenie pre záznam reálneho rozsahu plnenia.
The icon ![]() will alert you in case of fulfillments without selected billing item – these fulfilments will not be billed for. By using the context menu
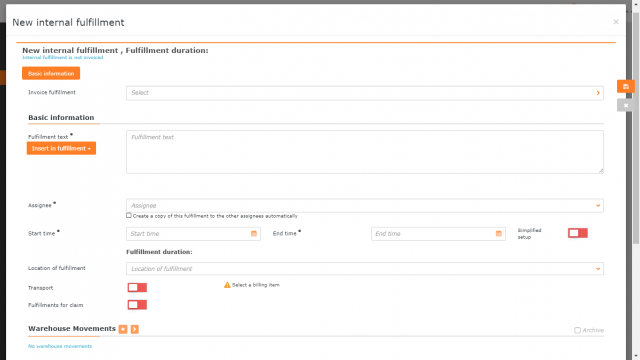
will alert you in case of fulfillments without selected billing item – these fulfilments will not be billed for. By using the context menu ![]() , you can Edit an existing fulfilment, Create a copy , or Add an internal fulfilment to it in order to record the real fulfilment extent.
, you can Edit an existing fulfilment, Create a copy , or Add an internal fulfilment to it in order to record the real fulfilment extent.
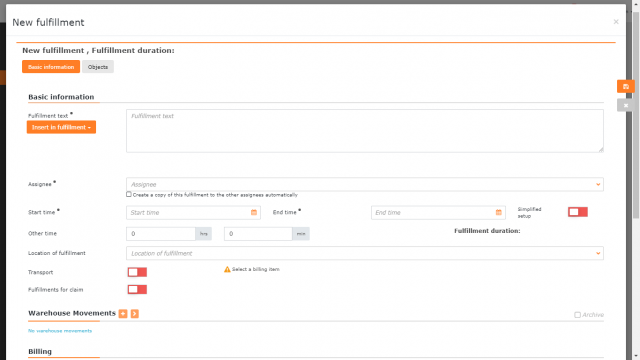
To add a new fulfillment to the deal, click the + button. By doing so, a form to enter the fulfillment opens, for more information on the form details see the Fulfillments article.
History
This section records all changes of deals – when they were made and by whom. The tab is only displayed to those with the permission to see it. Permissions can be set in Users and Groups-> Users-> specific user-> Permissions tab-> Deals-> Access to Tabs-> History.
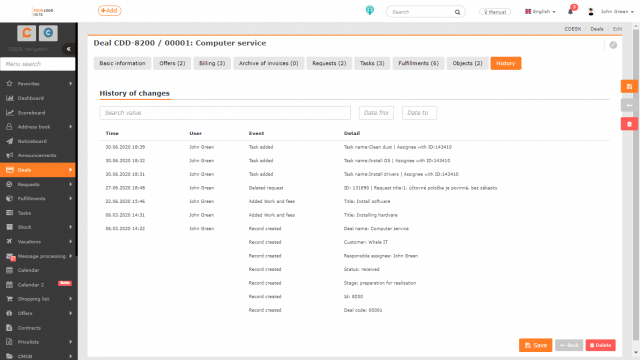
Pre zachovanie zmien vykonaných na záložkách Základné údaje, Objekty a Plán, je potrebné zákazku Uložiť, zvyšné zmeny sa v systéme CDESK ukladajú ako samostatné záznamy s väzbou na zákazku.
To save changes made within the Basic Information, Objects and Plan tabs, the deal must be Saved, the remaining changes are saved as separate records in the CDESK system with a link to the deal.
Export of deals
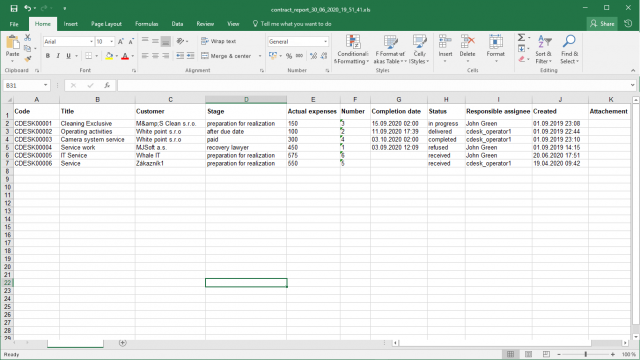
In the bottom left corner of the list of deals, there is an XLS button to export the list in XLS format.
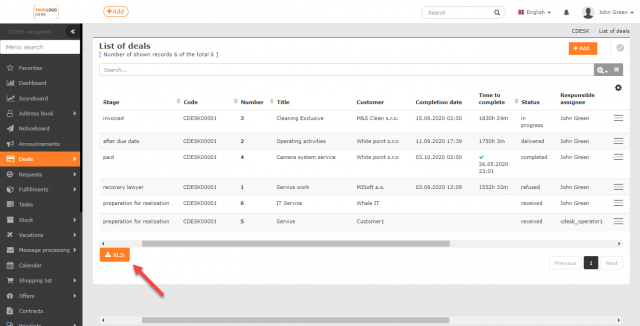
When clicked, a new window opens to select columns to export. If you want to export all columns, no need to select them individually. Click on < to select them all. The order of the columns in this list also determines their order in the export. If you wish to have the columns in the default order, click ![]() and the columns will be sorted.
and the columns will be sorted.
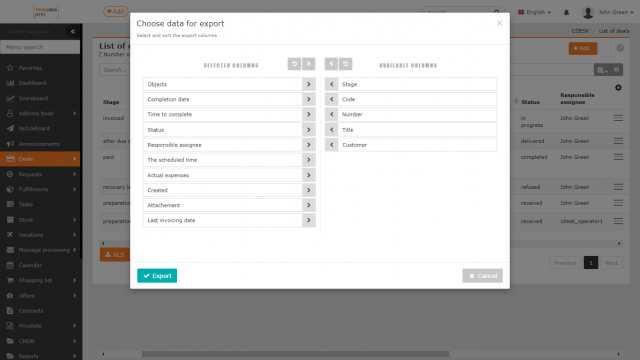
When the columns are selected, create an export using the Export button located in the bottom left corner of the window. Select Cancel to return to the list of tasks without exporting.
