Further Tips to Make the Application Easier to Use
To take advantage of the CDESK Desktop Application potential, get acquainted with the features and selected functions described in the following text.
CDESK Desktop Application Works with a Local Database
As mentioned above, the CDESK Desktop Application has a local database, which makes the software less taxing on the server. The transfer with the server can be manual or automatic. Manual mode requires pressing the “Save” button, or if you by any chance leave a record without saving it, you can use the sync center to complete the saving on the server. In the automatic mode, the application attempts to transfer the data each time you leave the record.
Information About the Status of Data Synchronization Between the Application and the Server
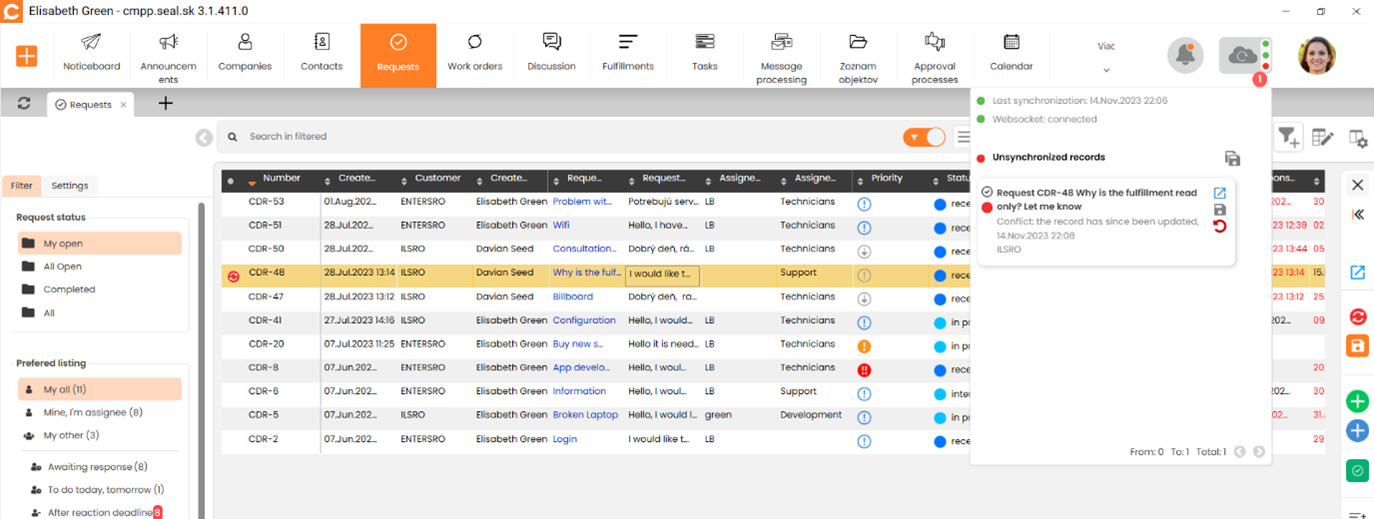
Report about synchronization status via the “Sync Cloud” and the yellow/red icons in the item row.
Automatic synchronization to the server after each change allows direct linking and saving to the server. If this option is not selected, the data will be stored in the local database. Use the cloud icon to save the entered information to the server.
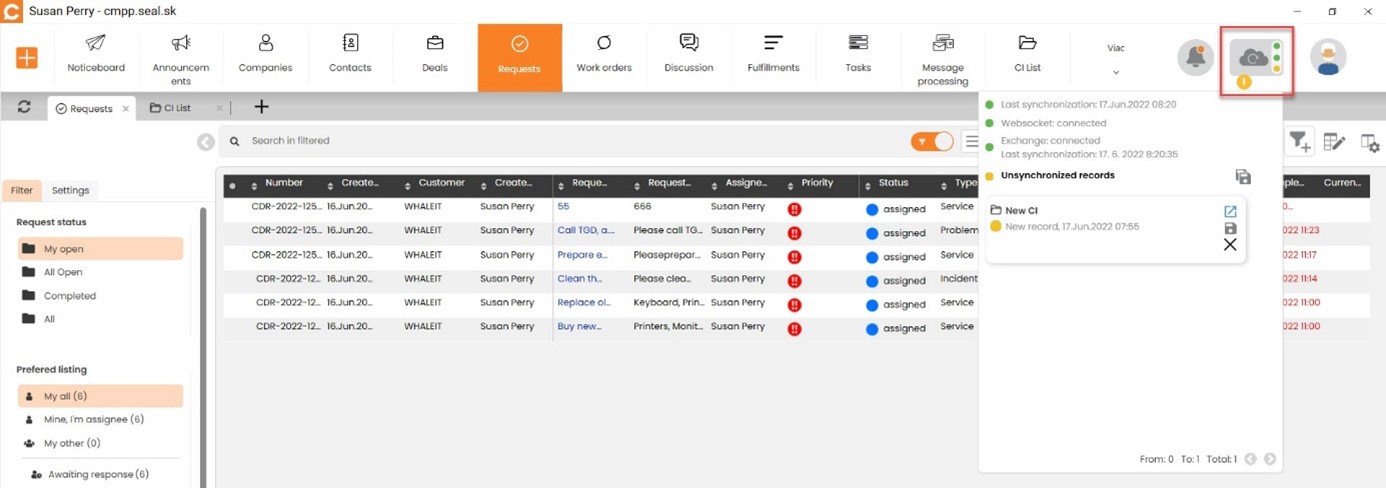
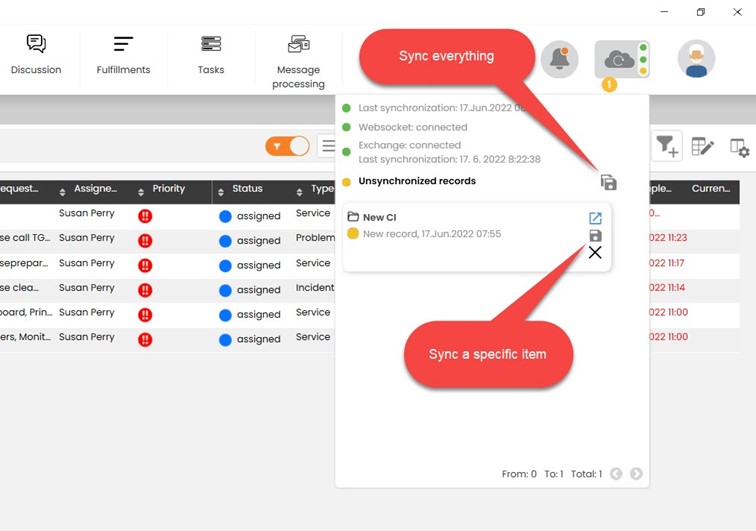
Use the disc icons in the first level to save all the necessary synchronizations. If you want to save only one synchronization, this can be done using the disc belonging to the specific synchronization.
If you change certain information on the website, it will be transferred to the CDESK Desktop Application. The opposite is currently not possible. Not all changes can be made in the Desktop application like on the web, for example if you want to delete a record.
If you edit records on the web and in the CDESK Desktop application at the same time and then save them or synchronizing, a conflict will occur, which you are informed about according to the image below.
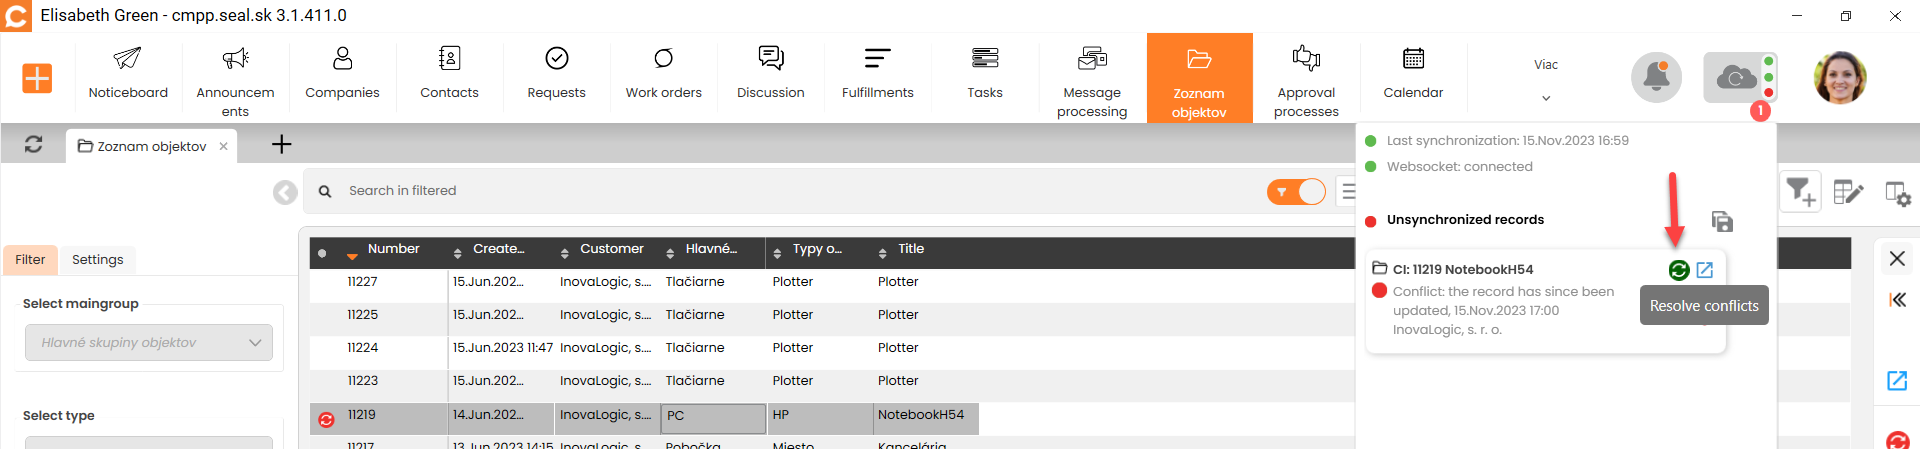
If you make changes symmetrically in the “List of objects” module, the conflict notification will offer you the option “Resolve the conflict”.
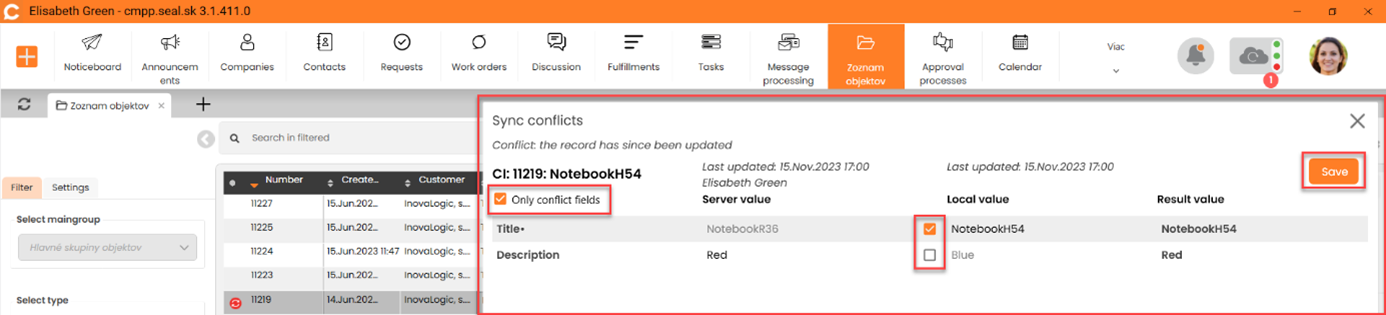
After clicking on “Resolve conflict”, a modal window will open in which you can choose the required value that you want to save. You can also choose to display all fields or only fields with a conflict.
Yellow/Red Sync Notification Icon
The colored icon informs about the current synchronization status of specific items.
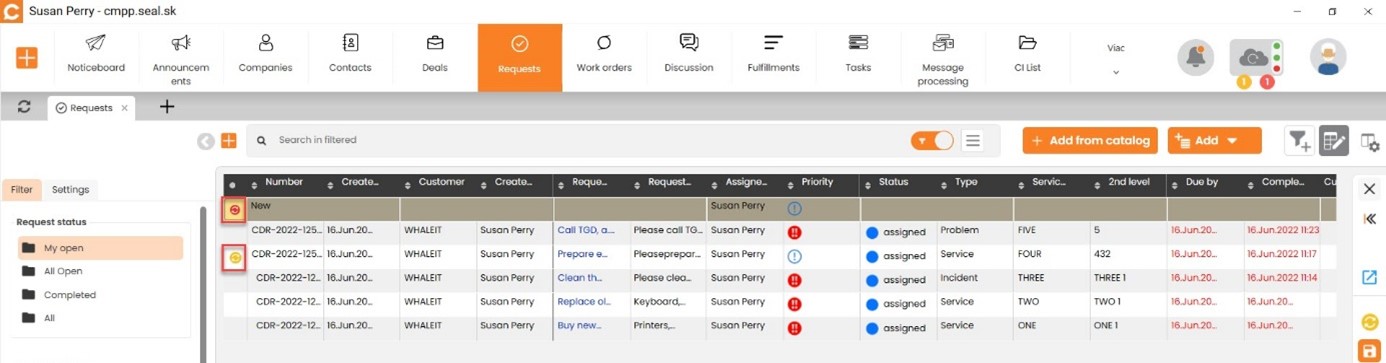
If any mandatory fields are not filled in, the sync button appears in red. It appears in yellow if the item needs to be saved.
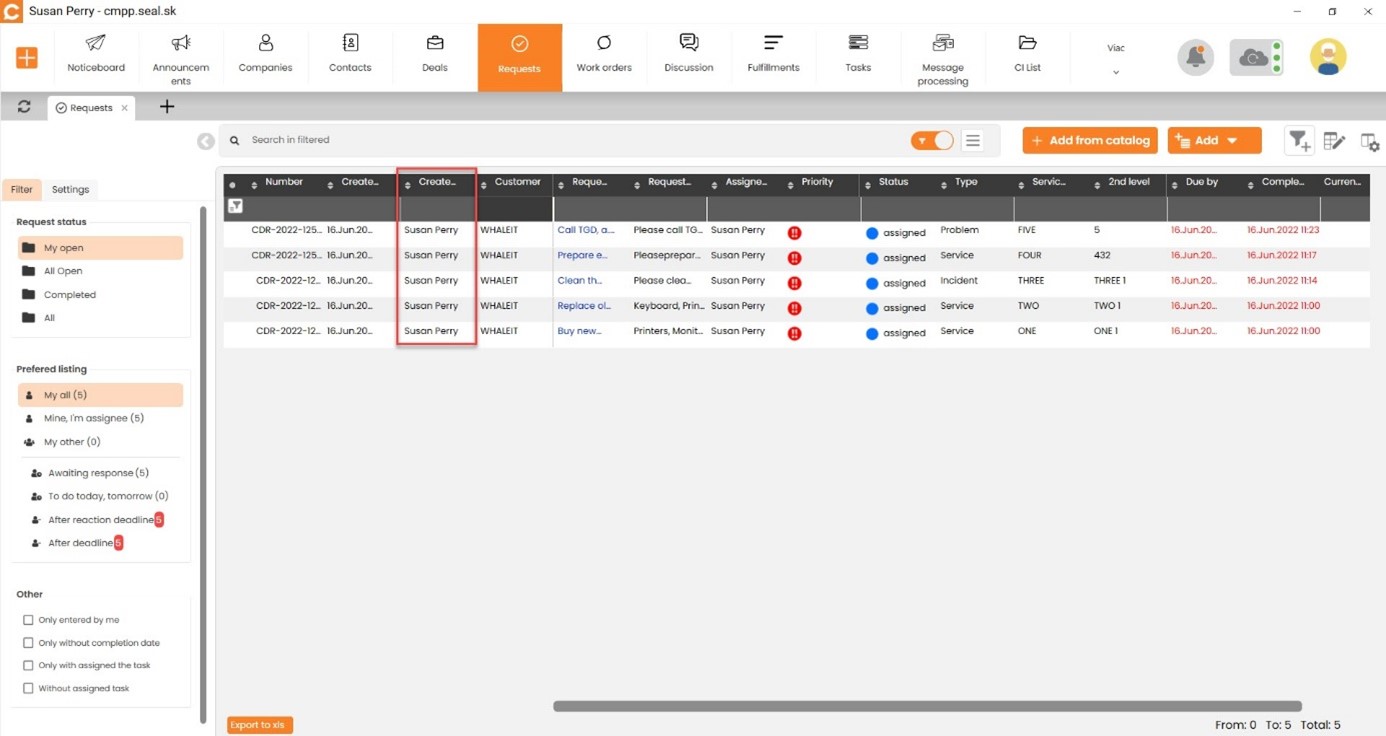
The Most Commonly Used Parameters at the Top of the Form
In the requests as the first module, the data is at the top of the record detail. Although the parameters at the top of the form seem to be read-only, they can be edited.

Overview of the Data at the Top of the Request Form:
- Company
- Assignee
- Status
- Response time
- Time to resolve from
- Completion deadline
- Priority
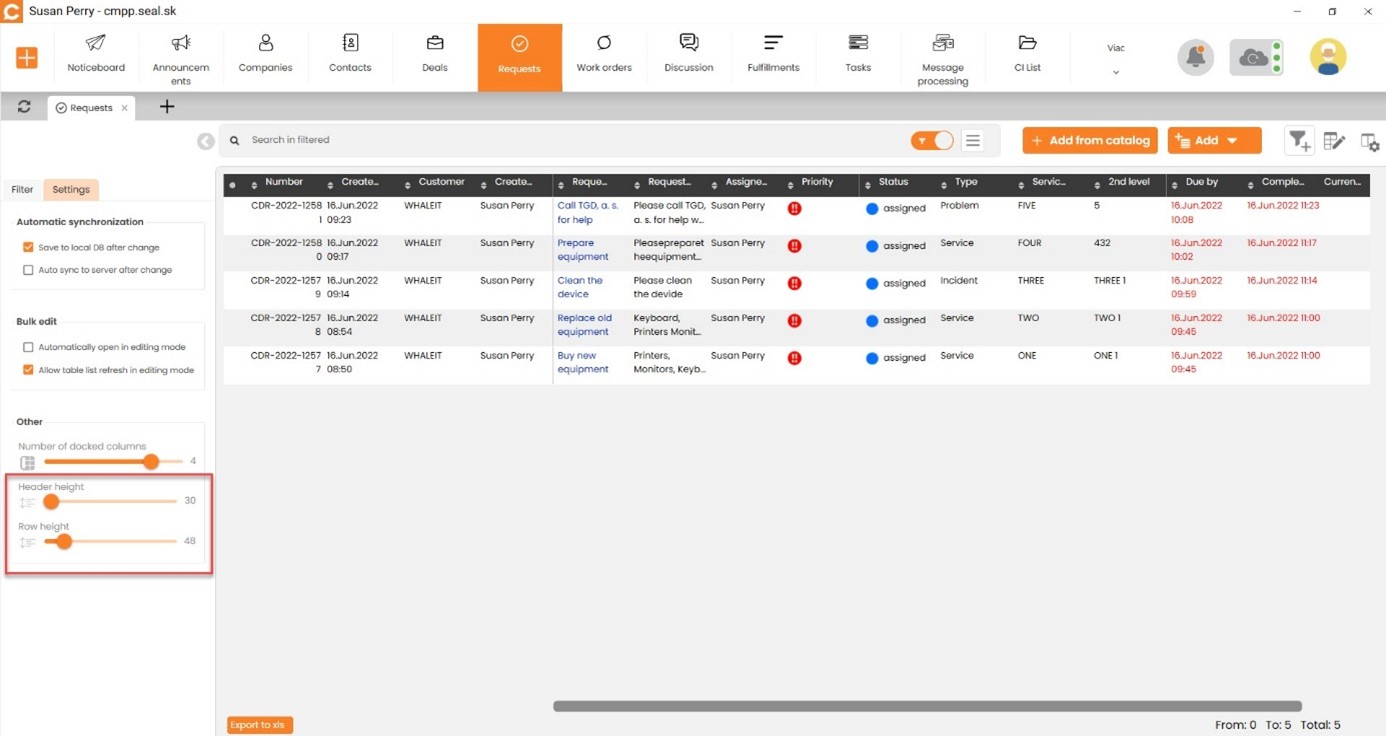
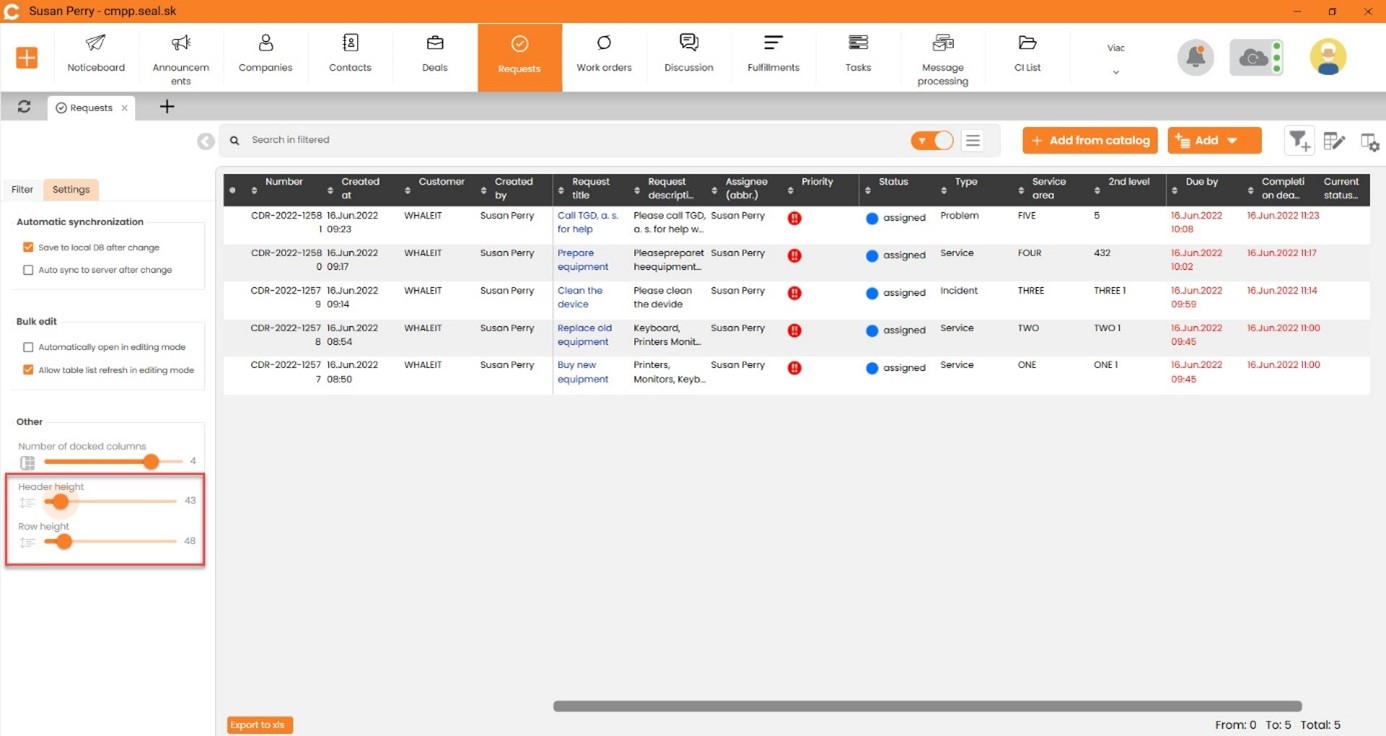
Height Settings with Column and Common Rows Names
As the option to anchor columns similar to the one in Excel has been already mentioned, in the left column in the Settings tab you can set the column name height and row height to fit more text in the cells.
Each Module Has Its Own Settings in the Left Panel
In addition to the primary settings offered in the profile, it is also possible to select settings in the specific module as well as when filtering in the left section. The Settings option is located right next to the filter.
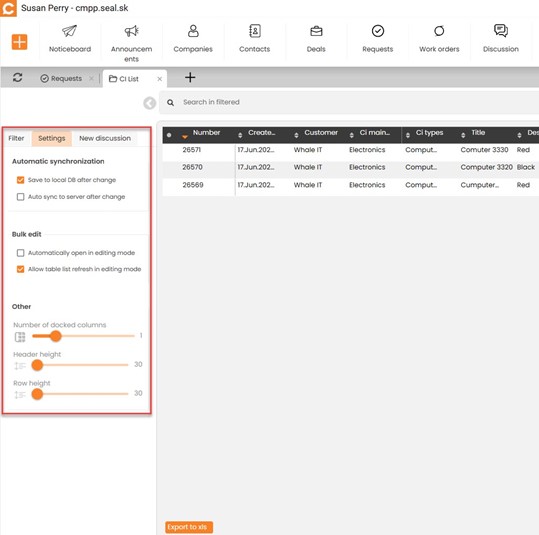
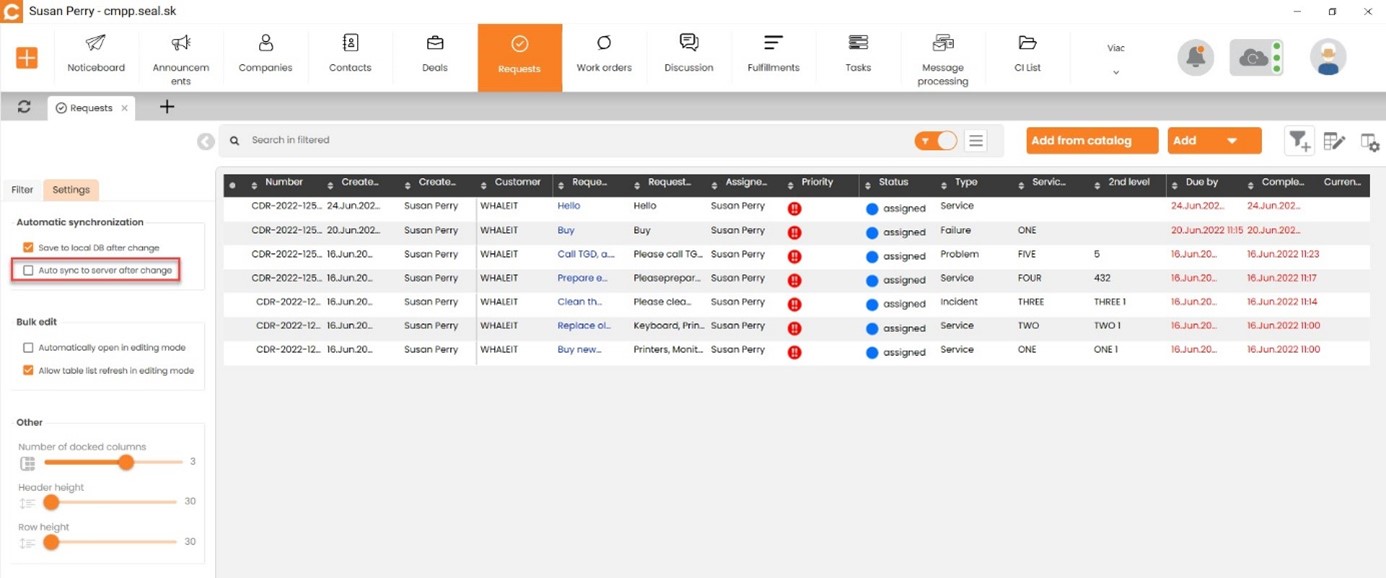
In the settings, you make the same choices as we have already mentioned in the list of configuration database objects:
- Automatic synchronization
- Save to local database after every change
- Automatically synchronize to server
- Spreadsheet editing
- Automatically open in spreadsheet editing mode
- Enable the update of the table list in edit mode
- Other
- Number of anchored columns
- Height of column title
- Row height
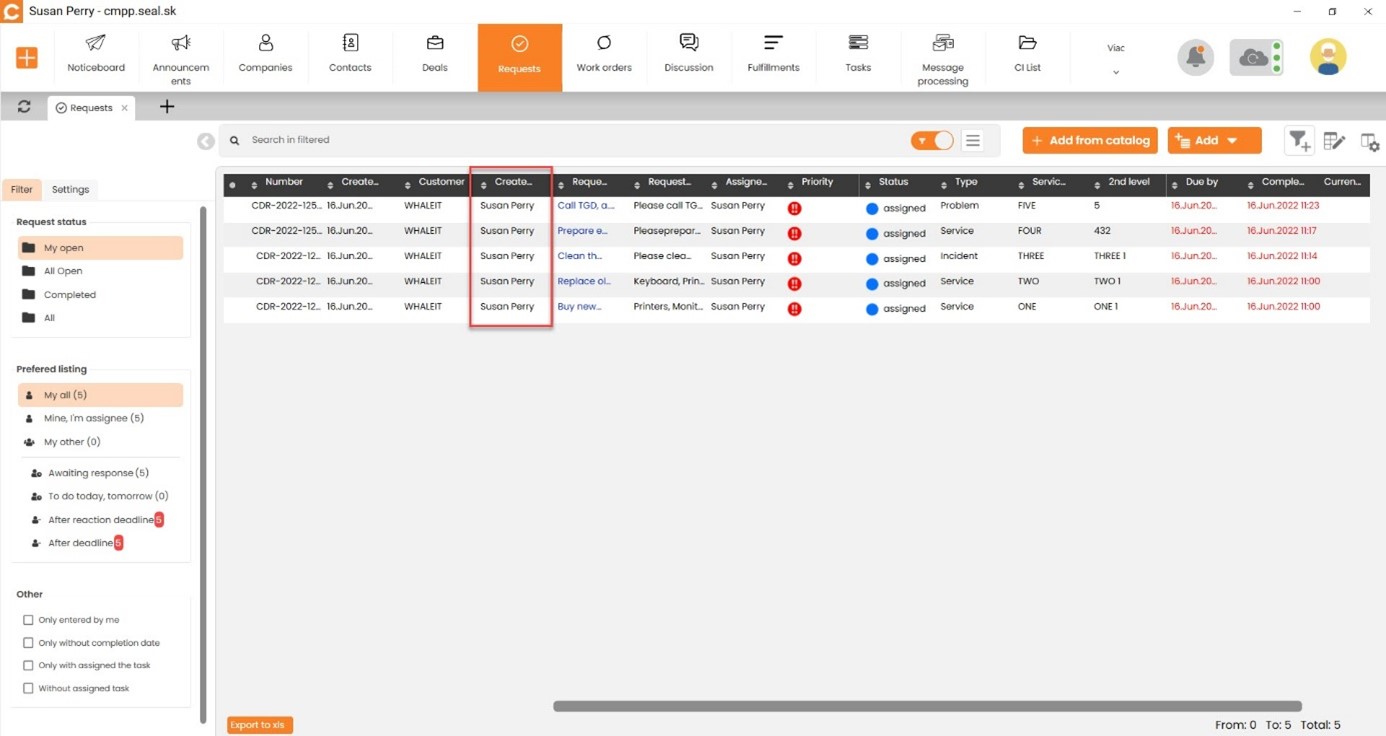
Order of Columns via Drag and Drop
You can set the order of columns not only by the first column selection and order setting next to the spreadsheet editing, but also by direct mouse contact: you simply grab any column and then move it as needed.
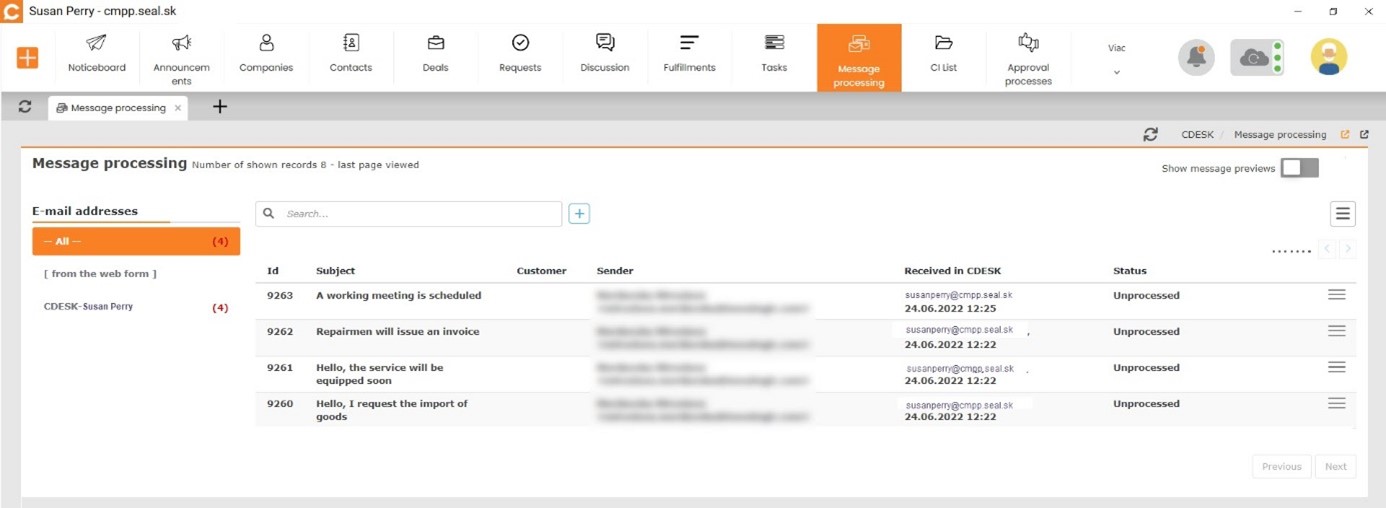
Web-Only Features Integrated in the CDESK Desktop Application
It is possible to use some features on the website without having to leave and exit your current activity in the program. The mentioned function is offered by e.g. Message Processing, opening the detail of the offer. Please note that such access to the web interface uses up a direct web access license.
Useful keyboard shortcuts
Table
F2 – Table editing is automatically activated and the marked cell can be edited immediately
CTRL + ENTER – automatically turns on spreadsheet editing and the selected cell can be edited immediately
CTRL + S – saves and synchronizes the item with the server (works in spreadsheet editing)
CTRL + SHIFT + S – the currently opened module is synchronized with the server
ALT + END – exits spreadsheet editing
HOME – moves the cursor to the cell in the first column
END – shifts to the end of columns
Requests
CTRL + T Change state
CTRL + A Change solver
CTRL + E Exit
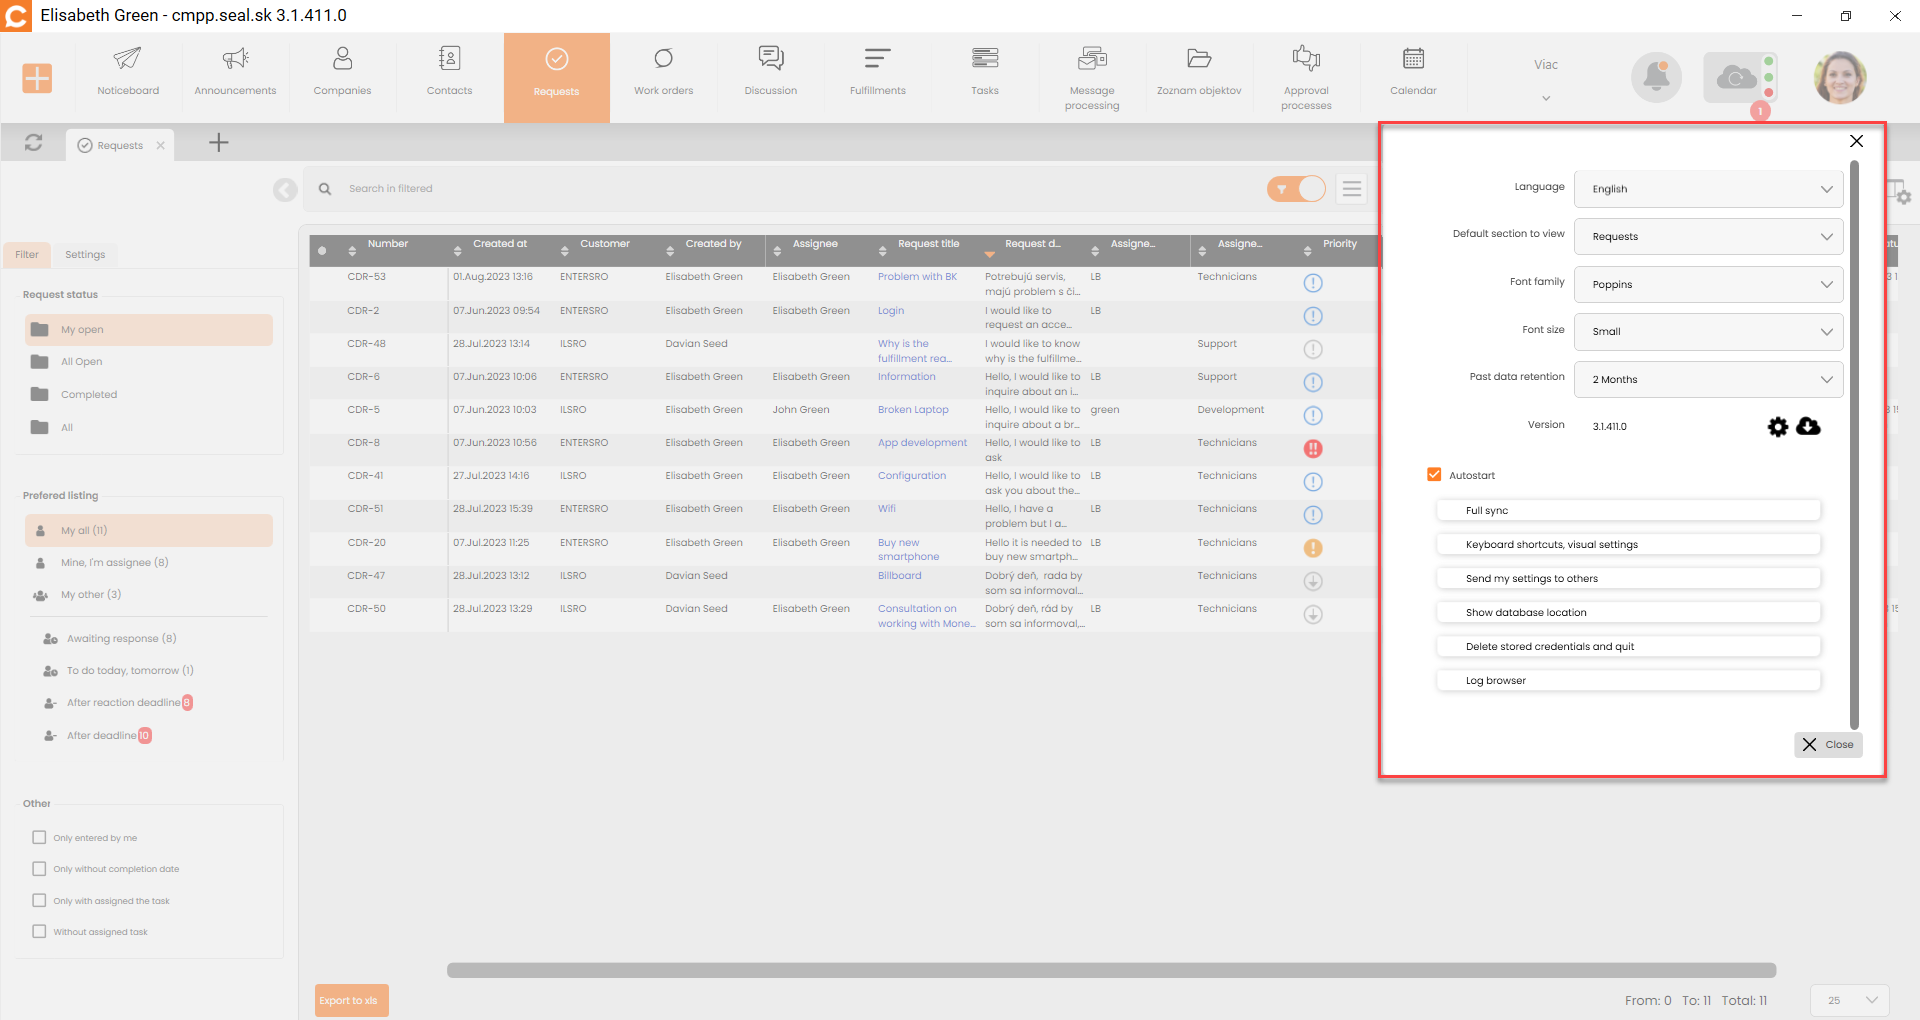
Central settings
In the upper right corner, click on Profile – “Figure” then on settings to display a window with options:
- Language – language selection
- Default section to view – when you turn on the CDESK Desktop Application, the module that is set as default in the settings is opened at the same time
- Font size – small, medium, large – the setting is valid for the whole Desktop application
- Version – displays the version number of the currently used CDESK Desktop Application – settings and updates
- Autostart – if the Autostart option is enabled, the CDESK Desktop Application will automatically start when the computer is turned on
- Full sync – used to manually start database synchronization with CDESK server
- Keyboard shortcuts, visual settings – The current setting is “Show bookmark names”. If the setting is on/off, bookmarks will be displayed as icons/icons with name.
- Show database location – when clicked, the database location path is displayed
- Delete stored credentials and quit
Log browser – window with an overview of error messages, which can be useful in case of contacting support to resolve problems faster.