REGULAR REQUESTS
List of Regular Requests
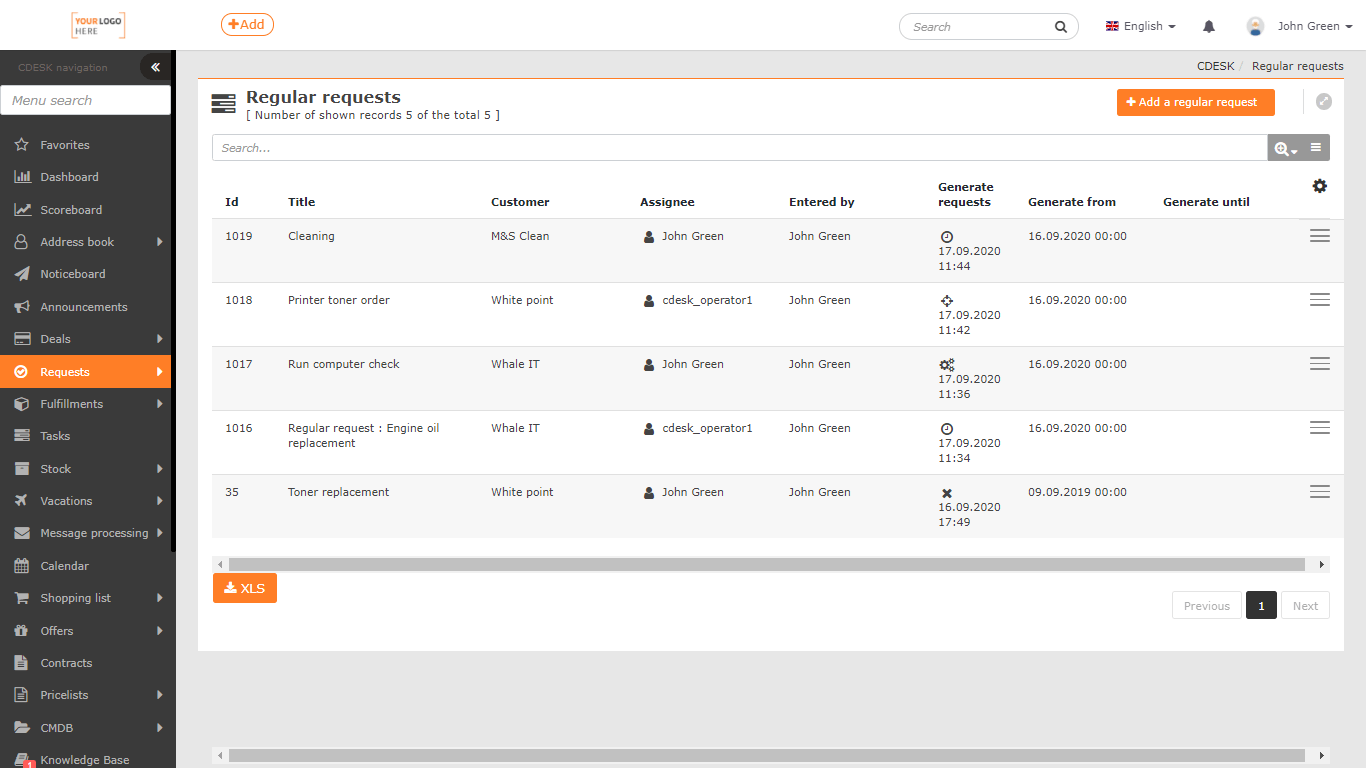
The list of regular requests can be found in Requests->Regular Requests if the Requests module is enabled in Global Settings->Requests->Basic Settings.
If the module does not appear in the menu, check the permissions to access it. Permissions can be set in Users and Groups->Users-> choose a user->Permissions tab->Requests->Regular Requests. You also need to have access to the Requests module itself. Permissions to access the Requests module can be set in Users and Groups->Users->choose a user->Permissions tab->Requests.
In the list of regular requests, you can search, create a new regular request and also export the list of existing ones.
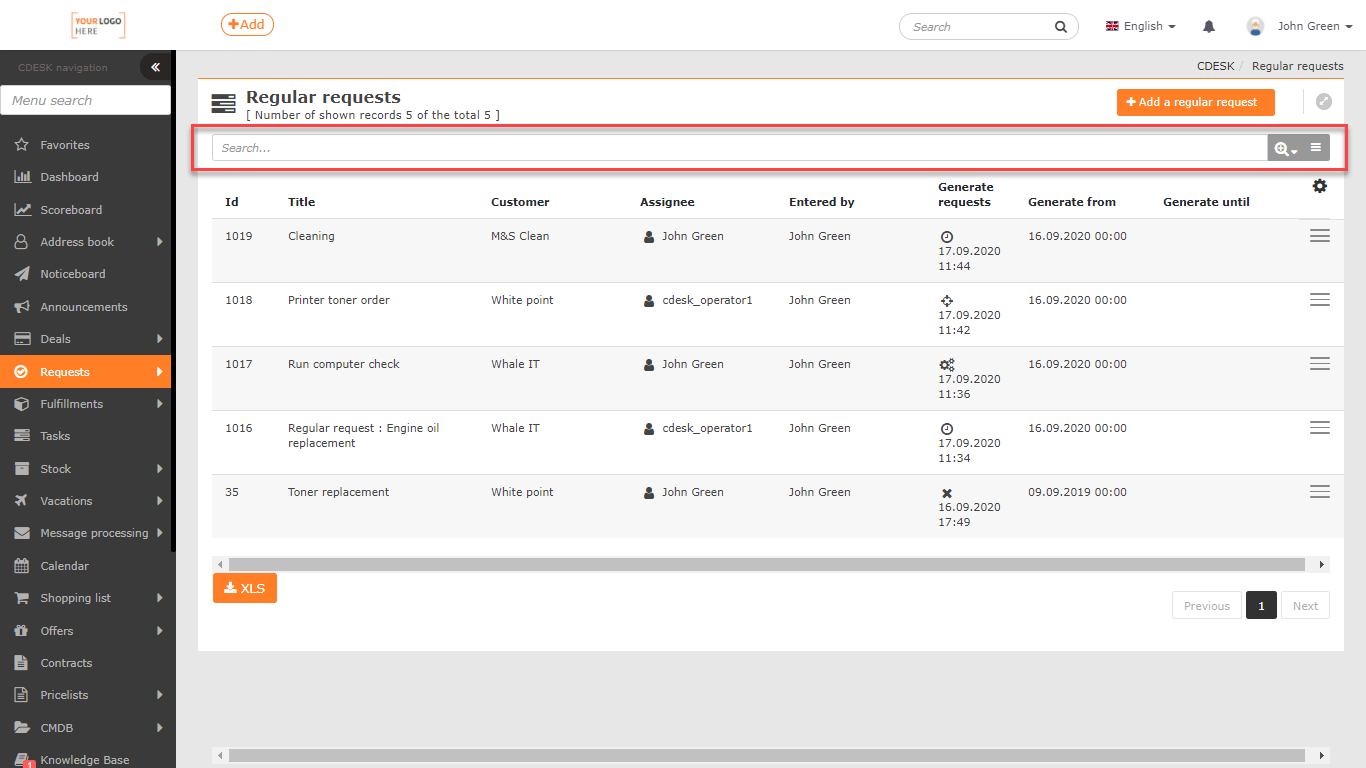
Search and Filter in the List of Regular Requests
At the top of the list of rules, there is a bar for full-text search. The list of rules can be searched by the following conditions:
- ID
- Title
- Customer
- Assignee
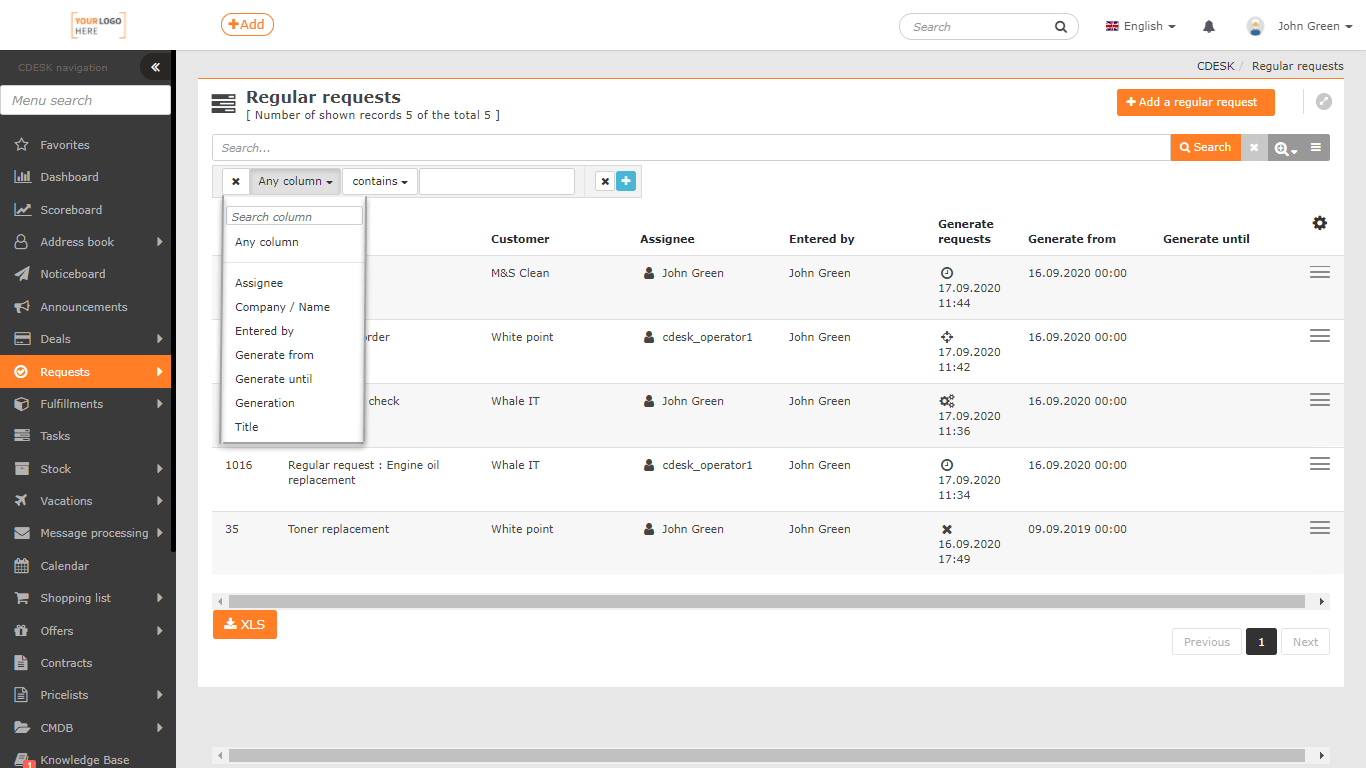
In the advanced filter, you can filter by the following conditions:
- Any column
- Generation
- Generated until
- Generated from
- Title
- Assignee
- Company/Name
- Entered by
Working with full-text search as well as saving and sending filters is described in the text Search and Advanced Filter.
New Regular Request
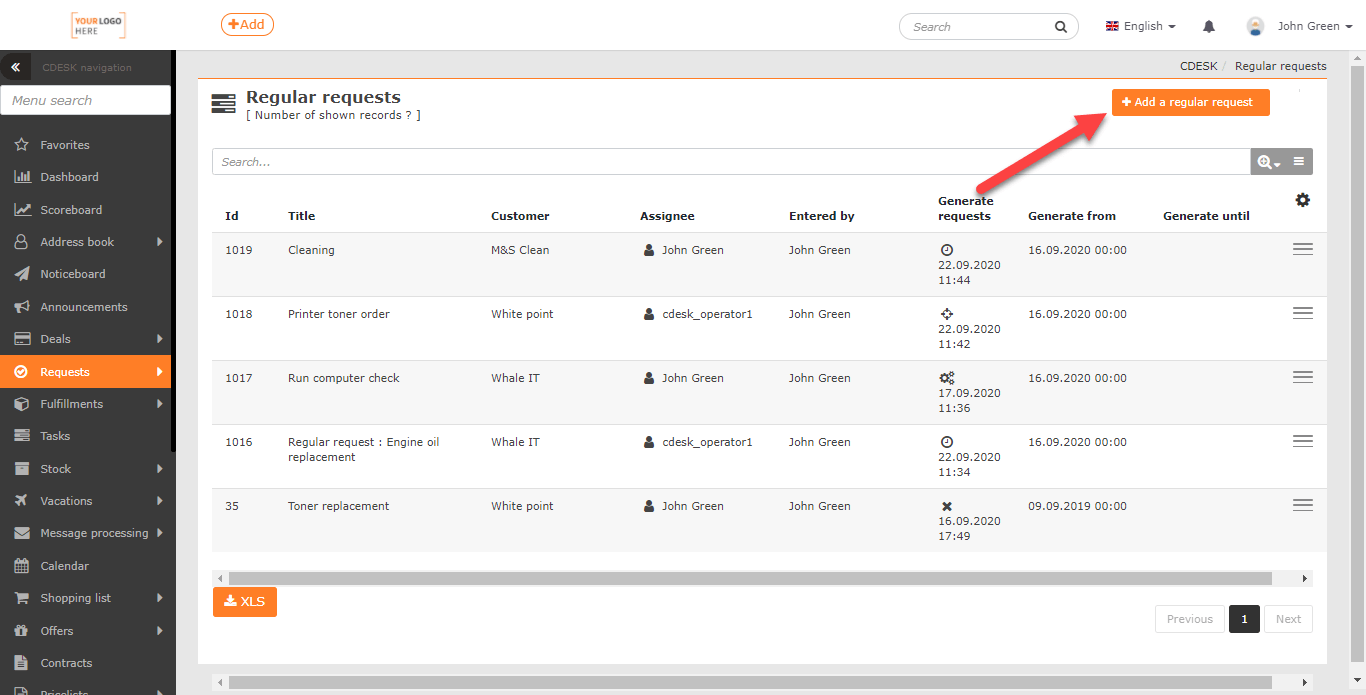
To create a new regular request from which specific solution requests will be generated, use the +Add Regular Request button at the top right of the window. When clicked, the form for entering the request will open. The items below, highlighted in blue, can be enabled and used optionally. Mandatory items are marked with the symbol •.
Basic Data
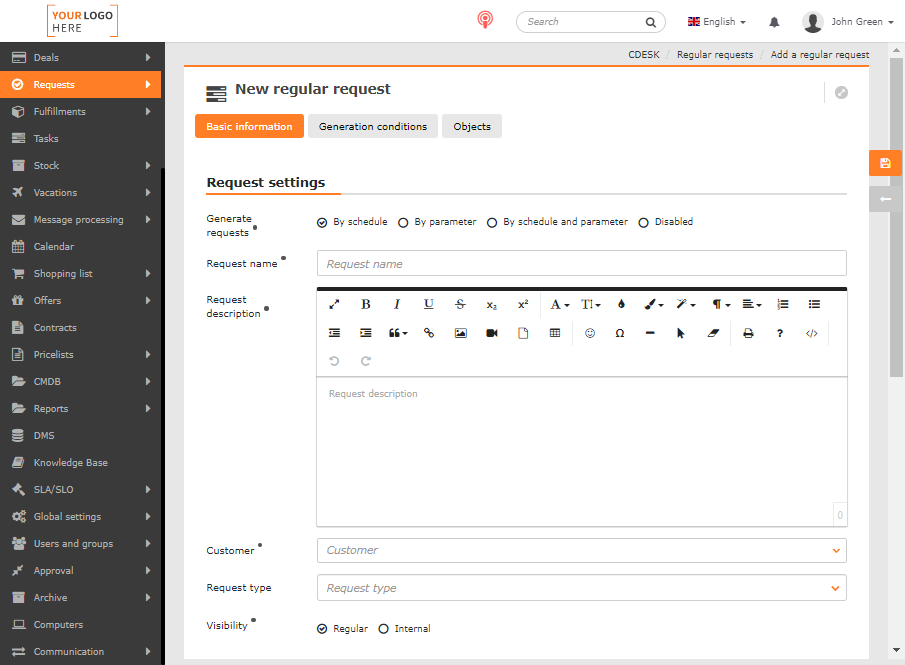
Generation of Requests
- By schedule – On the Conditions for Generation tab, the fields for setting the request generation schedule are made available.
- By parameter – On the Conditions for Generation tab, the fields for setting the generation of requests according to the parameters of the selected object are made available.
- By schedule and the parameter – On the Conditions for Generation tab, it makes available the fields for setting the schedule for both generating requests and the fields for setting the generation of requests according to the parameters of the selected object.
- Disabled – When you select this option on the Generation Conditions tab, only the fields where you specify the start and end time of the request generation will be displayed
Request Name • – The request is generated and displayed under this name in the list of requests, and it also serves as the name of the created rule in the list of regular requests.
Request Description • – Text field for specifying the problem/subject of the request, with the possibility of text formatting.
Customer • – Select the customer to which the regularly generated request will be associated.
Request Type – Offers a selection from those request types that are defined and enabled in Global Settings->Requests->Types and Areas of Service, and also have the sign in the Regular Request column.
Visibility
- Regular – The request is also seen by the assigned customer and notifications are sent to them.
- Internal – The customer does not see this request and is notified of it.
Area of Service/2nd level – Selection of the service area defined in Global Settings->Requests->Types and Areas of Service, where it can also be enabled.
Branch – If there is a defined branch in the CMDB (in the Configuration Database) for the customer, it will be offered for selection. The field can be enabled in Global Settings->Requests->Basic Settings.
Location – If there is a defined location in the CMDB for the customer, it will be offered for selection. The selection of location will only become available after the branch has been selected. The field can be enabled in Global Settings->Requests->Basic Settings.
Priority • – Informs the assignee of the importance of the regular request. For requests generated from Regular Requests, SLAs are not applied and response times as well as fulfillment times are specified explicitly in the Number of Days to Respond and Number of Days to Resolve fields.
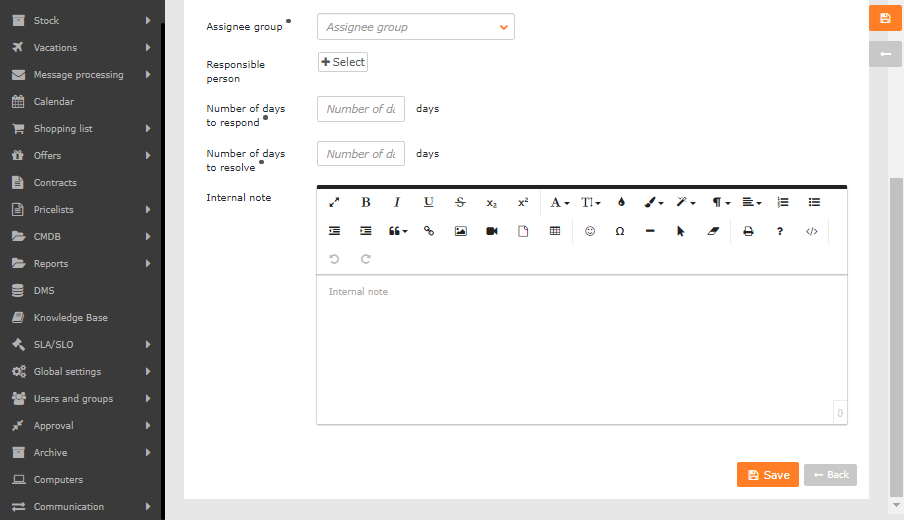
Assignee • – Selection of an assignee or a group of assignees for the request.
Change After Missed Response to – If the chosen assignee or any of the assignees in the assignee group misses the deadline for responding to the request, the request will be assigned to another assignee or group. If the request is not to be assigned to another assignee after the response deadline is missed, leave blank. This field can be enabled in Global Settings->Requests->Basic Settings .
Assistant Assignees – Additional assignees or groups of assignees can be added to the assignee, they have access to edit the request and are also notified of changes. The Assistant Assignees field can be enabled in Global Settings->Requests->Basic Settings.
Responsible Person – User informed of changes in the request as well as of overdue deadlines, although they are not in charge of resolving the request. The Responsible Person field can be enabled in Global Settings->Requests->Basic Settings.
Number of Days to Respond • – Specify how many days assignee has at their disposal to respond to the request.
Number of Days to Resolve • – Specify in how many days the request should be resolved.
Internal Note – Field for assignees of the request, with text formatting options. Unless otherwise set in the permissions, this field is not visible to customer accounts. The Internal Note field can be enabled in Global Settings->Requests->Basic Settings .
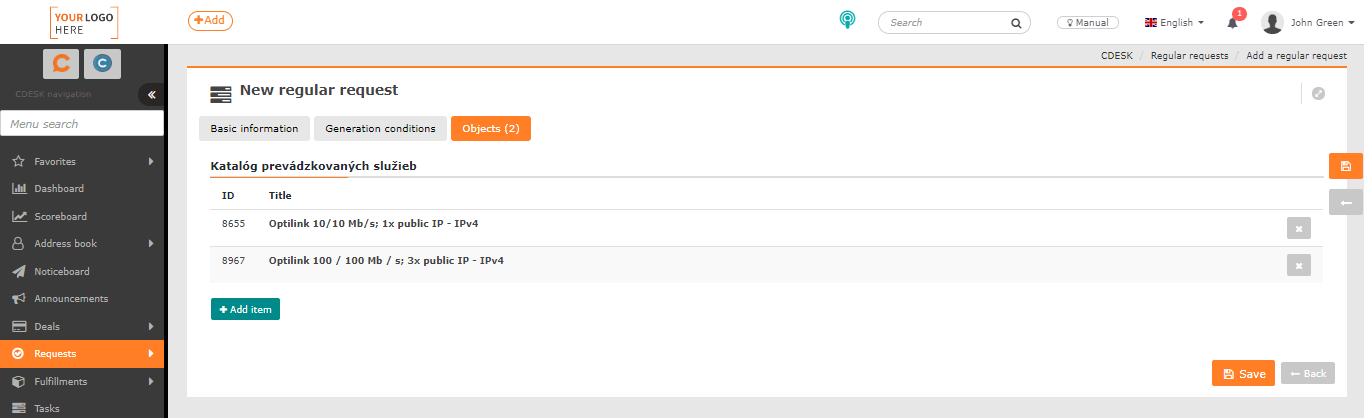
Objects (from CMDB)
The tab is displayed if the Selection of Objects from CMDB option is enabled in Global Settings->Requests->Basic Settings. These are objects located in the CMDB – i.e. in the Configuration Database. In order to be able to select from the objects, it is first necessary to define at least one group from Devices, Catalog of Provided Services or General Category in the CMDB for the selected customer.
If the customer has defined objects*, they are added to the request by clicking + Add item. This opens a window for selecting objects by main group and CI Type. The objects that are in that category are listed. Check the selected objects and click Add, to add them to the request.
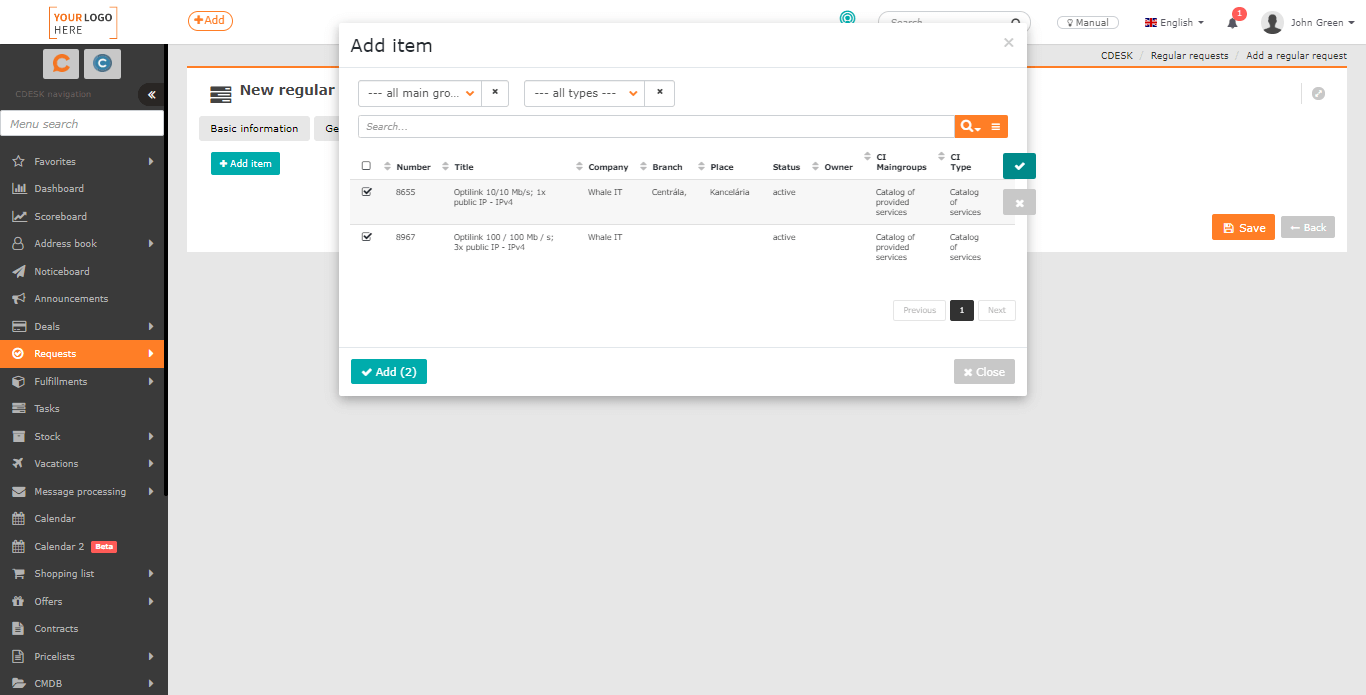
*) If there are defined objects for the customer but they are not shown in the selection, check if the objects are assigned to the same branch/location as specified in the request.
Objects can be removed from the request by clicking ×.
Requests (List of Generated Requests)
The tab becomes available when the regular request has been saved. It contains a list of requests generated so far.

Conditions for Generating Regular Requests
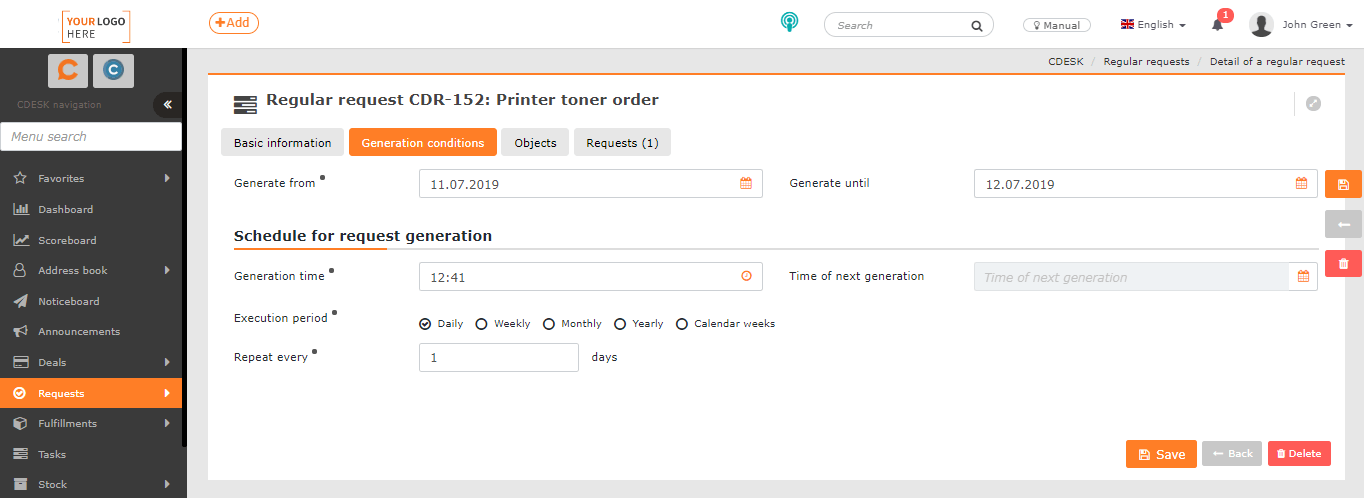
Generated from • – The date from which the regular request will be generated.
Generated until – The date until which the regular request is supposed to be generated. If you leave the field blank, the regular request will be generated at the specified intervals until request generation is disabled.
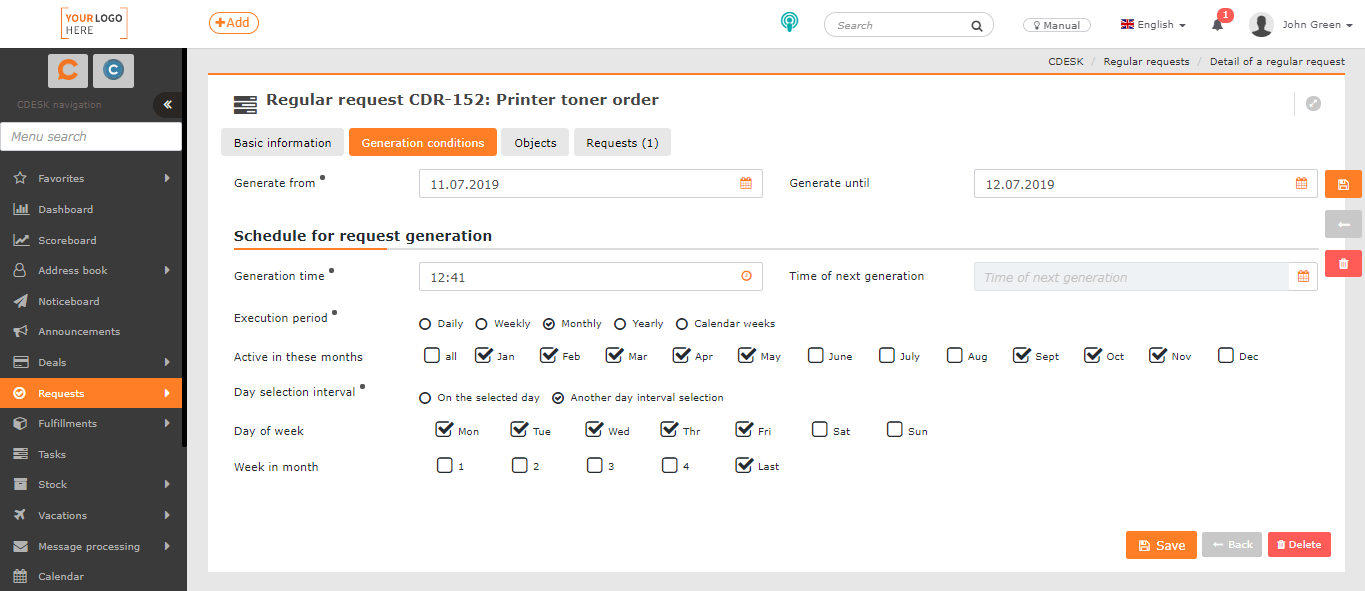
Generation by Schedule
Generation time • – The time at which the request should be generated.
Time of Next Generation – After selecting the repeat period and saving, the date of the next generated request is displayed.
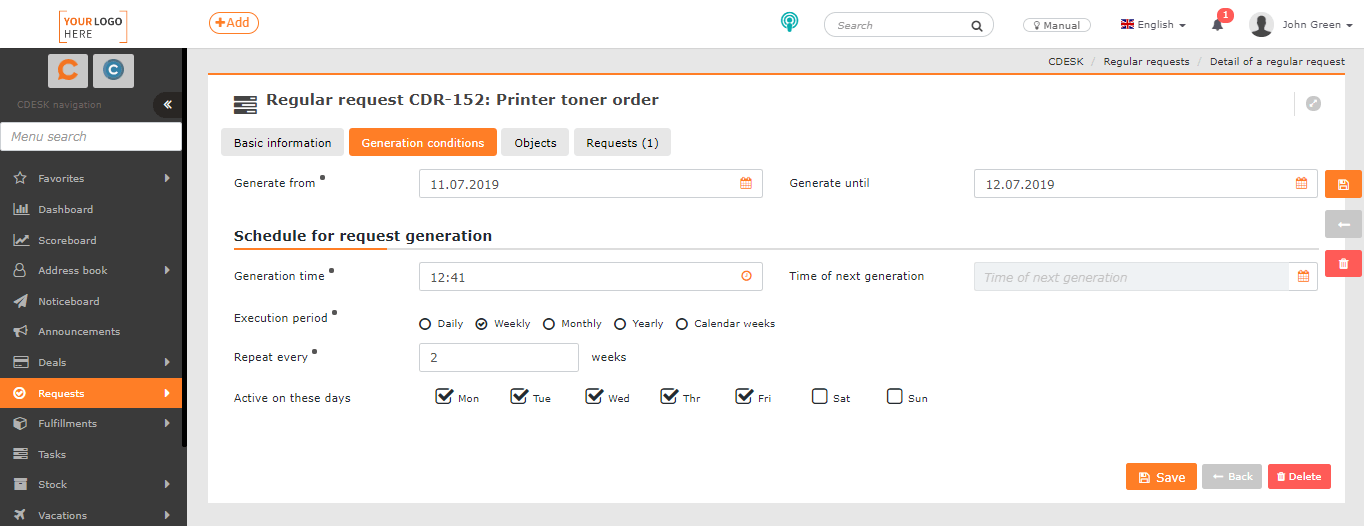
Execution Period • – The interval at which the periodic request should be generated:
- Daily – Specify the interval in days.
- Weekly – Specify the interval in weeks and select the day or multiple days of the week to generate the request. If you do not select a day, the next request generation date will be calculated according to the date of Generated From.
- Monthly – Select in which months the request should be generated. Other options include the possibility to select a specific day of the month or a specific day in the selected week of the month.
- Yearly – Indicate the interval in years. The date of generation of the following request is calculated by the date of Generated from.
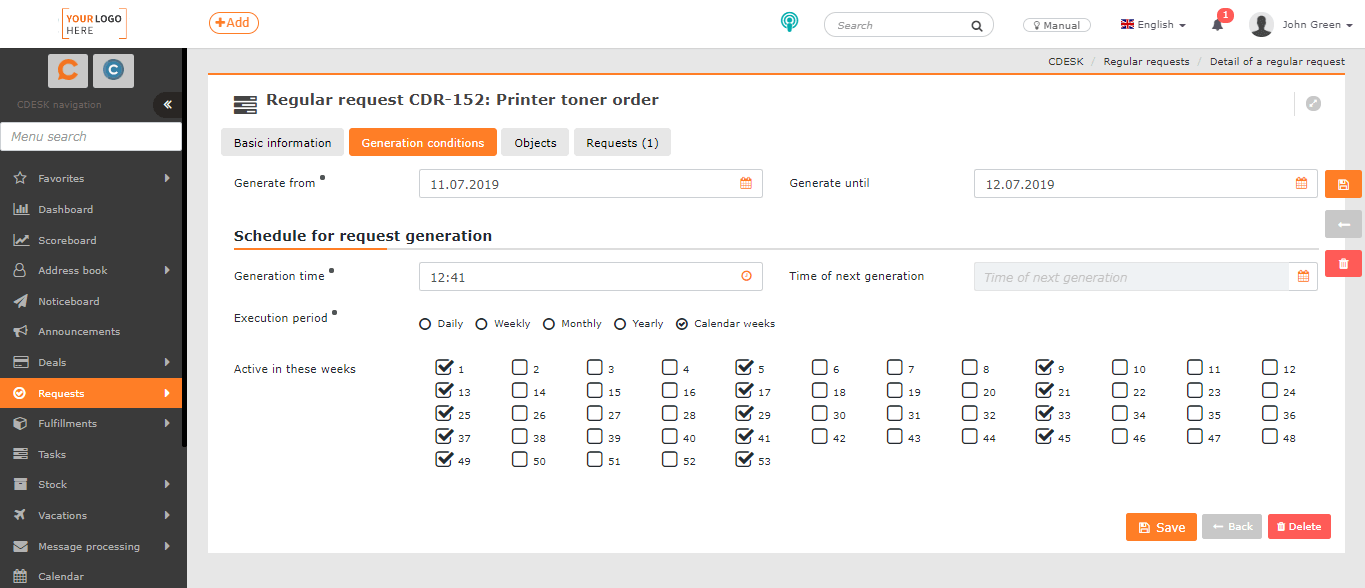
- Calendar Weeks – Regular request will be generated on the first day of the selected calendar weeks.
Repeat Every• – Specifies the period after which the request is supposed to start being generated again. The field is available when setting the repeat period: daily, weekly and yearly. The time unit of this field depends on the selected repetition period. For example, if you set the repetition period to daily, the number entered in the Repeat every field will be in days.
Active on These Days – The field is accessible if the repetition period is set to be weekly. Allows you to select the days of the week when the request generation will be active.
Active in These Months – The field is accessible if the repetition period is set to monthly. Allows you to select the months of the year when the request generation will be active.
Day Selection Interval •
- On the Selected Day – Enables the field for selecting days in months.
- Other Day Interval Selection – Enables the field for selecting the day of the week and the week of the month.
Days in the Month – Allows you to select the day of the month by date. The field is accessible if the monthly repeat period of request generation is set and the Day Selection Interval has been set as On the Selected Day.

Day of Week – Allows you to select a specific day of the month. The field is accessible if the monthly period of repetition of the request generation is set and the Day Selection Interval has been set as Other Day Interval Selection.
Week in Month – Allows you to select a specific week of the month. The field is accessible if the monthly period of repetition of the request generation is set and the Day Selection Interval has been set as Other Day Interval Selection.
Active in these weeks – The field is accessible if the repetition period is set to calendar weeks. Allows you to select the weeks in the calendar year when request generation will be active.
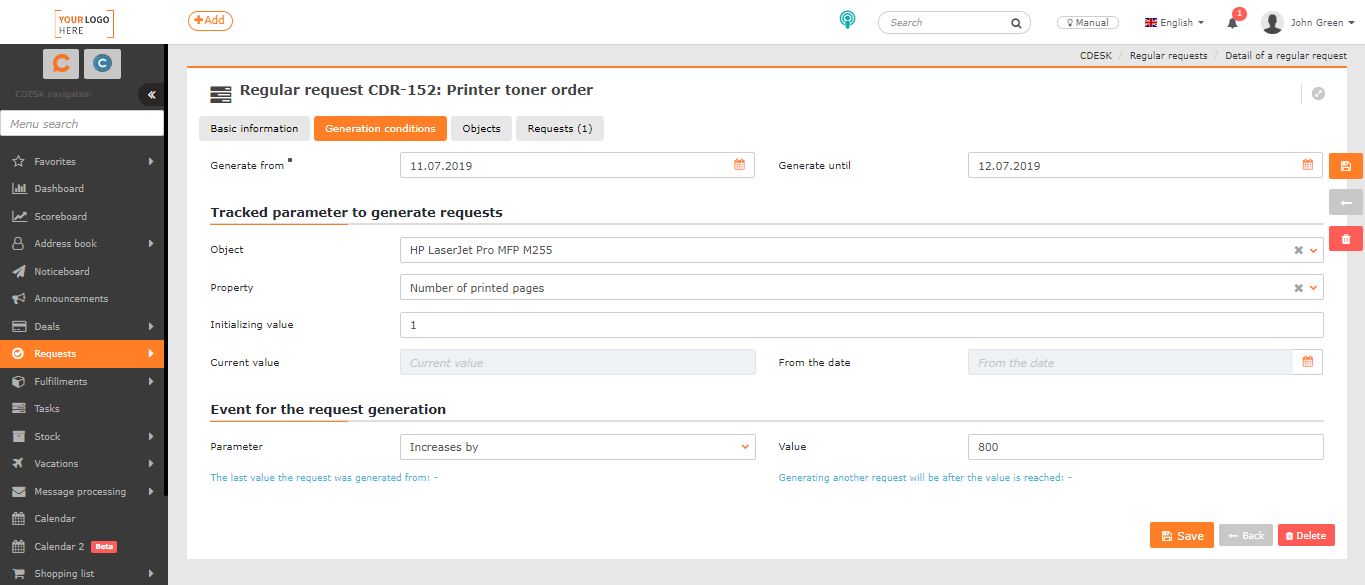
Generation by Parameter
Object – Field for selecting a configuration object that is accessible to the customer filled in on the request. The selection of properties on which the generation of the request will depend are dependent on the selected object.
Property – Selection of properties accessible for the selected object.
Initializing Value – Enter the value from which the countdown will start.
Current Value – Shows the value that is currently in the CDESK for the property.
From Date – Date to which the current value shown is associated.
Event for the Request Generation
Parameter – You can select one of the following mathematical operations:
- Increases by value
- Increases above a multiple of the value
- Decreases by value
- Decreases below a multiple of the value
Value – You can enter a number to be used in the selected mathematical operation.
On the left side of the form, you can see the last value from which the request was generated. On the right side, you see the calculated value at which it will be generated again.
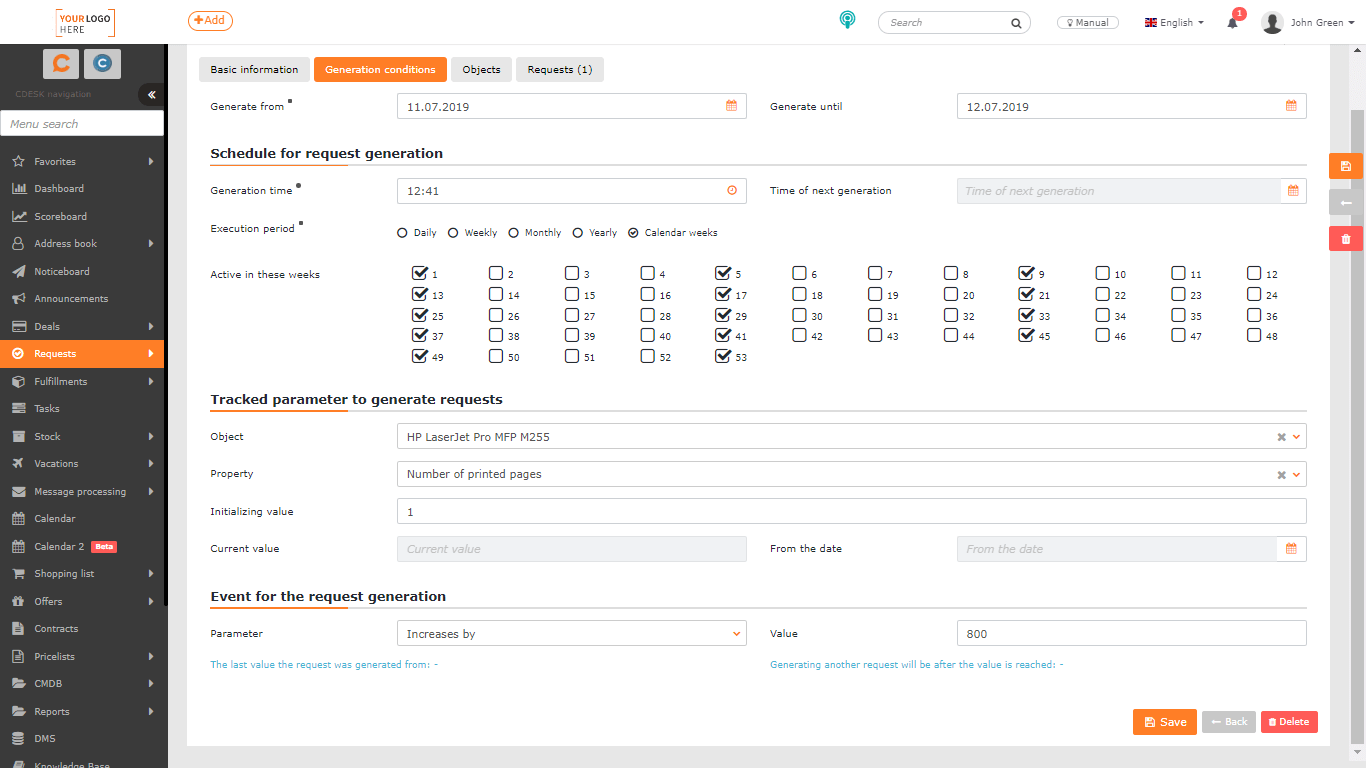
Generation by Schedule and Parameter
This is a combination of generating requests by the criteria described above. If request generation by schedule and parameter is set, the tab will make available the fields that are used when setting up both schedule-based and parameter-based request generation. The meaning of these fields is described above.
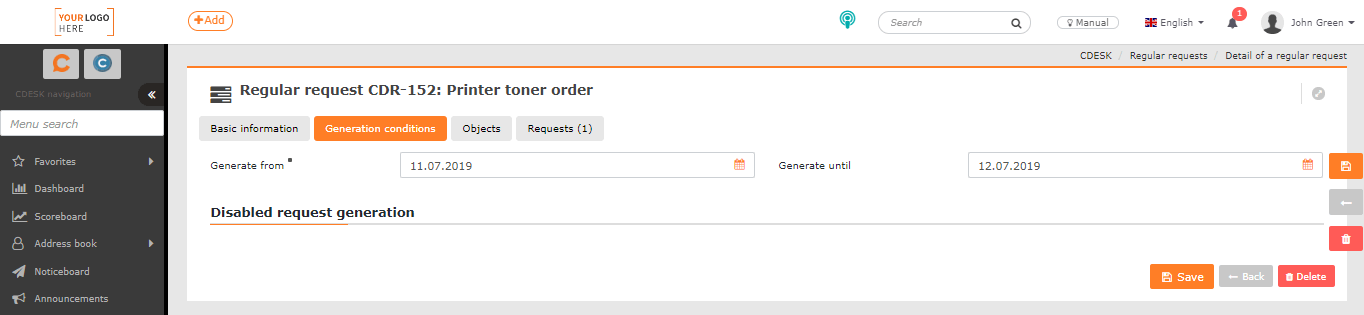
Disabled Request Generation
If request generation is disabled, only the fields for setting the time interval of the request generation will be generated are available on the Conditions for Generation tab.
Click Save to create a rule for making regular requests. The generated requests are available in Requests->List of Requests and will be marked as Regular Requests.
Stop Generating New Requests
New regular requests will stop being generated:
- automatically by reaching the deadline of Generated until. The deadline can be changed, if necessary, by editing a rule in the list of regular requests.
- by switching to the state Disabled in the editing of regular request in the first tab Basic Data, item Request Generation•. If you decide to continue generating requests at some point in the future, you need to set the criteria by which the request should be generated.
- by deleting a regular request – choose a rule from the list of regular requests and click the Delete button at the bottom of the page. The button is only accessible to users with permission to delete regular requests, see Permissions and Access->Users. Deleting only removes the rule, the requests generated by the rule remain in the list of requests.
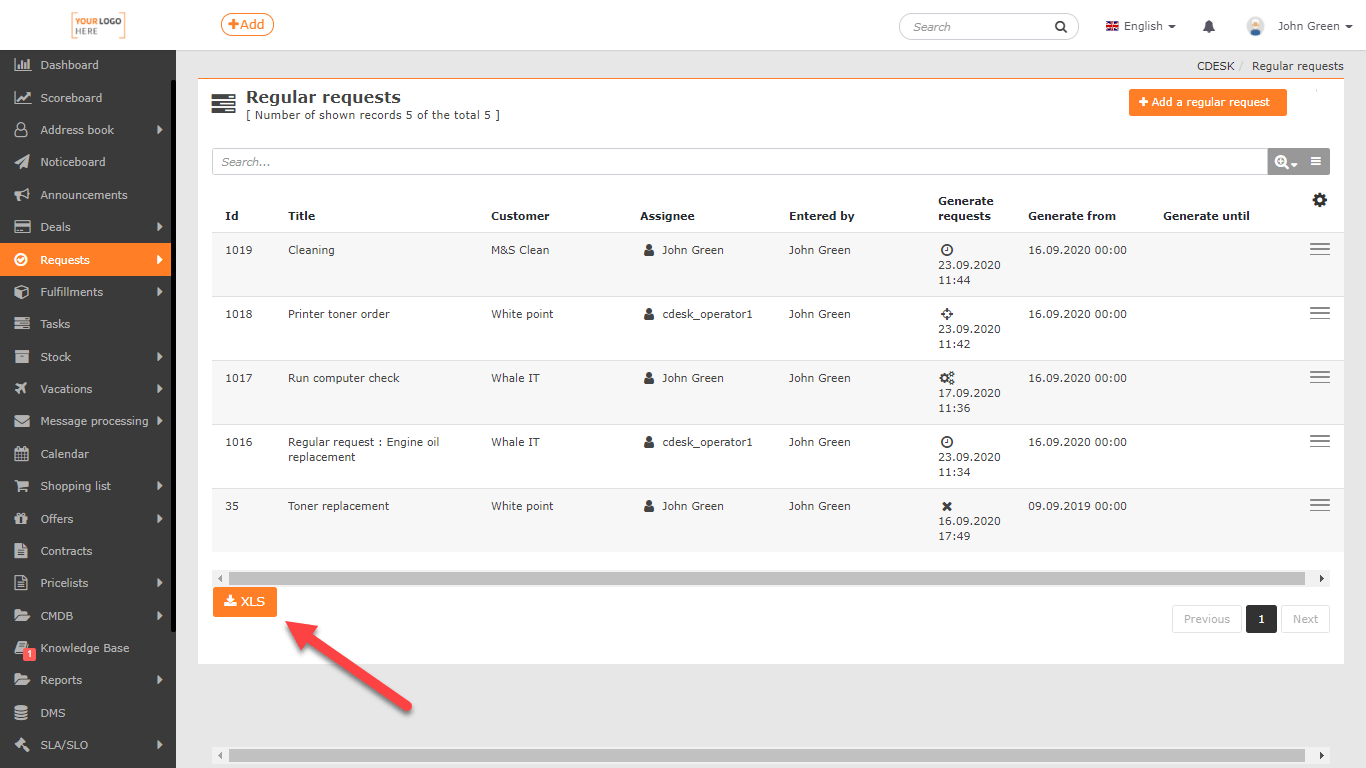
Export of Regular Requests
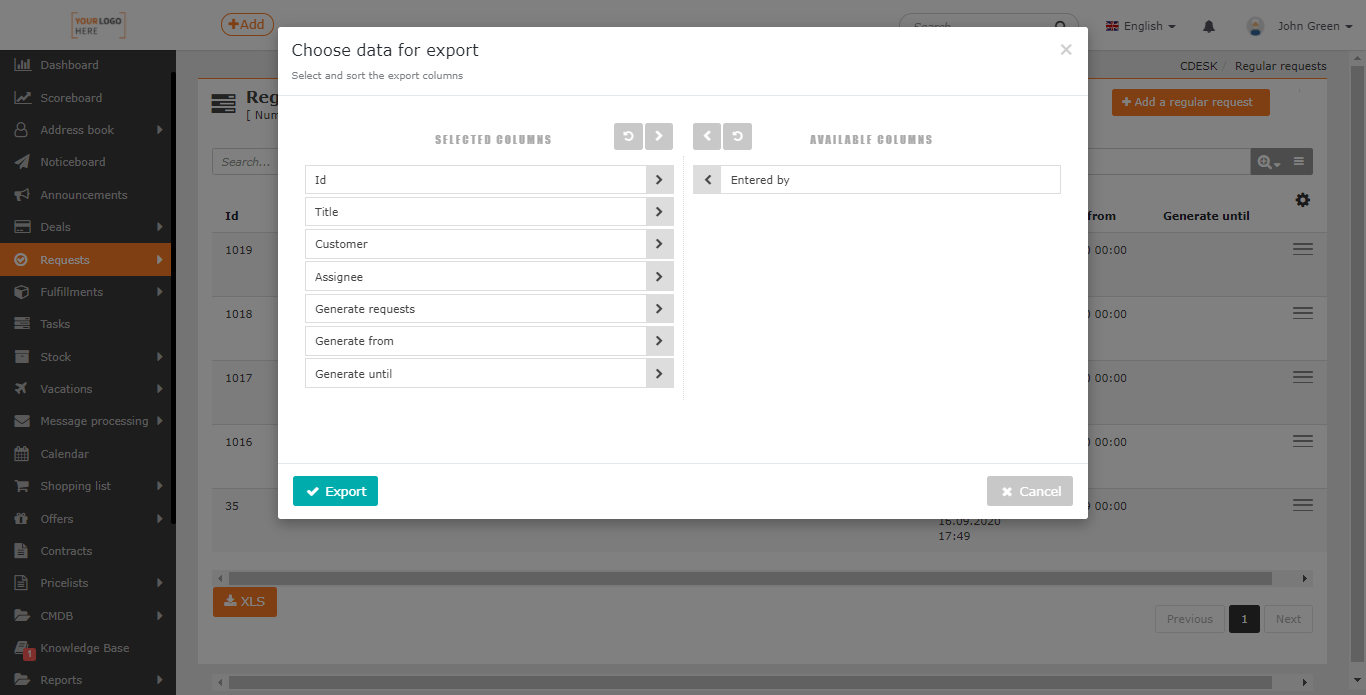
The XLS button, located in the bottom left corner below the list of regular requests, is used for export. If the export button does not appear, check that you have permission to export records. You can set permissions in Users and Groups->Users->choose a user->Permissions tab->Requests->Regular Requests->Export.
Click the XLS button to open a new window where you can select the columns to export. If you want to export all columns, you do not need to select them individually: click on ![]() to select them all. The order of the columns in this list also determines their order in the export. If you wish to have the columns in the default order, click
to select them all. The order of the columns in this list also determines their order in the export. If you wish to have the columns in the default order, click ![]() and the columns are sorted.
and the columns are sorted.
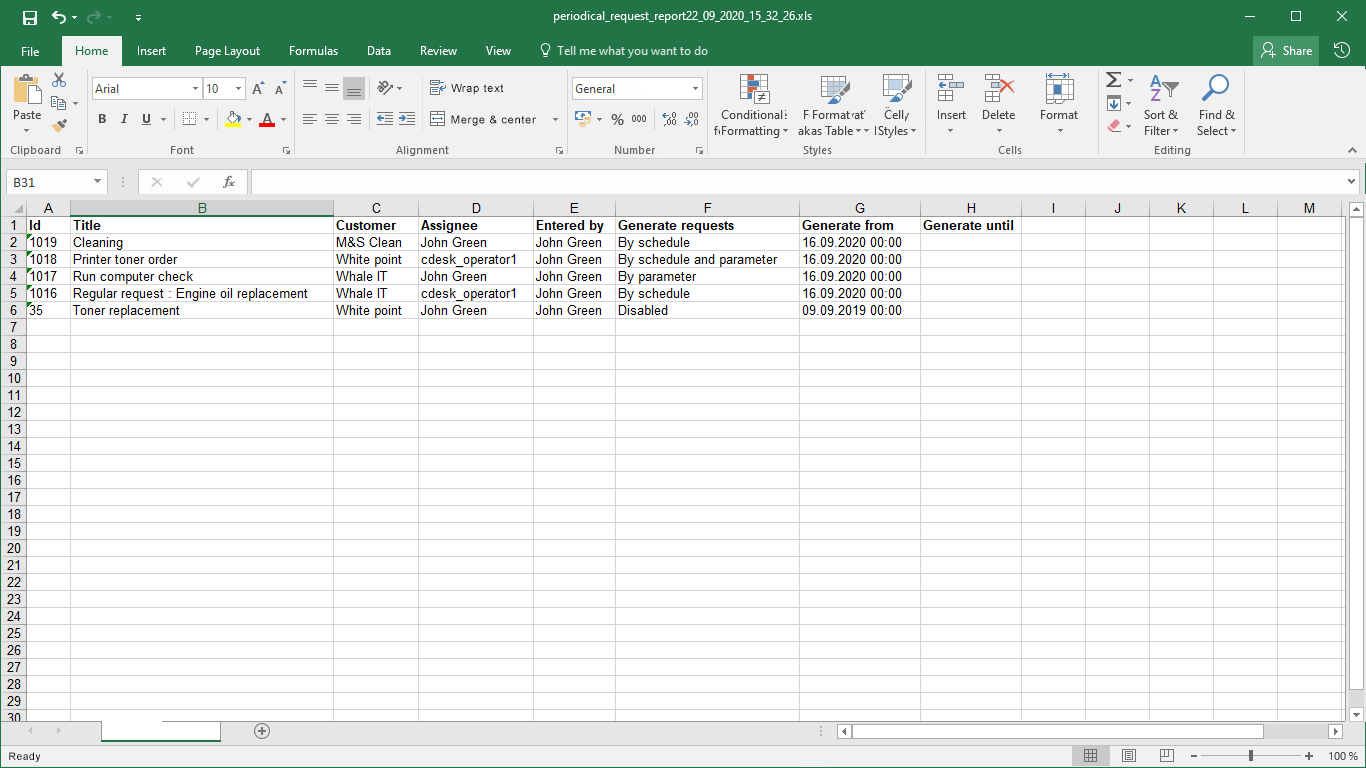
After selecting the columns, create an export using the Export button located in the bottom left corner of the window. Select Cancel to return to the list of regular requests without exporting.