NOTICEBOARD
The Noticeboard module displays all important information in a visible place. Unlike the Announcements module, the content of the Noticeboard is valid indefinitely. Of course, the creator of the post can delete it if necessary.
If the Noticeboard module is not in the menu, it must be first enabled and configured in Global Settings -> Noticeboard. The visibility of the module in the menu is subject to permissions. Permissions can be set in Users and Groups-> Users-> specific user-> Permissions tab-> Noticeboard.
The Noticeboard can also be accessed as a widget on the Dashboard.

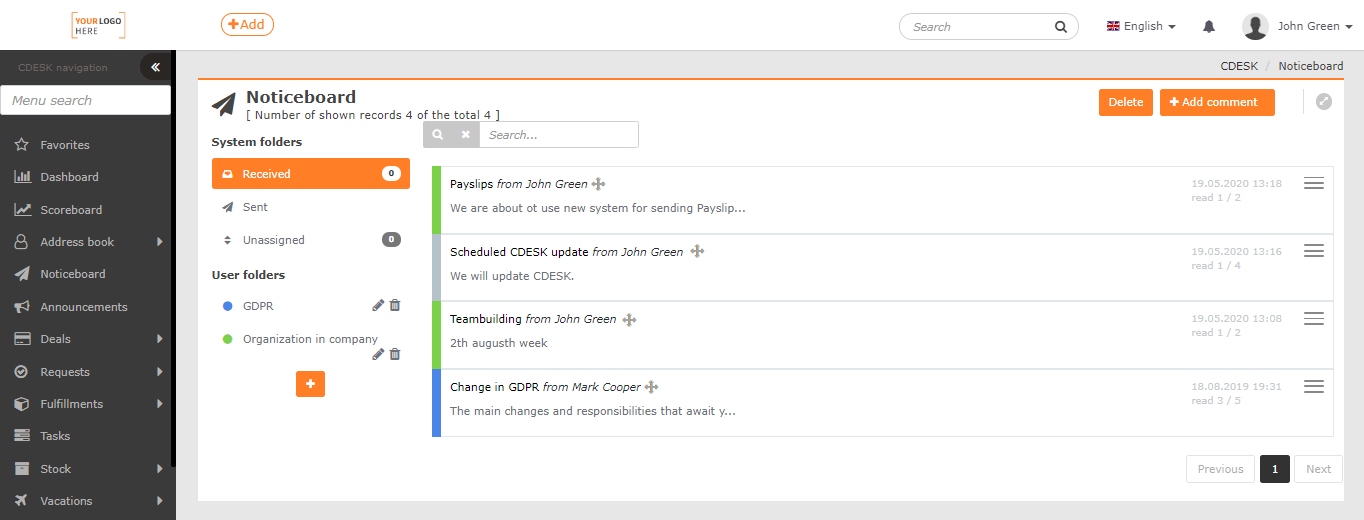
List of posts
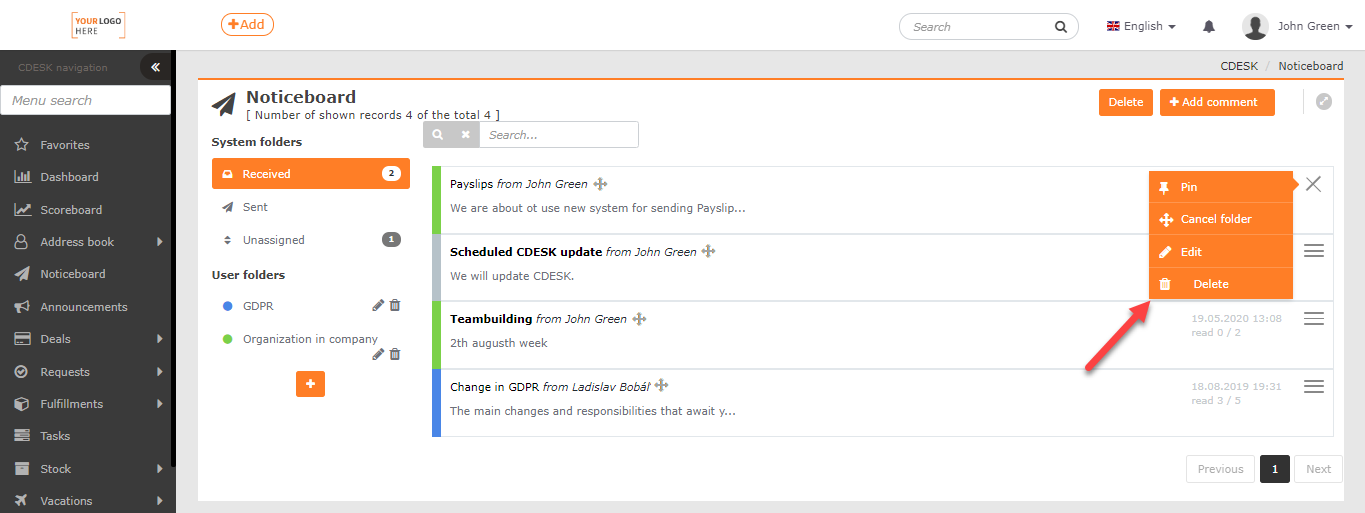
At the top of the Noticeboard module window, there is a button for adding a new post, and a field for searching in posts. Next to the Add a post button, there is the Delete button to delete posts. Below is the window divided into two parts – on the left side, there are folders, on the right, there is a list of posts sorted from newest to oldest with the priority of pinned posts, along with information about the readability of the post. Unread posts are listed in bold.
Posts can be not only added, but also sorted, pinned as important, edited and monitored by readability or deleted. Most of these operations are accessible via the context menu ![]() located below every post on the right.
located below every post on the right.
Add a new post
Click on the + Add a comment.

A form window will open, items marked with • are required:
Title of the post• – the title under which the post will appear on the noticeboard. It should be apt and short.
Post content• – field for entering a post with the possibility of using controls for formatting.
Recipients• – select several users / groups to view the post. Only Assignee users can be recipients.
Type / Category – possible to select from predefined values, if the option to select the type / category is enabled in Global Settings -> Noticeboard. The obligation to select as well as the predefined values for the type / category depend on the settings.
Attachments – if there are attachments related to the post, you can upload them by clicking in the box, or by dragging (even more) files to this location.
To add a post, you need to Send it. The Back button closes the form without adding a post.
Add new posts through the message processing
Posts for the noticeboard can also be added through the Message Processing module in two ways: manually and automatically using the processing rule.
Create posts through the message processing manually
To manually create a post from a received message, go to Message Processing-> Message Processing. When you open a specific message, select Create entry to Bulletin board under the Action button. Subsequently, a form will open for entering a new post on the Noticeboard, while the individual fields will be pre-filled according to the selected message. Details on how to manually create posts from reports can be found HERE.

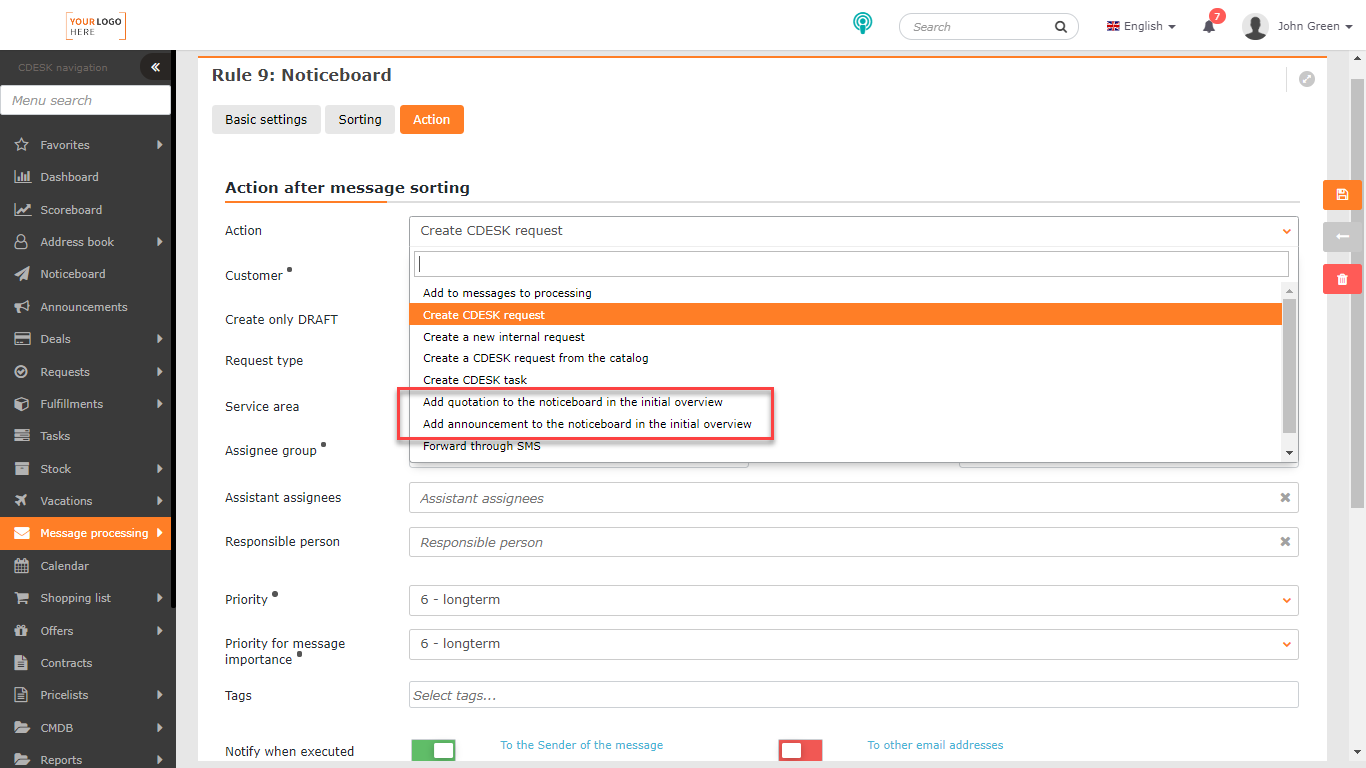
Creating posts through the message processing rule
New posts can also be created automatically from received messages if the corresponding rule is defined. You create a message processing rule in Message Processing-> Rules of Processing. Then, when entering a new rule on the Action tab, select Add quotation to the noticeboard in the initial overview or Add announcement to the noticeboard in the initial overview. All details on creating your own message processing rules can be found HERE.
Sort posts to folders
The folders on the noticeboard are dual:
- System folders – divided onto received, sent and unassigned posts. Posts addressed to the logged in user are included in the Received folder. The Sent folder contains the posts created by the logged in user. The Unassigned folder contains posts that have not been included in user-created folders.
- User folders – created by each user separately for clear sorting of posts.
To create a new folder, click the + icon. Creation is quick, just enter the name and select the color for visual differentiation and click Save. You can edit the folder at any time by clicking on ![]() or deleting with the
or deleting with the ![]() icon. Creating, editing folders, and sorting posts from one user has no effect on other users’ folders and sorting..
icon. Creating, editing folders, and sorting posts from one user has no effect on other users’ folders and sorting..

To place a post under the selected user folder, click and drag the post by the ![]() icon above the user folder (drag & drop). When a post is assigned to a folder, it will display a color flag according to the color of the folder, as well as the name of the folder. If you want to remove a post from a folder, click on the context menu
icon above the user folder (drag & drop). When a post is assigned to a folder, it will display a color flag according to the color of the folder, as well as the name of the folder. If you want to remove a post from a folder, click on the context menu ![]() icon and select the Cancel folder option.
icon and select the Cancel folder option.

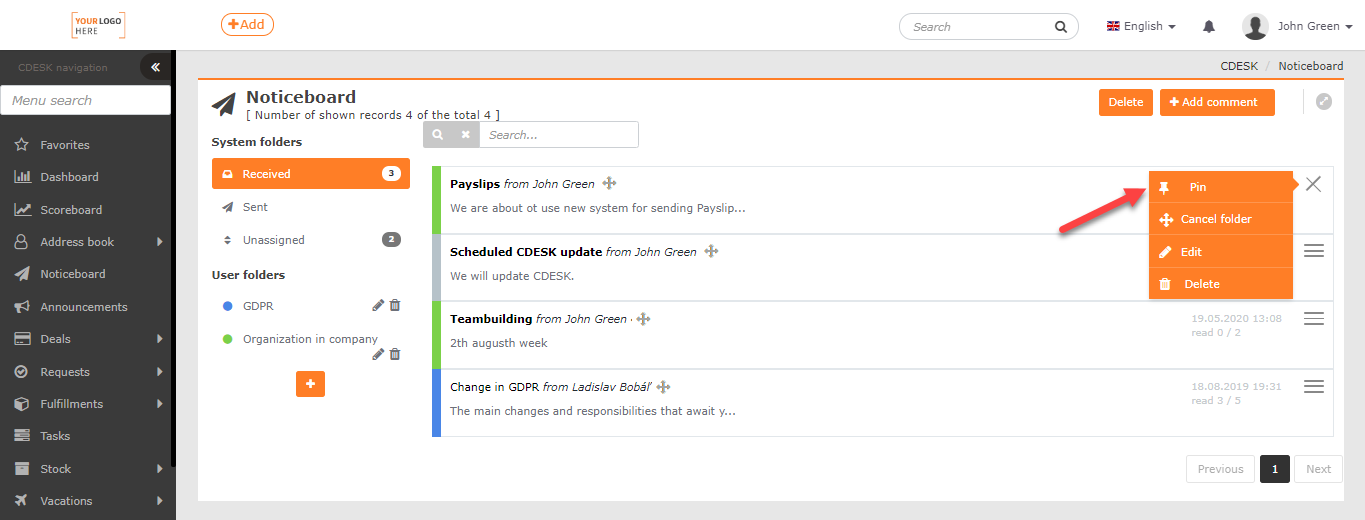
Pin important posts
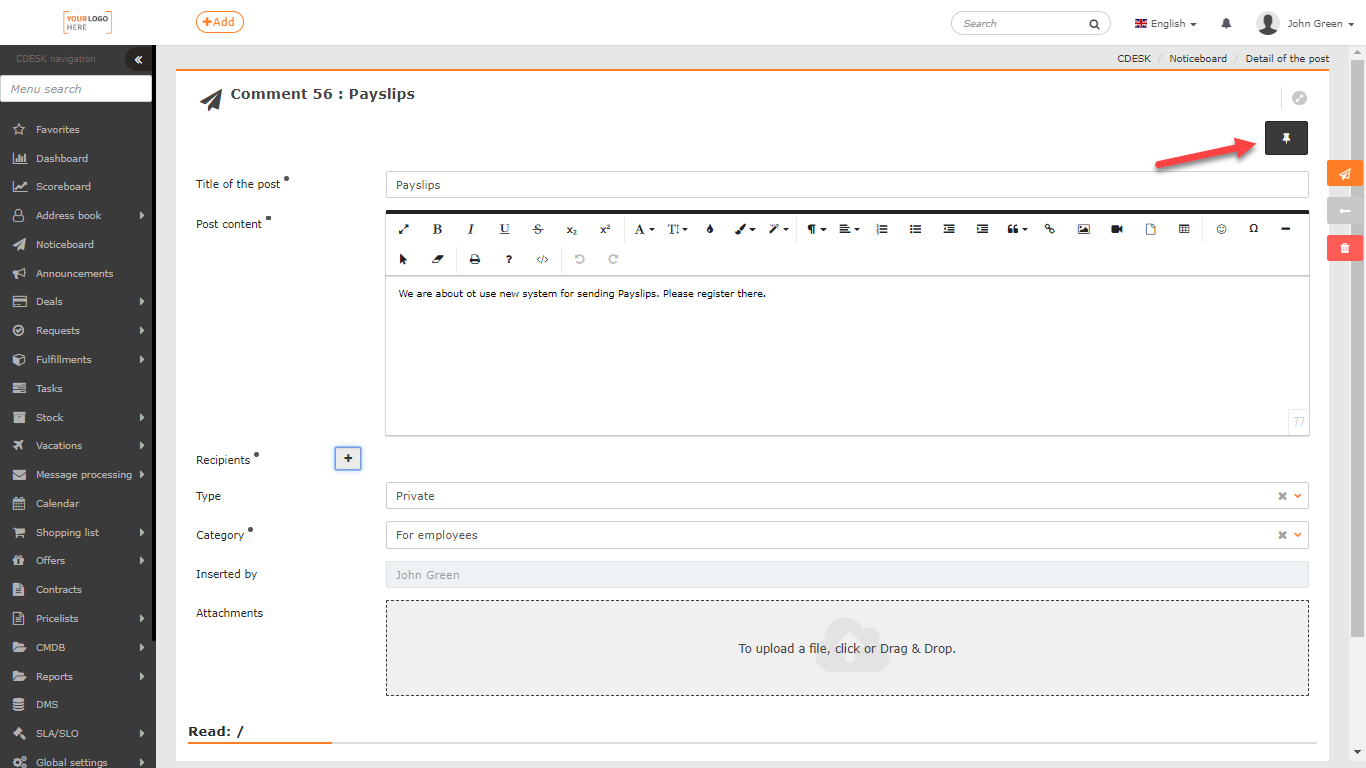
Important posts the user wants to see can be pinned on the noticeboard. The first option is to open the post and in the upper right corner click on the ![]() icon or to open in the list of posts the context menu
icon or to open in the list of posts the context menu ![]() and select Pin.
and select Pin.
You can cancel the pinning in two ways – from an open post by clicking on ![]() or from the list of posts, again via the context menu
or from the list of posts, again via the context menu ![]() and the Unpin option.
and the Unpin option.
Editing and post readability
Only a user with appropriate permissions can edit a post. Permissions can be set in Users and Groups-> Users-> specific user-> Permissions tab-> Noticeboard.
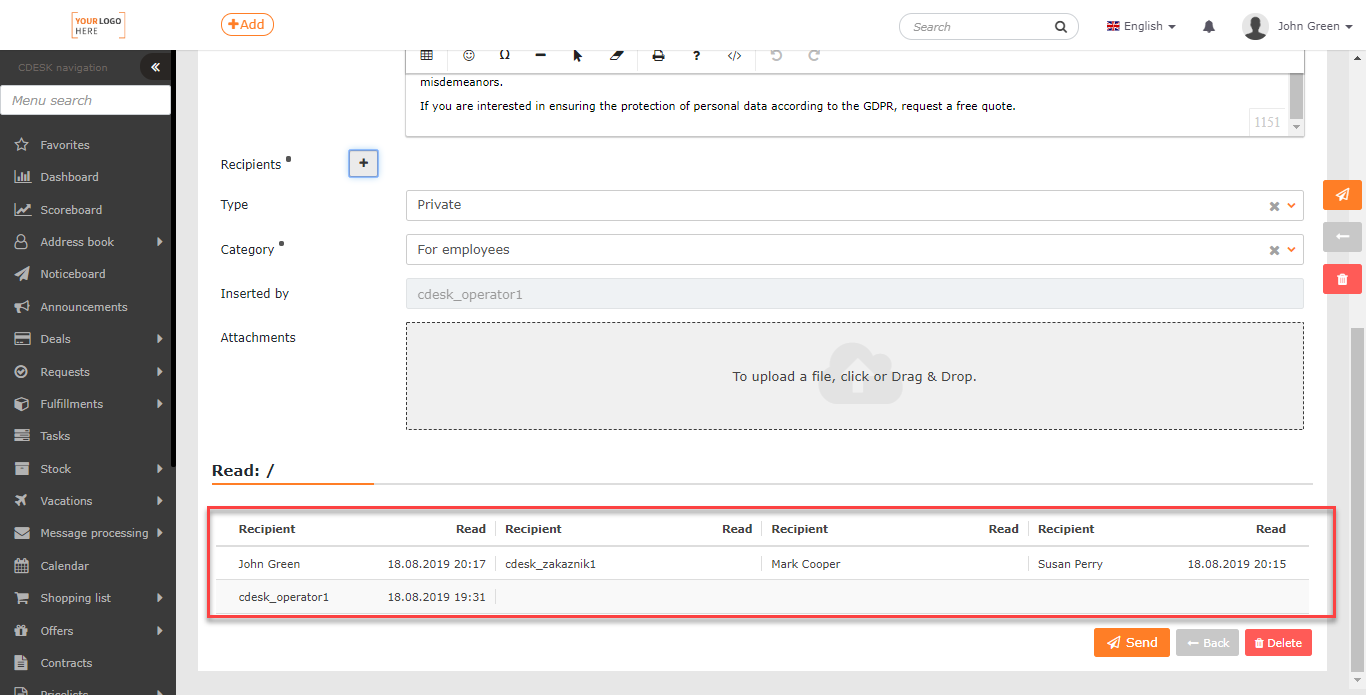
After opening a specific post, the form for adding a post will open, extended by the Inserted by field with the name of the user who created the post and the Read section. This section shows which recipients read the article and when.
Delete posts
Each message recipient has the option to delete the post from the noticeboard by opening the post and clicking on Delete or directly on the noticeboard, clicking on the ![]() context menu and selecting the Delete option. The post will only be removed from this user’s noticeboard and will remain on the noticeboard of other users. If the post is deleted by its submitter, it will be removed from each user’s noticeboard.
context menu and selecting the Delete option. The post will only be removed from this user’s noticeboard and will remain on the noticeboard of other users. If the post is deleted by its submitter, it will be removed from each user’s noticeboard.
You can use the Delete button at the top of the window to delete multiple posts at once.
Click to display the ![]() check mark icon on each Noticeboard post. Select Select all to check all posts. Click the Delete button again to delete the selected posts. If you do not select any posts, an error message will appear notifying you. Selecting Cancel will not delete any of the selected posts.
check mark icon on each Noticeboard post. Select Select all to check all posts. Click the Delete button again to delete the selected posts. If you do not select any posts, an error message will appear notifying you. Selecting Cancel will not delete any of the selected posts.
