CREATING AND LISTING WORK ORDERS
Ways to create a new work order
A new work order can be generated automatically once a request is submitted from the catalogue of requests, or it can be entered directly on the request, or in the list of work orders. Whichever way you enter the order, it will always be linked to a request.
1. Method (preferred) – from a request template
The work order is created automatically from the request template. This means that the request was created via the catalogue of requests (from a tile). For more information on setting up the generation of work orders, see the text on the Catalogue of requests
2. Method – manually from a request
You can add a work order to a request via the Work orders tab. Adding a work order to a request is described in this text.
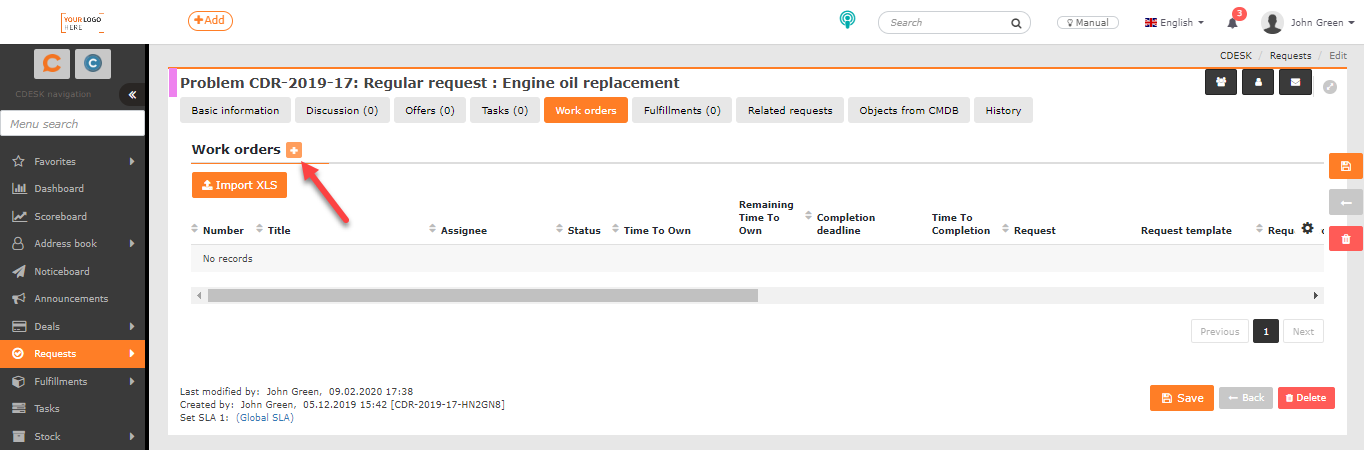
3. Method – manually from the list of orders
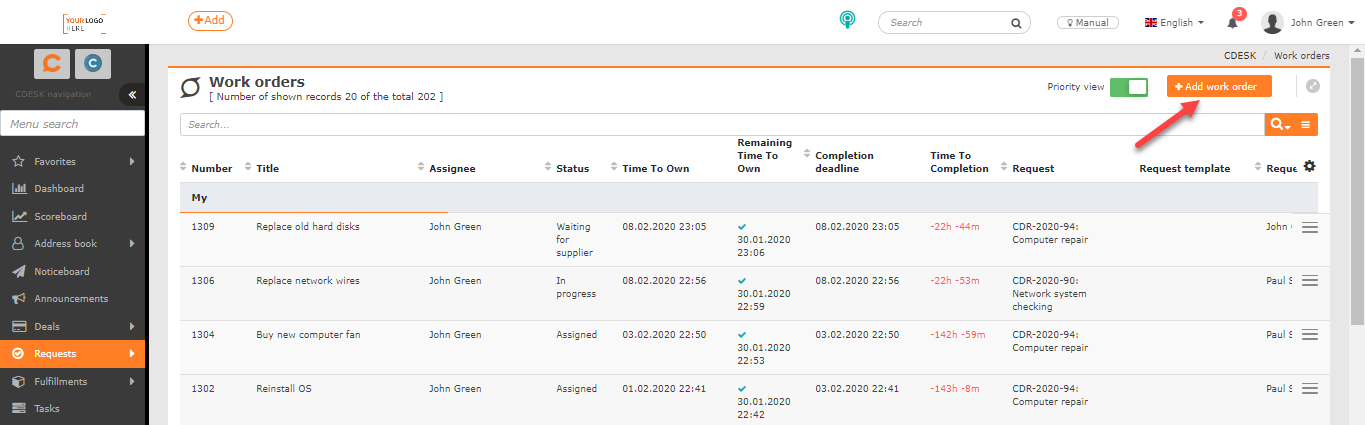
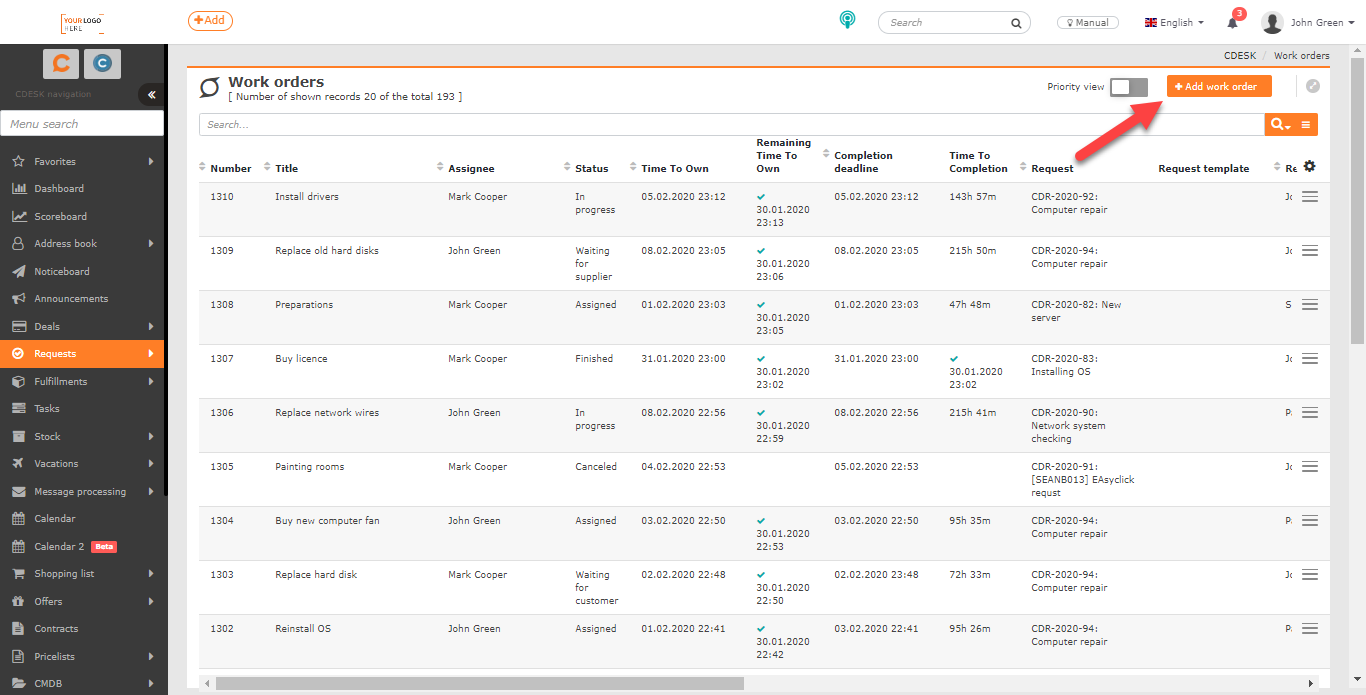
Adding a work order in the list of work orders is described in the text below. This is done using the +Add work order button above the list of work orders. The same forms are used for both ways of adding work orders.
The same forms are used when entering work orders via requests and from the list of work orders. We will introduce their meaning in this text. The display of some items may depend on the settings of the Requests module. In the following text these will be colour-coded in blue, together with information on how they can be enabled. The visibility of some items may also depend on permissions. Information on how to set permissions for these items is provided alongside them.
Creating a new work order via the list of orders
Above the list of work orders there is a +Add work order button, which you use to add a new work order. The button for adding work orders is only displayed to users with permission to create new orders. You set permissions in Users and groups->a specific user->Permissions tab->Requests->Work orders->Records.
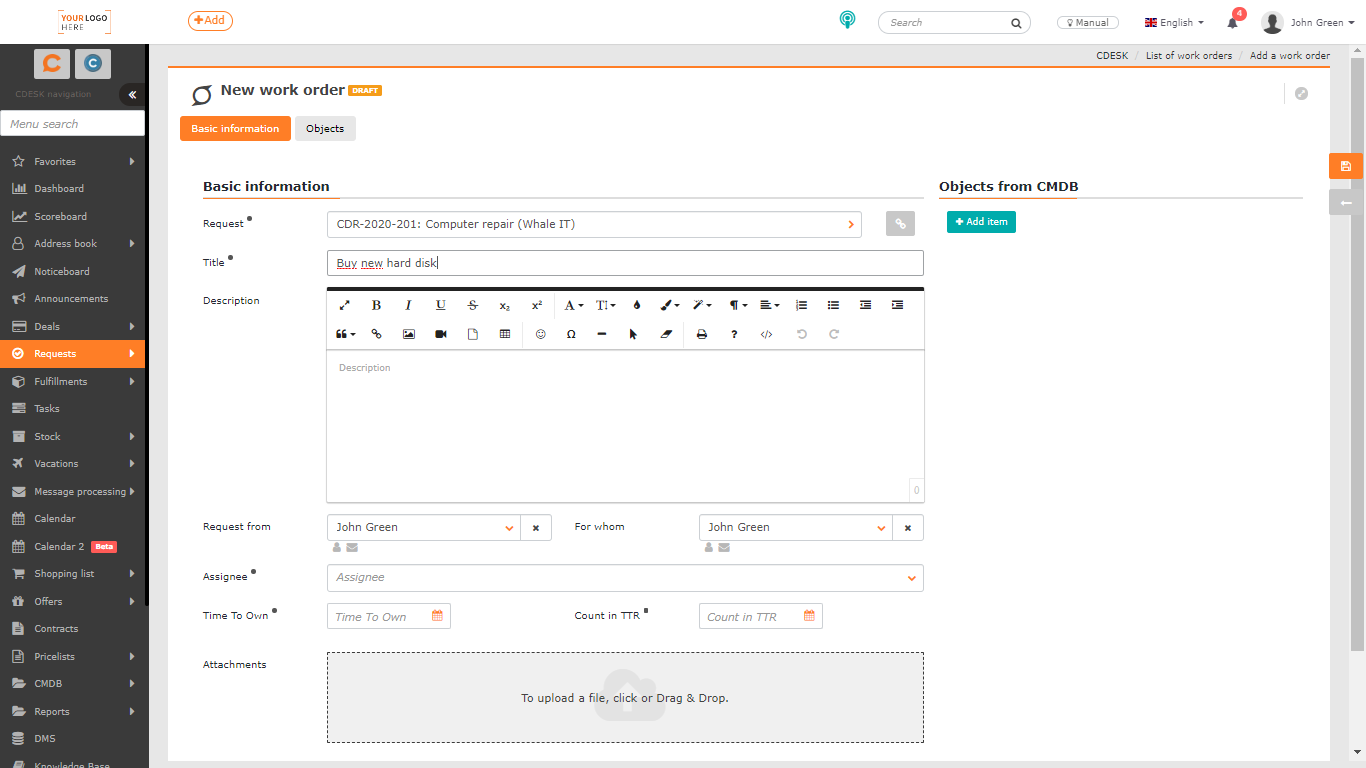
After clicking the +Add work order button, a form for entering a new work order opens. The same form is also used when a work order is entered directly via a request. Mandatory items are marked with the symbol •
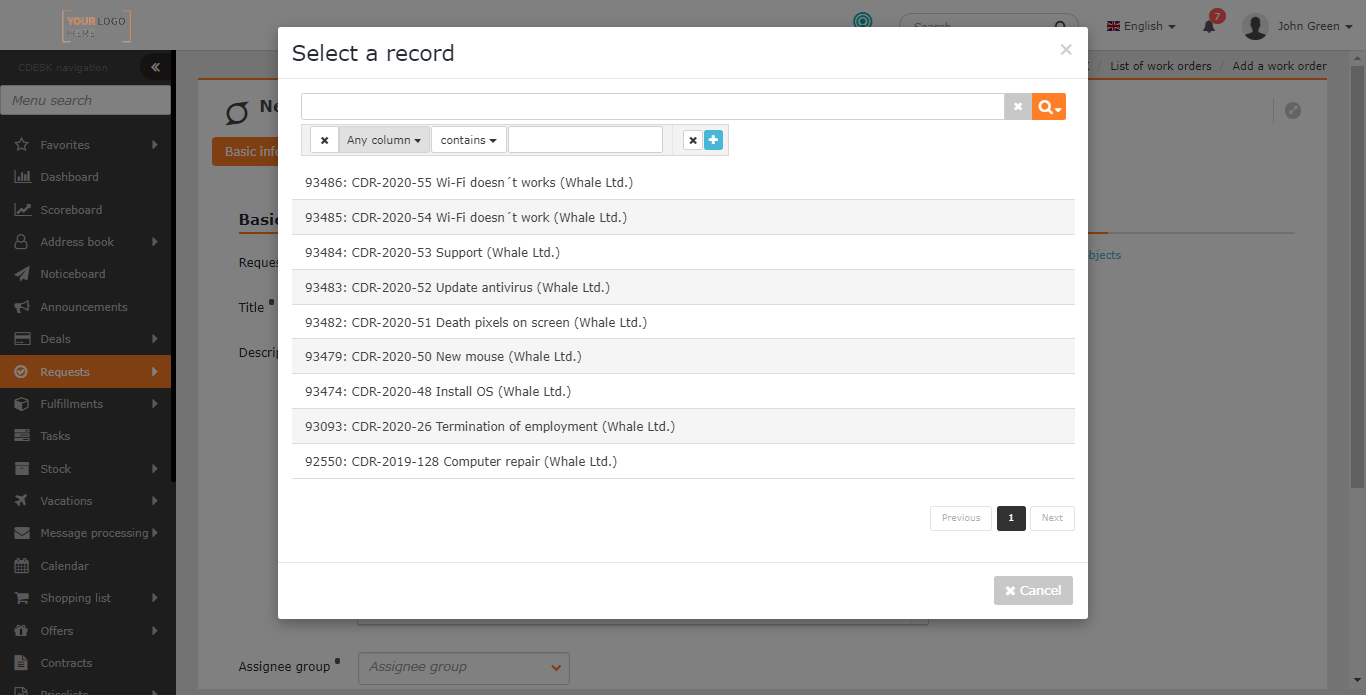
Request • – Clicking the > icon opens the list of all requests with the option to filter records. Select the request that you want to split into work orders. The selection creates a link between these two objects. After adding the request, an  icon appears next to this field for displaying a preview of the linked request. Via this preview, the request can be edited. The Request field is subject to permissions and you can make it available / unavailable to certain users or a group in CDESK. (in permissions: Requests->Work orders->Field access->Request).
Name • – the work order is displayed under this name in the list of work orders and also in the other modules linked to the given work order. The Name field is subject to permissions and you can make it available / unavailable to certain users or a group in CDESK. (in permissions: Requests->Work orders->Field access->Name).
Description – a field for entering the work order brief, with the option to format the text. Requests->Work orders->Field access->Description).
Who is requesting – select who entered the work order. If this field is filled in on the linked request, it is also pre-filled automatically on the work order. However, you can change it. If you are creating the work order on the basis of a (e.g. telephone) enquiry from another user or customer, you have the option of selecting a different operator / customer account. The field can be enabled in Global settings->Requests->Requests in the general settings section. It is also subject to permissions and you can make it available / unavailable to certain users or a group in CDESK. (in permissions: Requests->Work orders->Field access->Who is requesting).
On whose behalf – in the event that the work order was initiated by someone other than the person entered in the Who is requesting field, use this field to enter that person. They do not have to be registered CDESK users. Depending on the settings in Global settings->Requests->Requests you can also enter free text. If this field is filled in on the linked request, it is also pre-filled automatically on the work order. However, you can change it. The On whose behalf field is subject to permissions and you can make it available / unavailable to certain users or a group in CDESK. (in permissions: Requests->Work orders->Field access->On whose behalf).
Assignee group• – selecting the assignee group. The Assignee group field is only available when the Restrict assignee selection by assignee group function is enabled. The Assignee group field is subject to permissions and you can make it available / unavailable to certain users or a group in CDESK. (in permissions: Requests->Work orders->Field access->Assignee group).
Assignee • – selecting the assignee. When the Restrict assignee selection by assignee group function is enabled, the field is only displayed after the assignee group has been selected. The selection of the assignees offered depends on the permission settings of the user account. A customer / Easyclick account only sees the assignees who are assigned to the given customer. The setting of visible and assigned customers is done in Users and groups->Users in the Companies section, or in Address Book->Companies in the Operators section.
The Assignee field is subject to permissions and you can make it available / unavailable to certain users or a group in CDESK. (in permissions: Requests->Work orders->Field access->Assignee. To select an assignee, you need permission to see users registered in CDESK. (in permissions: Users and groups->Users->Records. For selecting groups it is Users and groups->Groups->Records).
Assignment deadline• – the deadline by which the work order is to be assigned to a specific assignee (not a group of assignees). The Assignment deadline field is subject to permissions and you can make it available / unavailable to certain users or a group in CDESK. (in permissions: Requests->Work orders->Field access->Date fields).
Completion deadline• – the deadline by which the work order should be resolved. The Completion deadline field is subject to permissions and you can make it available / unavailable to certain users or a group in CDESK. (in permissions: Requests->Work orders->Field access->Date fields).
Attachments – the option to attach an attachment (for example a screenshot). You attach a file either by dragging it with the mouse onto this field, or by clicking the field to select a file from disk. You can also add several attachments; the list of attached files is then displayed below this field.
Additional properties – allow you to extend the work order with further information. Additional properties can only be added after the order has been saved. For more information on defining additional properties, see the article Configuration database, CMDB->Additional properties. The Additional properties field is subject to permissions and you can make it available / unavailable to certain users or a group in CDESK. (in permissions: Requests->Work orders->Additional properties).
Objects
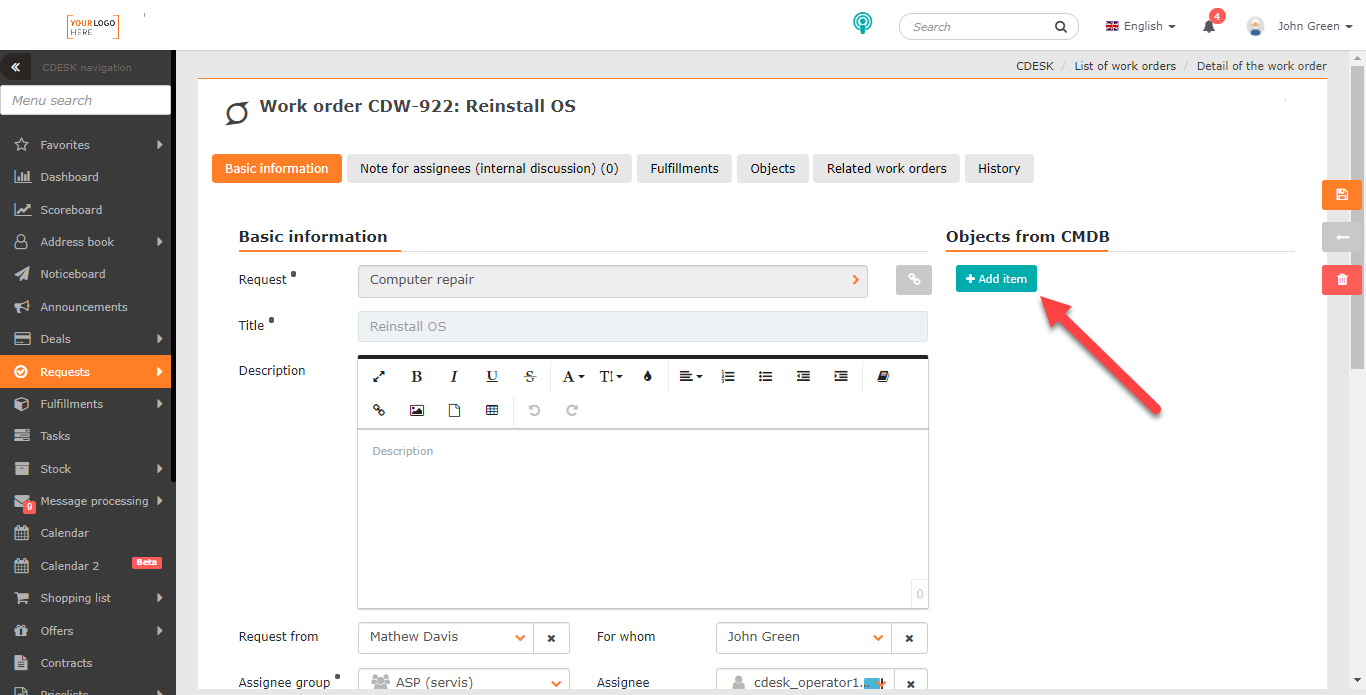
A work order can be linked to objects from the CMDB Configuration database. Information on linking objects can be found in the text Working with work orders.
List of work orders
The list of work orders is available in the main menu under Requests->List of orders. If List of orders is not in the menu, a user with administrator permissions must enable the work orders module in Global settings->Requests->Work orders. If the module is still not displayed, check the permissions for accessing it. You set permissions in Users and groups->a specific user->Permissions->Requests->Work orders->Records tab.
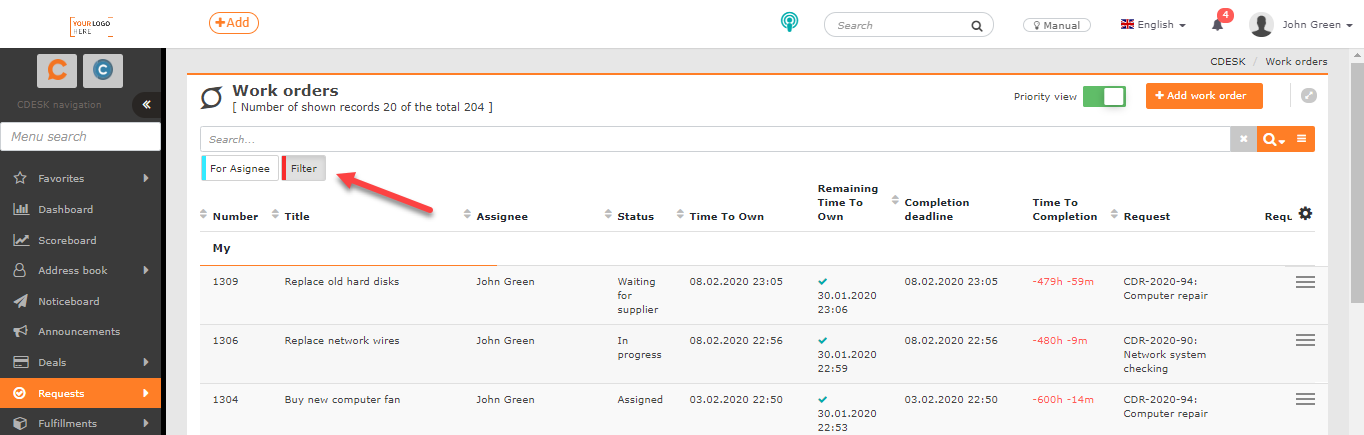
The header of the list of work orders window shows the number of orders displayed out of the total. It also contains controls for changing the display type, creating work orders, searching using the advanced filter and a button for export to XLS.
This is followed by a list of work orders according to the currently set filter.
Using the  icon you can set which columns will appear in the list and also their order.
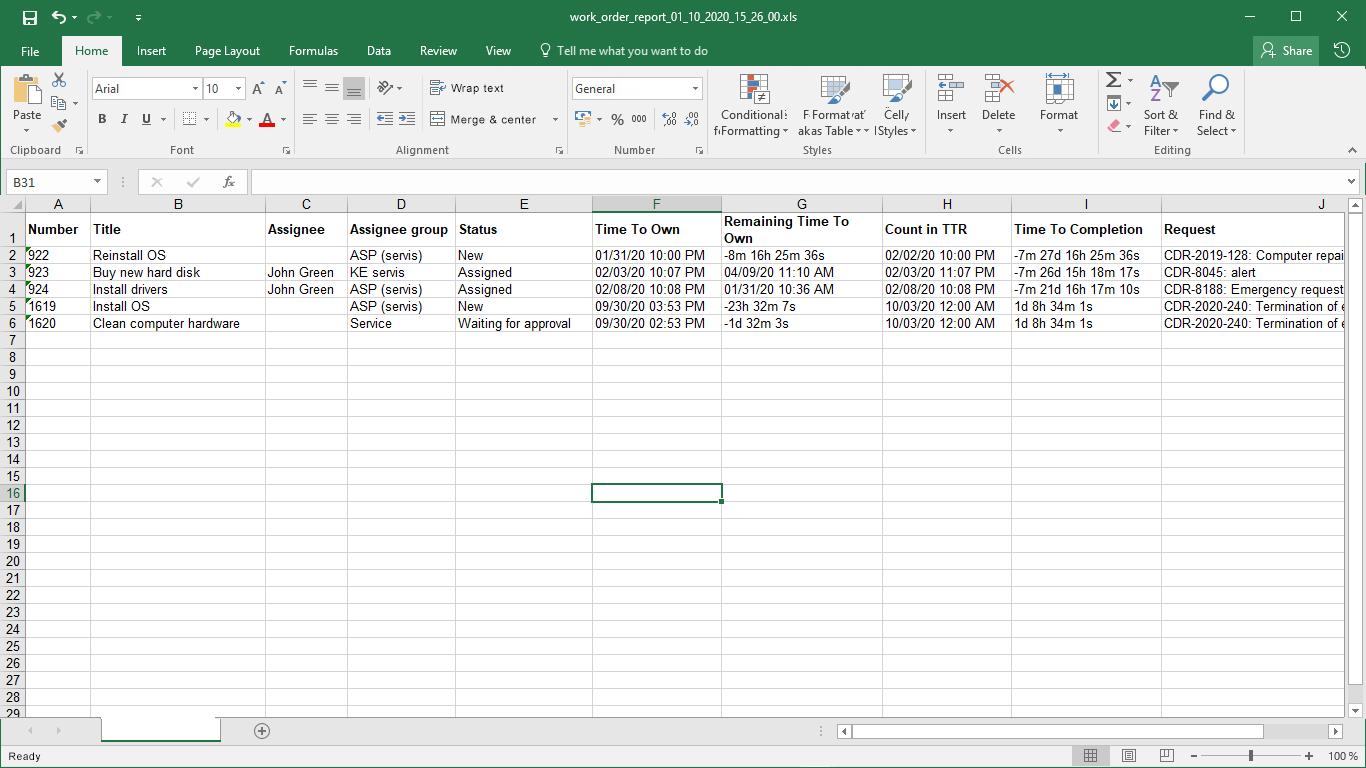
The format of all time data in the list and also inside the work orders depends on the settings in your profile. Dates and times in the XLS report will be in the same format. The times (time zone) displayed in the web interface depend on the settings of your computer. Times inserted into XLS reports and into emails follow Global settings->Date and time.
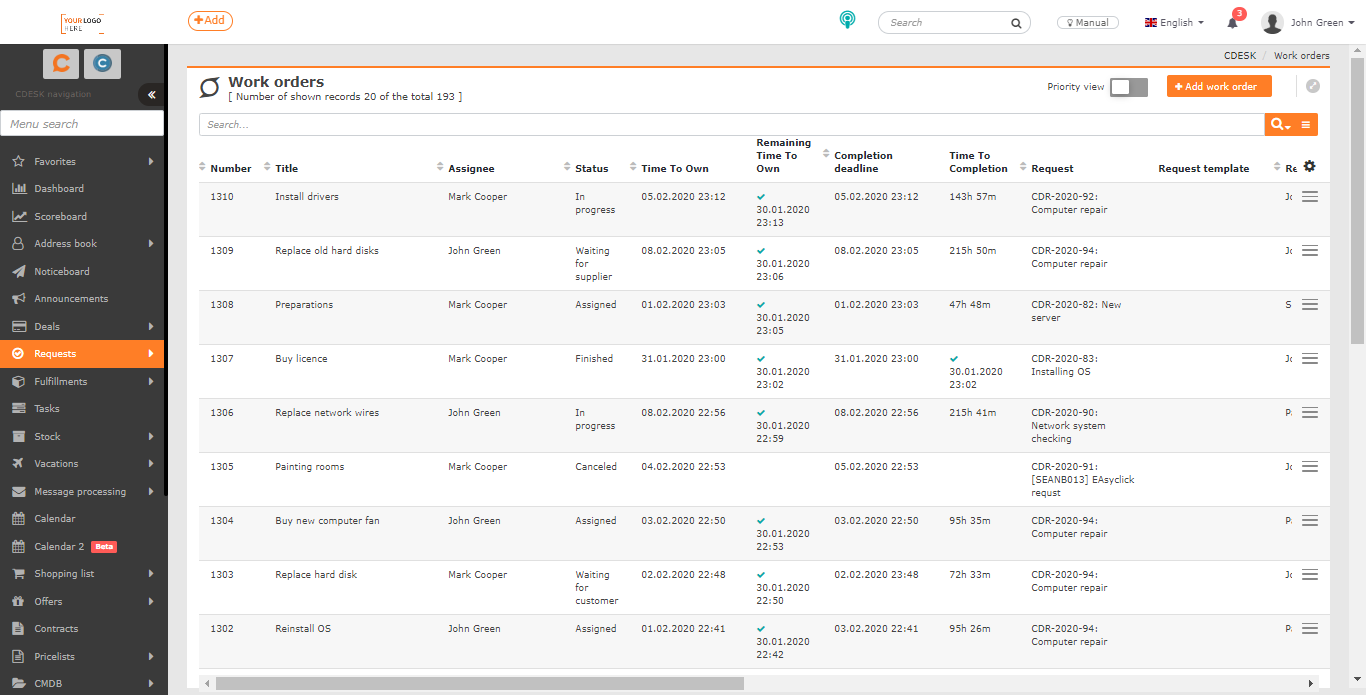
List display options
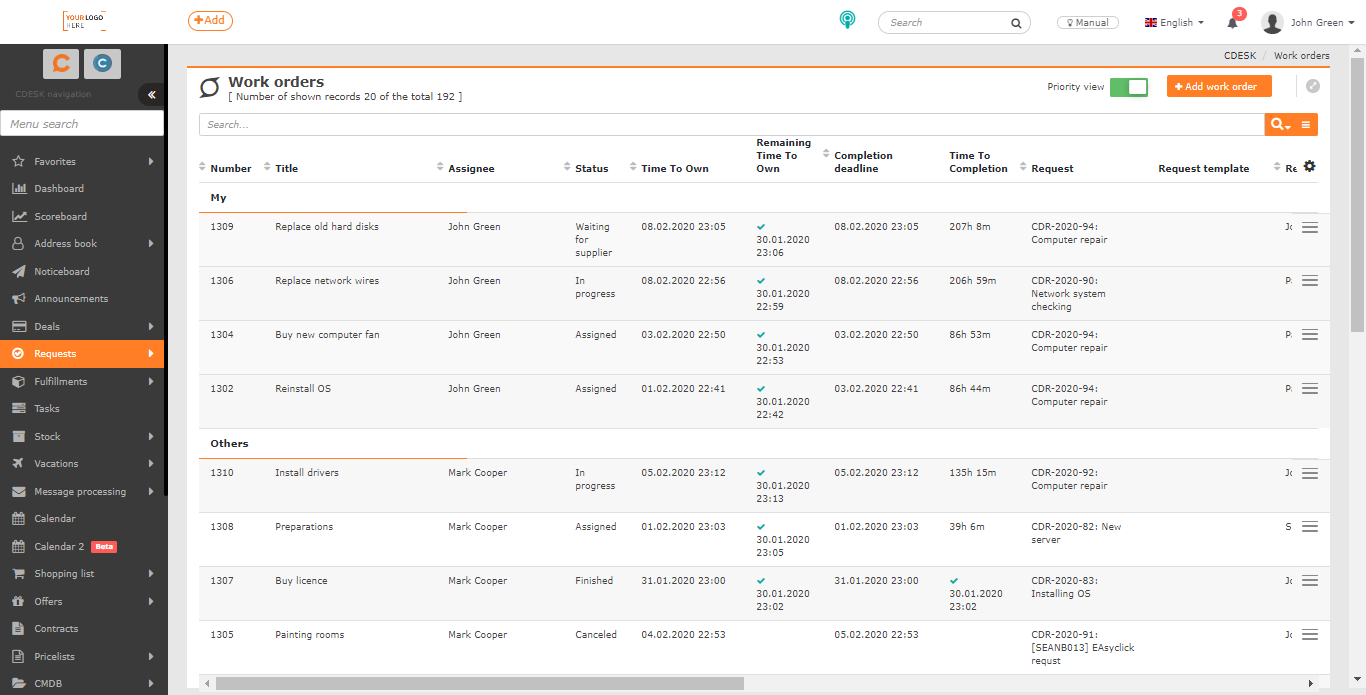
The Priority display toggle provides a priority listing of work orders, which shows you what you need to process urgently or what you are overdue on. The toggle allows records to be displayed in two ways:
- Normal display
 – displays a list of work orders of all assignees sorted by creation date, from newest to oldest
 - Priority display – displays a list of requests divided into these parts:
- My drafts – unsaved (draft) work orders from the logged-in assignee
- Unassigned – work orders for the assignee group of which the logged-in user is a member
- My waiting for approval – work orders assigned to the assignee group of the logged-in assignee. These are also work orders where the logged-in assignee is listed and which are at the same time in the Waiting for approval status.
- My overdue for completion – work orders assigned to the logged-in assignee where the completion deadline has been exceeded
- Mine – work orders assigned to the logged-in assignee that are not awaiting a response, are not overdue for completion and have no approval process on them
- Others – other work orders that do not directly concern the logged-in assignee but which they have access to. This also includes all completed work orders and work orders of other assignees from their own group
 – displays a list of work orders of all assignees sorted by creation date, from newest to oldest
 – displays a list of requests divided into these parts:
A customer account does not have access to the list of work orders by default. If it has permission to read records, it can view work orders via visible requests. Administrator accounts have access to all work orders.
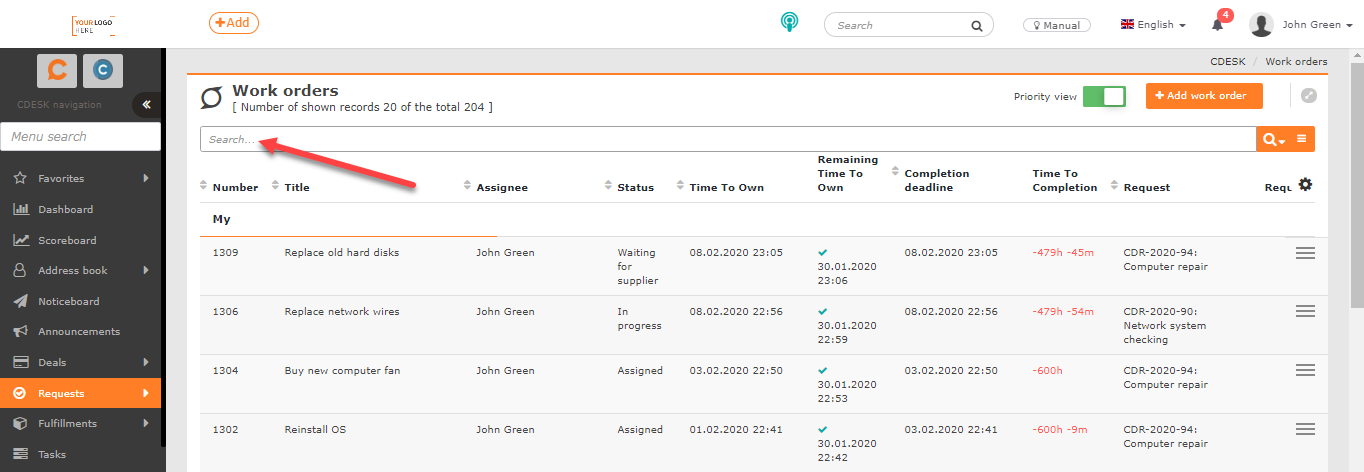
Searching and filtering in the list of work orders
Full-text search in the list of work orders searches by the Number and Name columns.
If you need to search for work orders by several criteria, this is done using the advanced search filter, in which you can specify the conditions:
|
|
|
|
|
|
|
|
|
|
|
|
|
|
|
|
|
|
|
|
|
|
|
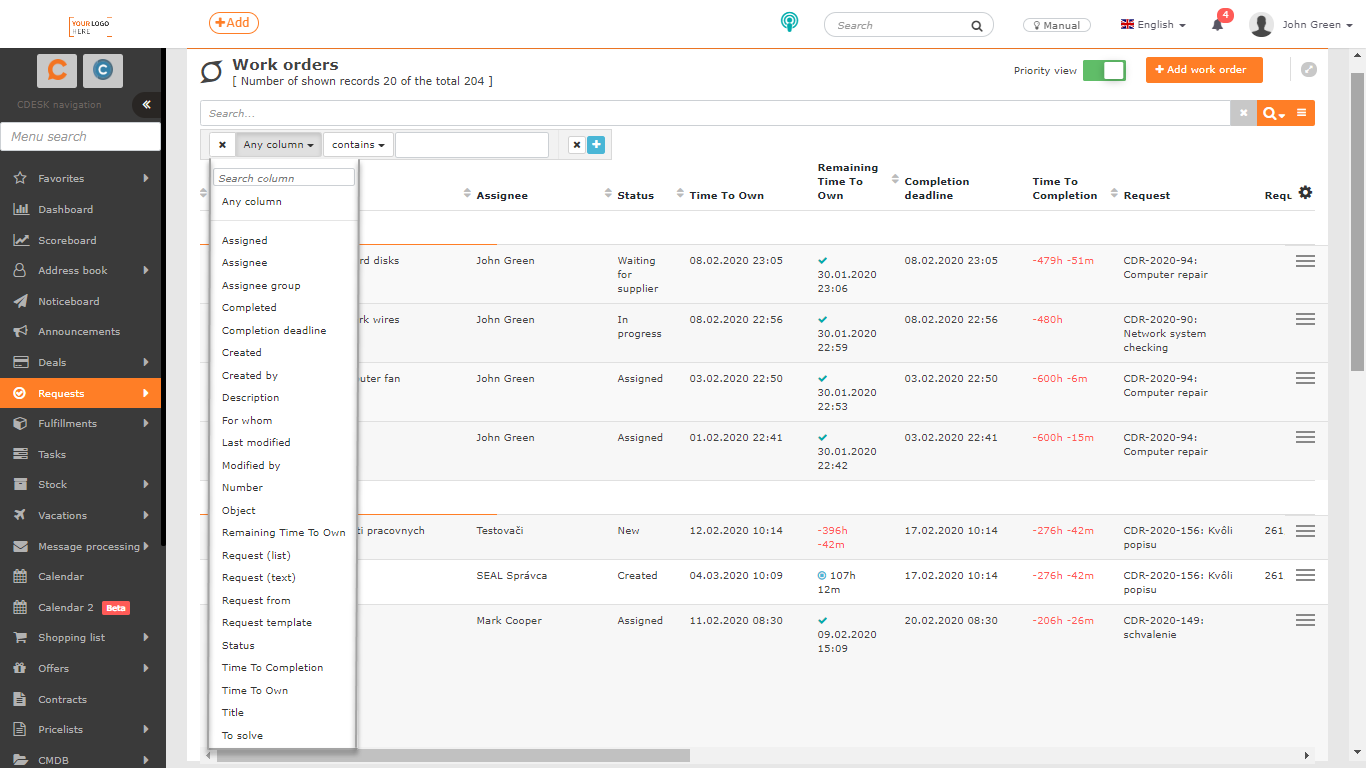
The individual conditions can be variously combined and chained, with the option of saving frequently used combinations of conditions. You can read more about working efficiently with filters in CDESK in the text Searching and advanced filters.
Exporting work orders
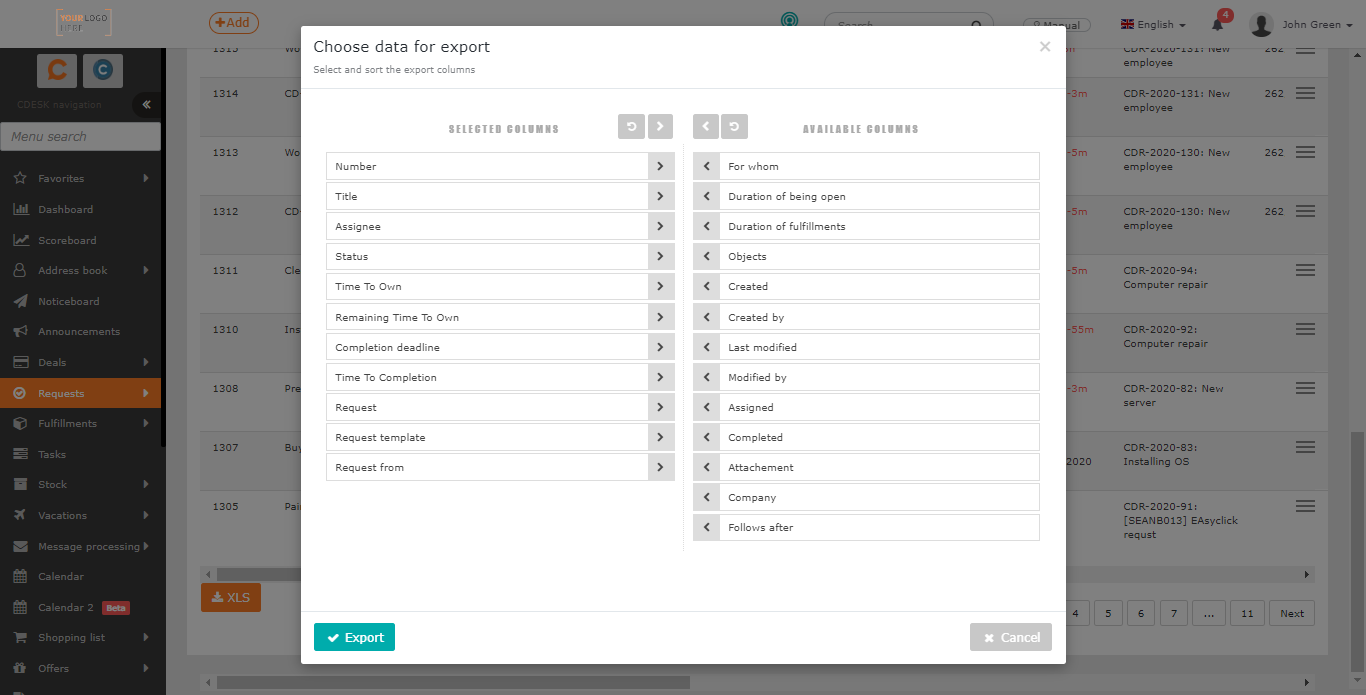
In the bottom left corner of the contacts list there is an XLS button, with which you can export the list in XLS format. The button for exporting tasks can be made available / unavailable to certain users in Permissions. You set the permission in Users and groups->a specific user->Permissions->Requests->Work orders->Records->Export tab.
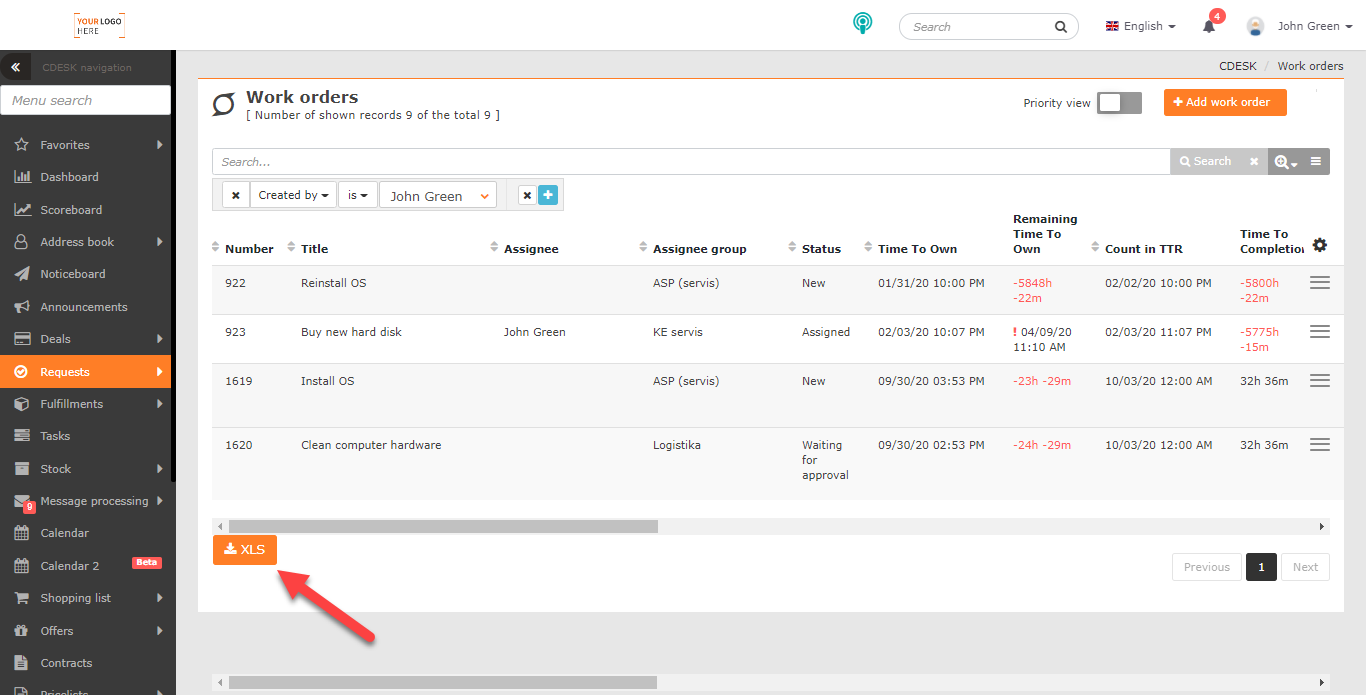
After clicking, a new window opens in which you can select the columns for export. If you want to export all columns, you do not have to select them individually. Clicking the  icon selects them all. The order of the columns in this list also determines their order in the export. If you want to have the columns in the default order, click the
  icon and the columns will be sorted.
After selecting the columns, create the export using the Export button, which is in the bottom left corner of the window. Choosing the Cancel option returns you to the task list without creating an export.