WORKING WITH A REQUEST
Requests created by any of the methods described in the article creating a new request are displayed in Requests->List of requests, from where you can continue working with them.
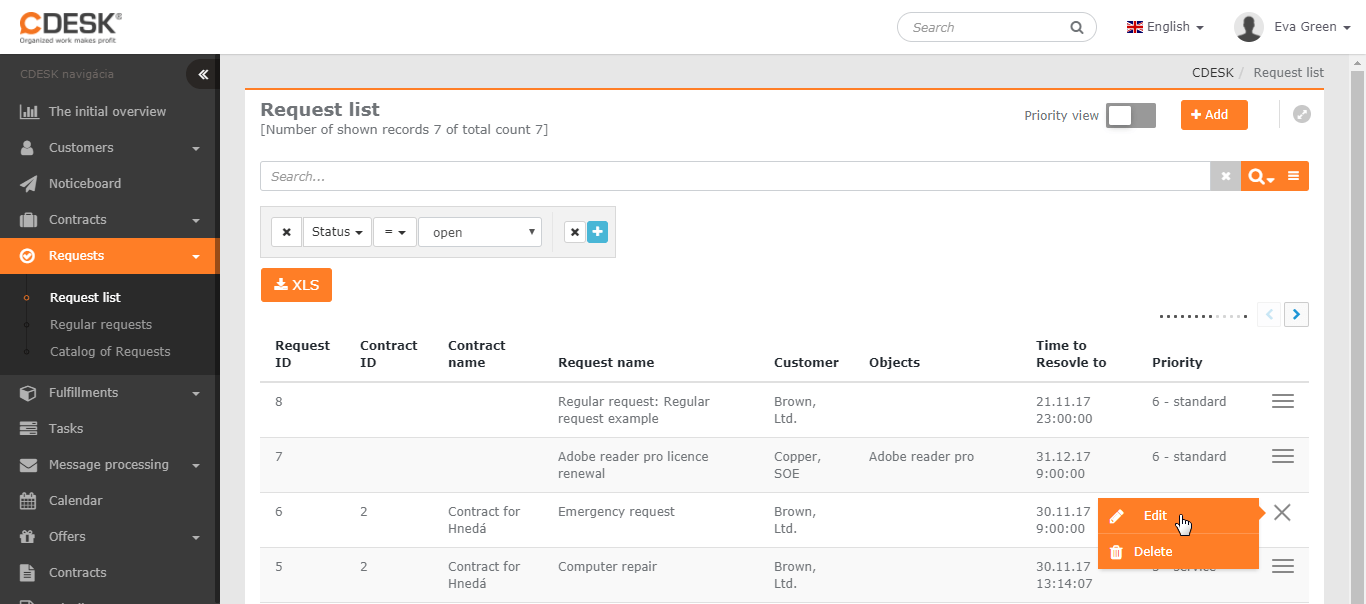
Double-clicking on the request row, or clicking on the context menu  and selecting Edit opens a window with a form similar to the one used when creating a request, extended with additional options that make the requests module a comprehensive tool not only for the help desk:
- the option to change the request status
- discussion with the customer and internal discussion
- adding tasks to the request
- adding billing and internal fulfilments of the request
- request history
Basic information
For working with a request, only the Assignee and Request status fields in the Basic information section are of fundamental importance, as they affect meeting the deadlines defined in the SLA.
Assignee
If the request is assigned to an assignee group, no field in the request form can be edited except the assignee. Once the request is assigned to a specific assignee, the option to edit almost all form fields becomes available, with the exception of the Customer and SLA fields, and possibly the request deadlines, depending on the setting of the deadline change option in the SLA.
Request status
In the Global settings->Requests section you can enable and use a total of up to 23 different request statuses:
| 1. received | 2. assigned | 3. verified by responsible person | 4. offer |
| 5. waiting for customer | 6. accepted by customer and RP | 7. ordered | 8. start of implementation |
| 9. working on workaround | 10. in progress | 11. waiting for 3rd party | 12. handled by subcontractor |
| 13. deployment activities | 14. for evaluation by responsible person | 15. internal testing | 16. tested by the customer |
| 17. postponed | 18. denied | 19. workaround provided | 20. workaround accepted |
| 21. closed | 22. implemented | 23. closure accepted |

The statuses can be divided into several groups:
- basic statuses of the request – they cannot be disabled and at the same time they affect the counting of deadlines
- statuses informing the customer about the progress of the request resolution, affecting only the counting of the response deadline; however, it is possible to set that in selected statuses the time until the request deadline is not counted
- statuses that affect the request deadline counter and at the same time evaluate whether the deadlines have been met
- a status enabling the option to accept or reject closure by the customer, with the option to rate satisfaction with the assignee and the solution provided
Request deadlines
For each of the request deadlines, the time until the deadline is met is counted down. When the deadline is met, the countdown stops and it is evaluated whether it was met on time. If so, the flag  is displayed, and for an exceeded deadline
  is displayed.
Each request has a set response deadline and completion deadline; depending on the settings, optional deadlines* may also be displayed and counted. The countdown of time and the evaluation of whether the individual deadlines are met work as follows:
- Assignment deadline* – the countdown stops when a specific assignee is assigned to the request, if the new request was assigned to an assignee group. For a request assigned to a specific assignee already at the time of its creation, no countdown takes place and the deadline is marked as met
- Workaround deadline* – the countdown stops when the request status is changed to workaround provided
- Response deadline* – the countdown stops with any change in the request – whether a change of status, adding a post to the discussion with the customer, or adding a fulfilment
- Completion deadline* – the countdown stops when the request status is changed to closed
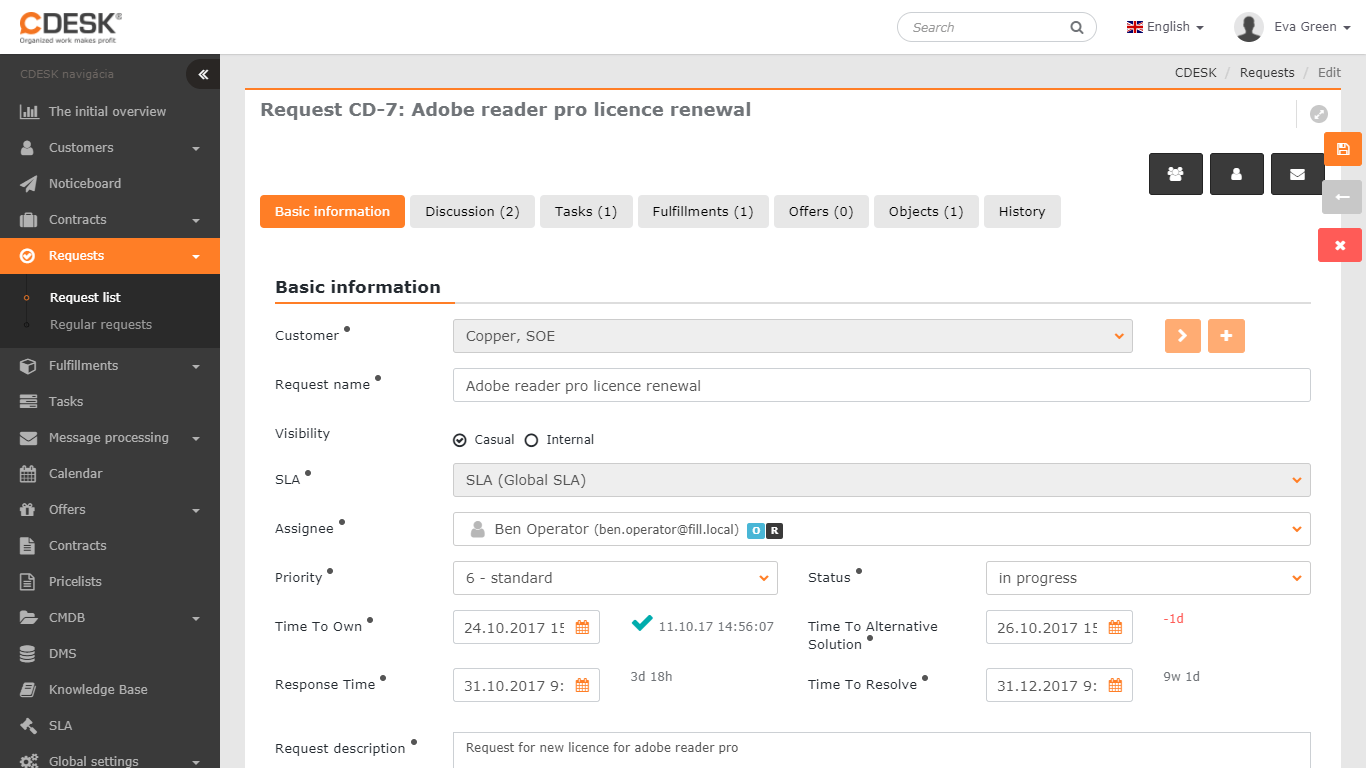
*) optional deadlines – the assignment deadline or the workaround deadline are displayed if the options Entering the assignee assignment deadline and/or Entering the workaround deadline are enabled in Global settings->Requests->Requests, and at the same time the Counting of request deadlines option is enabled on the customer card in the SLA section.
Closure acceptance
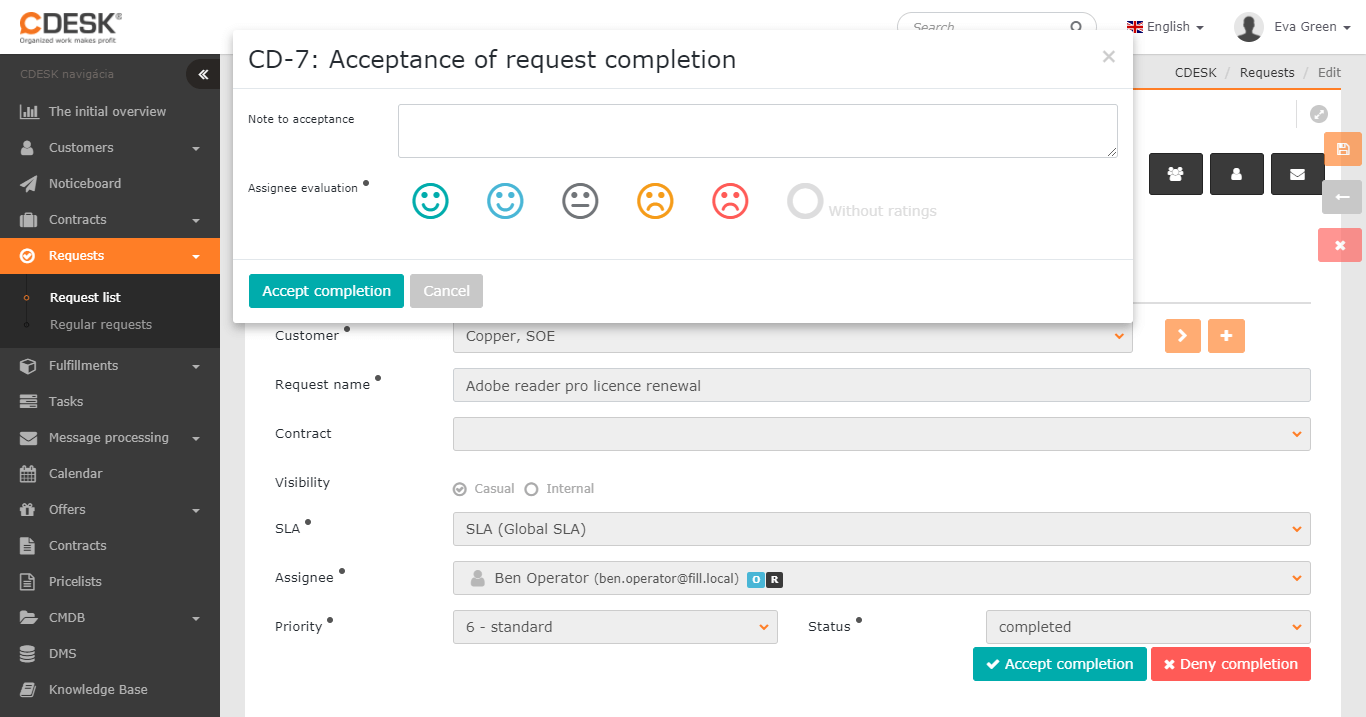
When the closure accepted status is enabled, options for (not) accepting the closure become available after the request is closed. When notifications are enabled, the customer is also informed about the closure acceptance option by email.
Selecting the Accept closure option opens a window with the option to add a note to the acceptance, as well as the option to rate the assignee. After the closure is accepted, the request status changes to closure accepted.
Selecting the Reject closure option also opens a window for stating the reason for rejection in the Note field. By rejecting it, the request returns to the in progress status and the deadline counter is reactivated.
Discussion
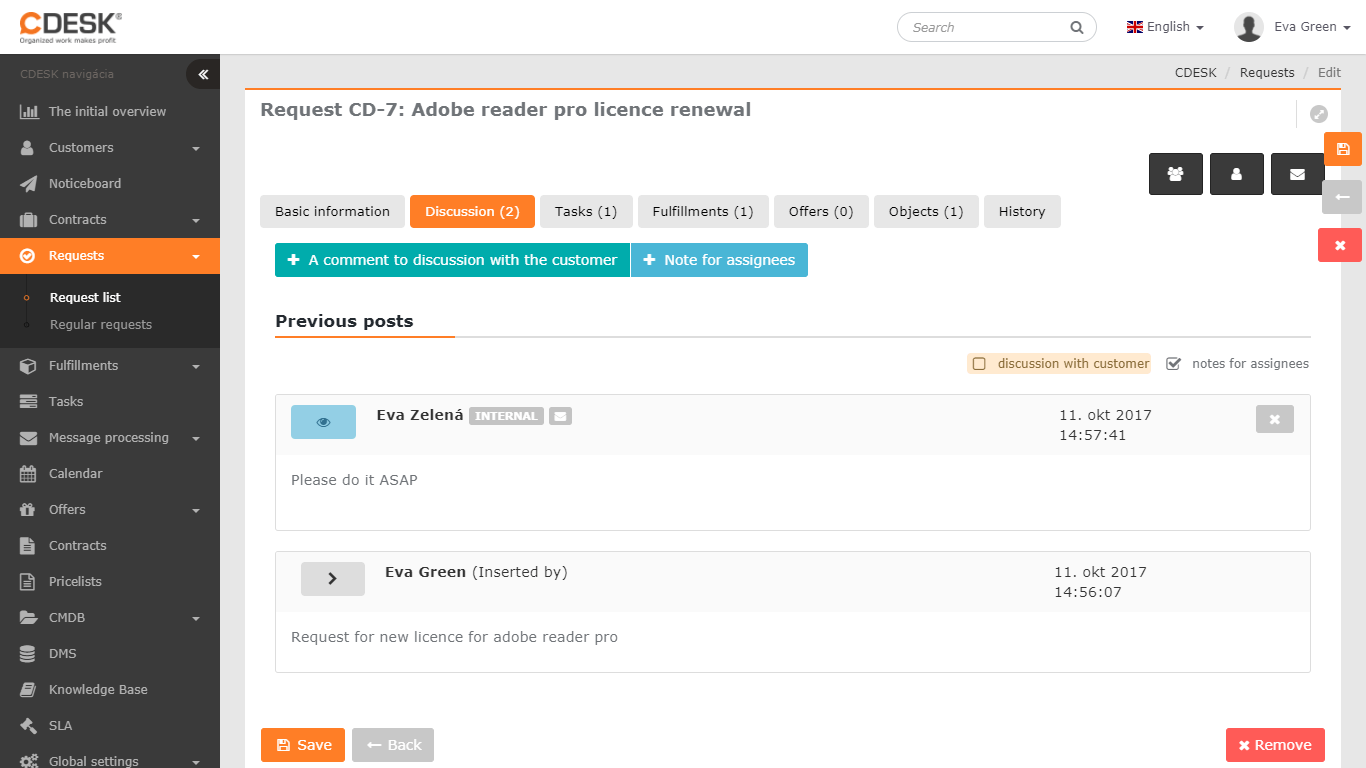
The discussion is used for communication with the customer and assignees. Two options are available for this purpose:
- + Post to the discussion with the customer – adds a post that the customer will also see and can respond to
- + Note for assignees – adds a post to the internal discussion, visible only to assignees
This is followed by a list of posts ordered from newest to oldest. The checkbox options above the list allow you to hide the posts of the discussion with the customer or the notes for assignees
Post to the discussion with the customer
To* – the option to manually add recipients of the notification about a discussion post on the request – by selecting from the list, or by entering an email address or a phone number in international format (+421…)
This is followed by a list of notification recipients, colour-coded into:
- Automatically added recipients are the request applicant, the assignee and previous assignees of the request, the responsible person, and the customer contacts that have copies of emails from requests enabled in the contact settings
- A manually added recipient can be a user, a customer contact, an email address, or a phone number (the recipient will be notified via SMS message – requires an active )
All contacts set to receive notifications will also be notified of all subsequent posts, until they are removed from the list by clicking on × next to the contact. Contacts marked with a lock cannot be removed from the discussion notifications.
This is followed by a field for the wording of the post with the option of text formatting, and a field for selecting a signature predefined in the user settings.
In the right part of the window there is a field for adding a file, for example a screenshot or a photo. Clicking on it opens a dialogue window for selecting a file, or find the file on your PC and drag it onto the indicated field using drag&drop.
You send the post by clicking on Send post. If you wish to change a post you have already drafted for the discussion with the customer into an internal note for assignees, it is still possible to switch the type of discussion post by clicking on Change to a note for assignees in the right part of the window. The type of the post changes without losing the content, only the assignees remain as notification recipients.
Note for assignees
The same form as in the case of a post to the discussion with the customer, with the difference that the automatically added notification recipients are only the assignees. It is likewise possible to switch a drafted note into a discussion post with the customer by clicking on Change to a post to the discussion with the customer in the right part of the window. The type of the post changes without losing the content.
Notifying recipients about a new post
The sent post is displayed in the request discussion, plus the notification recipients receive a message by email. Notifications of discussion posts are sent even if notifications are permanently blocked for the request.
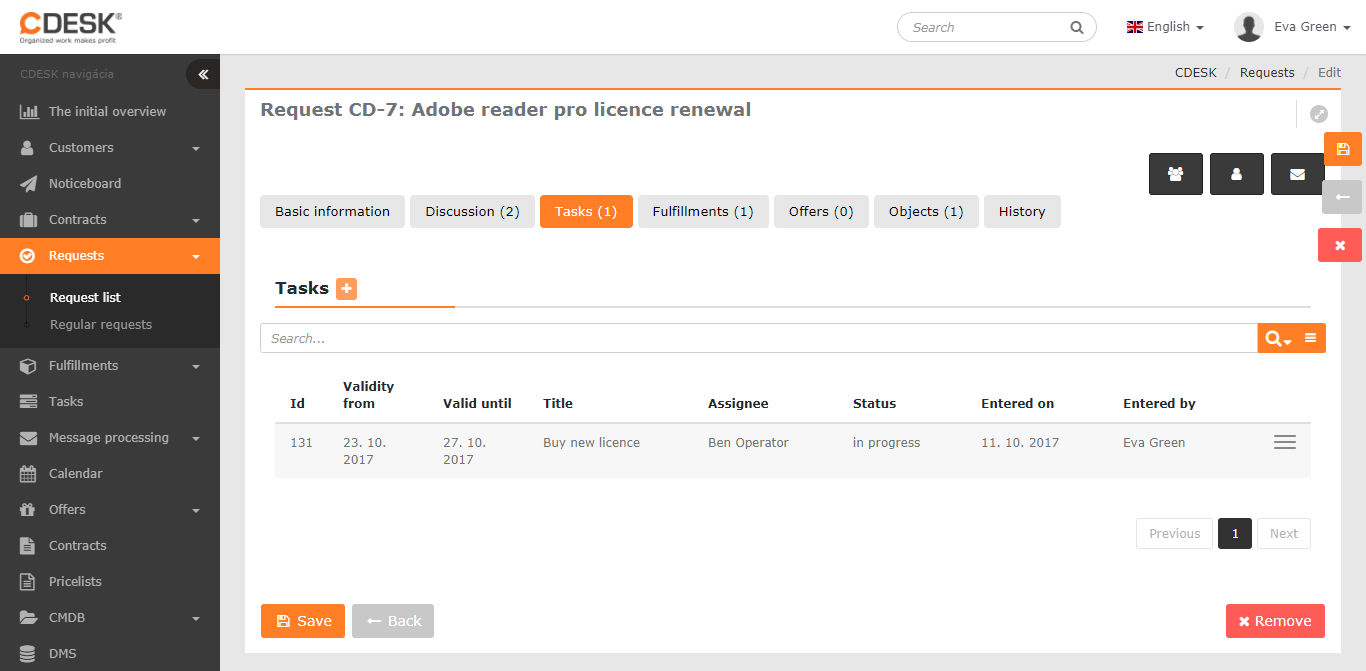
Tasks
Tasks allow a larger request to be divided into smaller units, which can be assigned to other assignees. The Tasks tab is available only if the module is enabled in Global settings->Tasks.
A new task for the request can be created directly from the request by clicking on + . A window opens for filling in basic information such as name or task type, assignee, deadline from-to and other fields. Their meaning, as well as working with tasks, are described in more detail in the article Tasks.
Fulfilments
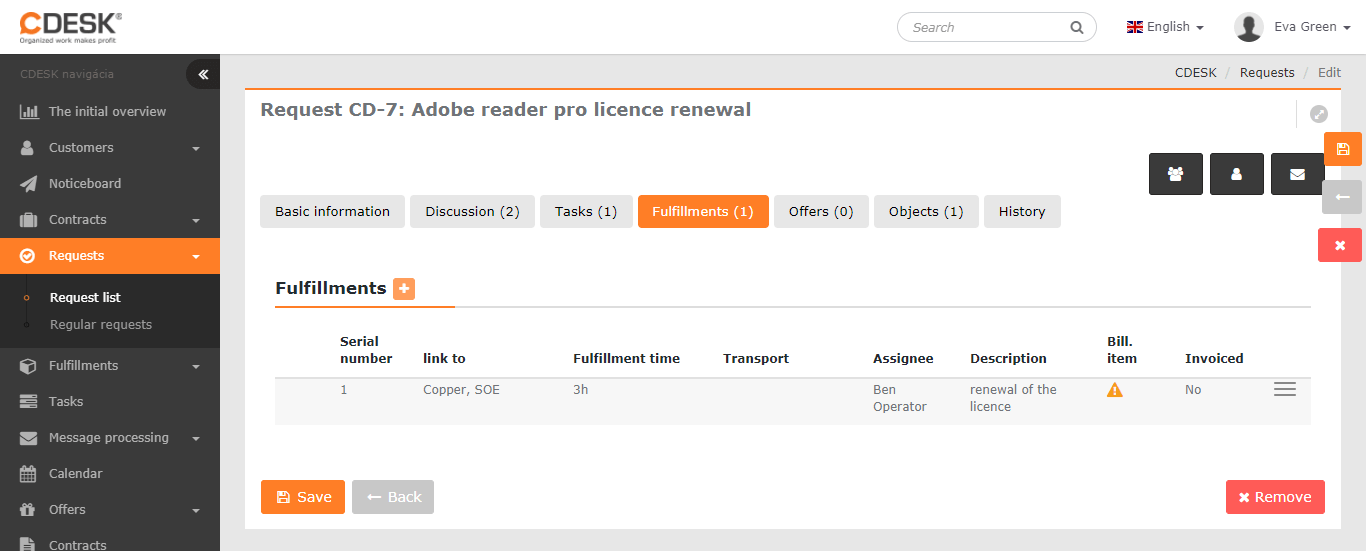
Fulfilments allow transparent recording of the work performed while resolving a request. The Fulfilments tab is available only if the module is enabled in Global settings->Fulfilments.
A new fulfilment for the request can be added directly from the request by clicking on + . A window opens for filling in the fulfilment fields. The meaning of the individual fields, as well as working with fulfilments, are described in more detail in the article Fulfilments.
Objects
The tab is displayed if the Object selection option is enabled in Global settings->Requests->Requests. Here you will find a list of objects, if any were assigned to the request. If you need to change the list of objects, you can do so by clicking on × to remove an object from the request, or by clicking on +Add item to add an object. Only objects defined for the given customer will be offered, according to the selected branch and location (if specified). More information about adding objects to a request is described in the article Creating a new request.
Changing the objects has no effect on the SLA of an already entered request, not even if the SLA was set according to an object that was subsequently removed or replaced by an object with a different SLA.

History
This section records all changes made and saved in the request, for example:
- changes – of priority, type, service area, status, assignee, deadline…
- info about notifications – notification recipients of a discussion post, blocking or allowing the sending of notifications
Notifications
In the upper right part of the window there are icons for setting the request notifications:
 All notifications allowed – notifications about changes in the request are received by all recipients – the affected users, or the user group, and the customer contacts that have receiving of request notifications enabled. If notifications for requests are blocked in Global settings->Notifications, only customer contacts will be notified, not CDESK users. By clicking repeatedly you can switch between the states:
 All notifications allowed – notifications about changes in the request are received by all recipients – the affected users, or the user group, and the customer contacts that have receiving of request notifications enabled. If notifications for requests are blocked in Global settings->Notifications, only customer contacts will be notified, not CDESK users. By clicking repeatedly you can switch between the states:
 ->  All notifications blocked once – the next saved change will not send any notification
->  All notifications permanently blocked – notifications about changes to the request will not be sent until they are allowed again
- Customer notifications allowed – notifications about changes in the request are received by all customer contacts that have receiving of request notifications enabled. By clicking repeatedly you can switch between the states:
 Customer notifications allowed – notifications about changes in the request are received by all customer contacts that have receiving of request notifications enabled. By clicking repeatedly you can switch between the states:
 ->  Customer notifications blocked once – the next saved change will not send a notification to the customer contacts
->  Customer notifications permanently blocked – notifications about changes to the request will not be sent to customer contacts until they are allowed again
- Edit notification recipients – after clicking, a window is displayed listing the recipients of the request, discussion, and notes for assignees notifications. For automatically added recipients, a flag is also displayed informing why the contact was added. Recipients can also be added manually – by entering their username, email address, or phone number in international format (+421 for Slovakia). Notification recipients can also be removed by clicking on ×. Recipients with the stated reason assignee, assistant assignee, previous assignee, applicant, or responsible person cannot be removed. Already removed contacts can be added again by clicking on +
 Edit notification recipients – after clicking, a window is displayed listing the recipients of the request, discussion, and notes for assignees notifications. For automatically added recipients, a flag is also displayed informing why the contact was added. Recipients can also be added manually – by entering their username, email address, or phone number in international format (+421 for Slovakia). Notification recipients can also be removed by clicking on